Introduction
Dynamic Status lets you define the conditions you want eramba to monitor and turn them into indicators. Those indicators can appear as labels, organise filtered views, provide KPIs for reports, and trigger notifications and automations.
Because you define the conditions, Dynamic Status supports advanced scenarios beyond predefined notifications. You can decide what matters to your organisation, how to recognise it and what should happen when that condition changes.
Statuses can also carry information across related modules. For example, an indicator affecting an Internal Control can be reflected in associated Compliance and Risk records, helping users understand its wider impact.
Use this course to understand these shared capabilities. Your implementation guide will help you decide which indicators and actions your use case requires.
Typical Scenarios
- Create advanced notifications: Define a condition you want to monitor and trigger a notification when it starts or stops matching. This supports notification scenarios beyond those built into eramba.
- Trigger automations: Use these status-driven notification scenarios to initiate automated actions.
- Monitor KPIs over time: Define statuses representing the conditions you want to measure, then use charts to track matching items over time.
- Focus filtered views: Include or exclude items according to their statuses, creating views that help users focus on relevant records.
- Recognise conditions at a glance: Use clear labels and colours to make important indicators visible without opening each item.
- Reflect indicators across modules: Use relationships between modules to show how a condition affecting one item influences associated records—for example, how an Internal Control indicator affects Compliance and Risk records.
Supported Versions
Enterprise, available both on premises and as SaaS, allows you to create custom Dynamic Statuses using your own conditions. Community includes predefined statuses, but you cannot create custom statuses or build your own status conditions. The custom configuration examples in this course apply to Enterprise.
Theory
Where Statuses Are Managed
Dynamic Status is available in almost every module. Status labels appear in the Dynamic Status column, typically the first column on the left. If the column is not there, it may have been moved or removed from the view.
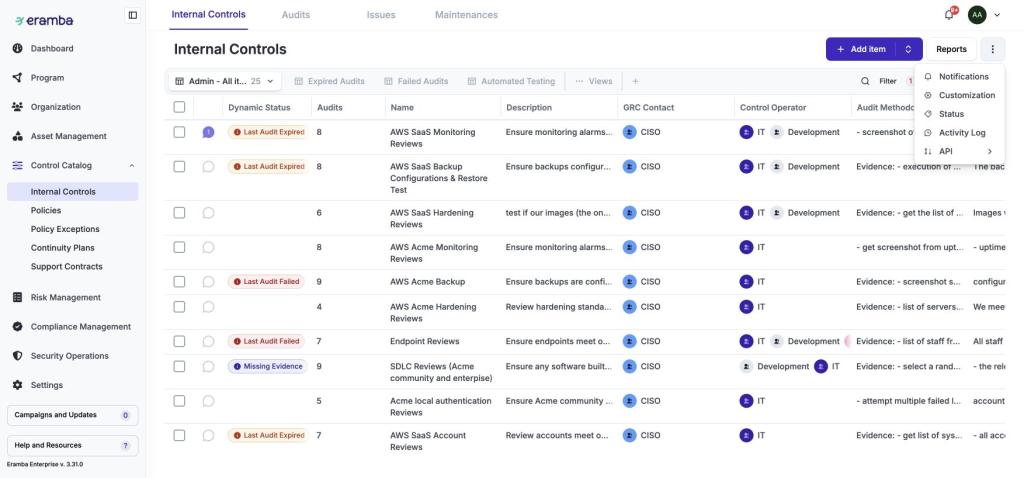
To manage statuses, open the three-dot menu and select Status in the module and tab containing the records you want to monitor. This context determines the records evaluated and the fields, functions and related statuses available. For example, manage control indicators in Internal Controls and risk indicators in the relevant Risk module.
System and Custom Statuses
System statuses provide predefined indicators. Community includes these built-in statuses; Enterprise also supports custom statuses with conditions you define.
In Enterprise, system-status names, descriptions, colours and visibility can be adjusted, while their conditions remain locked. Custom statuses let you configure the conditions as well as the presentation.
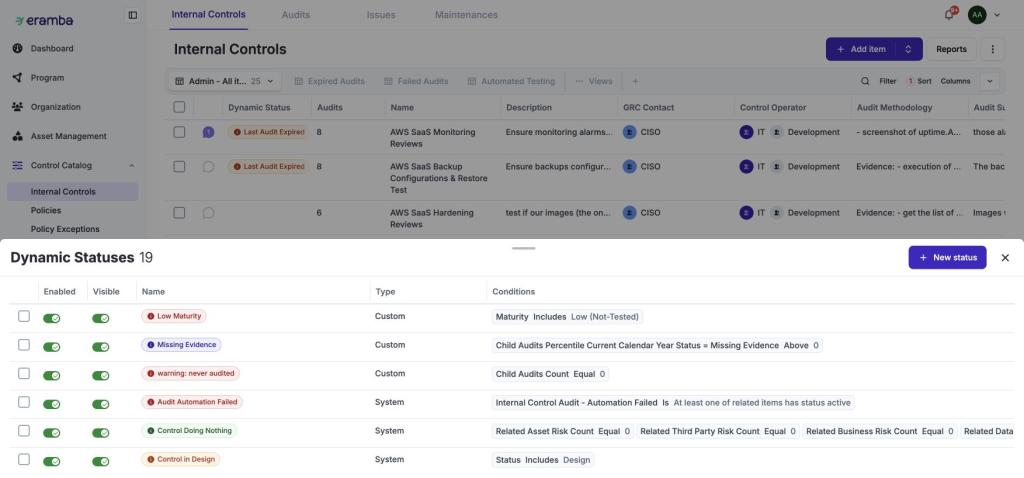
Review the available indicators before creating another one. The Type and Conditions columns make their purpose easier to compare.
Labels and Visibility
Give each indicator a clear name and description. Its colour and icon help users recognise it; the description explains its meaning.
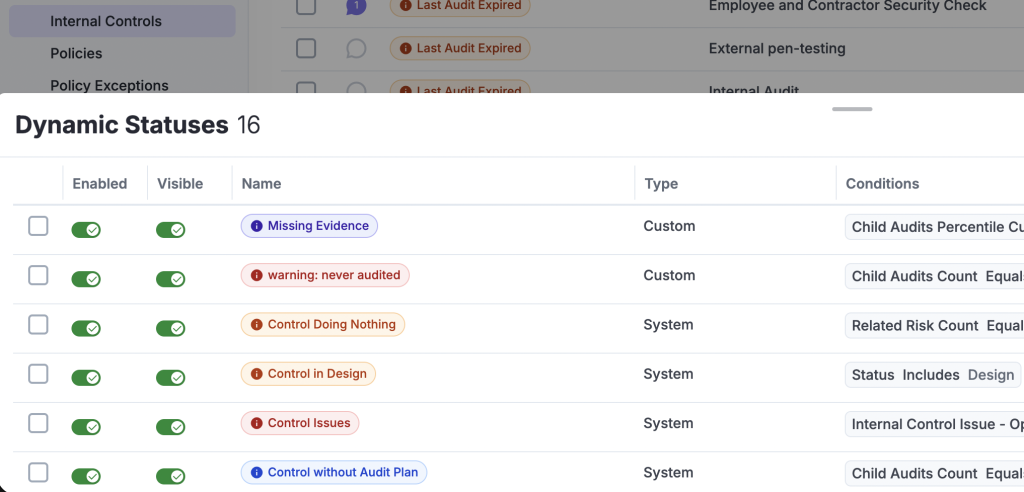
Enabled & Visible evaluates the conditions and displays the status label when they match. Use it when the status should act as a visual KPI as well as support other features.
Enabled & Not Visible evaluates the conditions without displaying a label. It is typically used when a status should trigger a notification or automation but is not needed as a visual KPI.
Disabled stops the status from running: its conditions are no longer calculated. Disable statuses you do not use to reduce real-time calculations and help eramba run faster. Hiding a status does not provide this benefit because it continues to run.
Inheritance Across Modules
An indicator in one module can depend on statuses in a related module. This is called inheritance. It makes the wider impact of a condition visible without requiring users to open every associated record.
For example, you can define a risk indicator that becomes active when at least one associated Internal Control has a low-maturity status. The risk indicator uses the related control status as a condition, allowing users to see the issue from the Risk module.
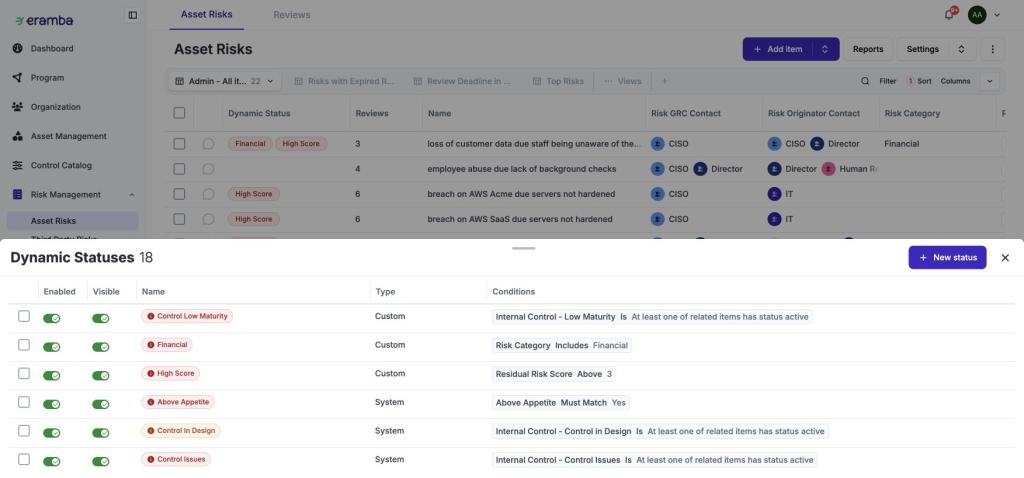
The same principle allows control indicators to be reflected in associated Compliance records. The receiving indicator needs a supported relationship and a suitable condition; statuses do not automatically appear in every connected module.
Defining Conditions
Conditions describe the situation an indicator should recognise. Enterprise lets you combine three kinds of information:
- Fields: values recorded on an item, such as its GRC Contact or Maturity.
- Functions: available calculations, such as counts of related records, that you compare with a threshold.
- Related Statuses: indicators on associated items.
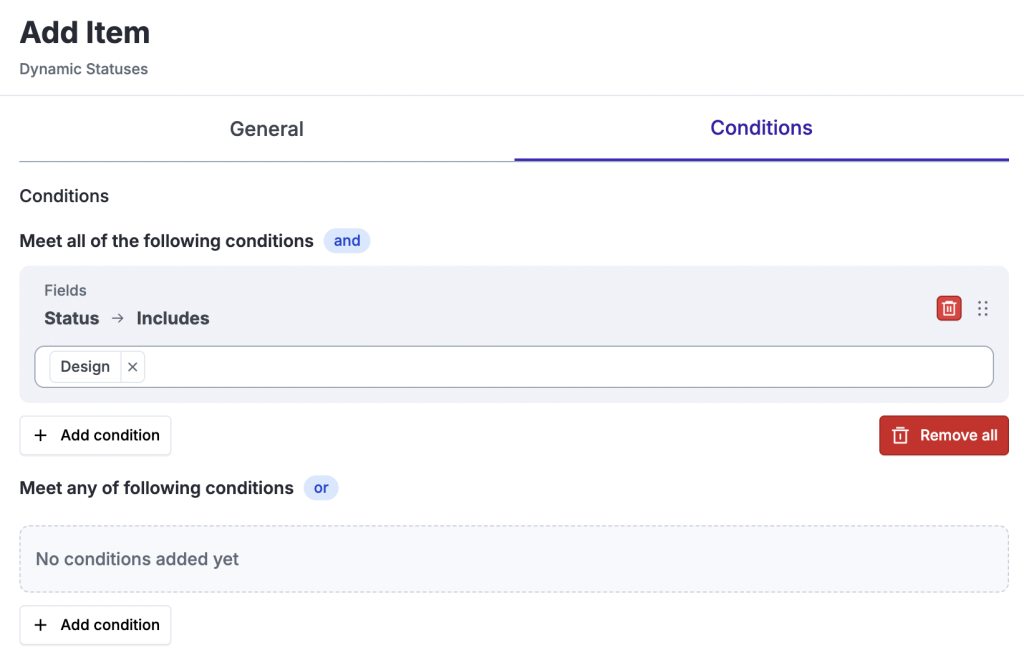
The editor separates ALL (AND) conditions from ANY (OR) conditions. AND requires all conditions in its group to match; OR requires at least one. Available choices depend on the module and its relationships.
Advanced Notifications
Custom statuses let you build notification scenarios around your own conditions. This extends monitoring beyond predefined notification events: define the situation first, then choose the response.
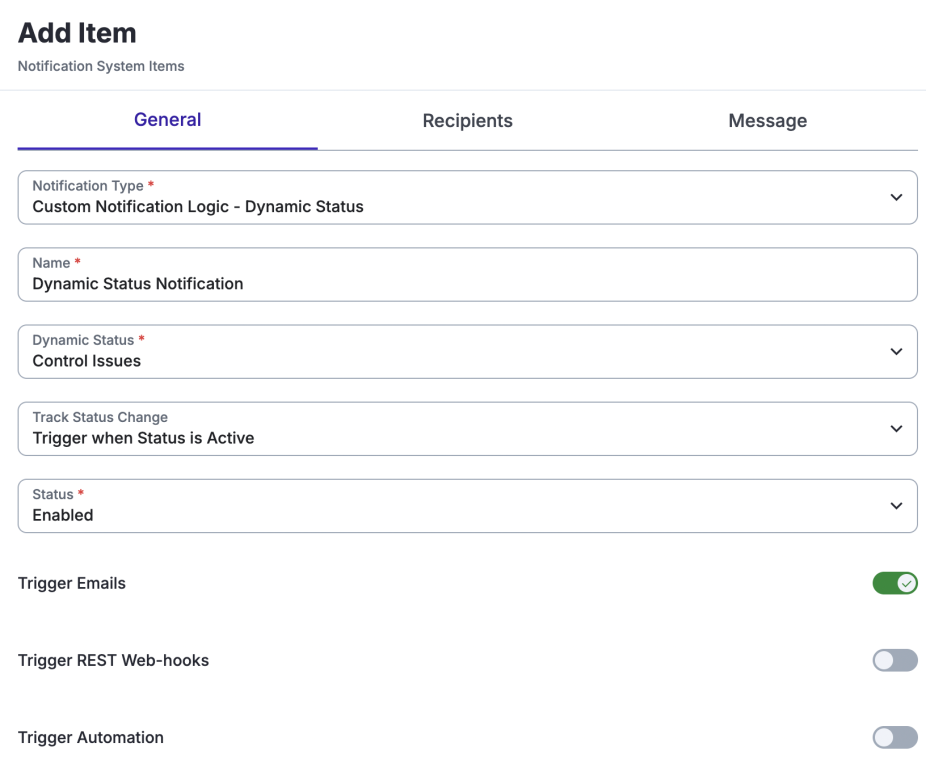
Use Notifications → New notification → Warning in the module menu. The Dynamic Status Change event connects the notification to the indicator. A transition to ON means the conditions start matching; a transition to OFF means they stop matching.
Triggering Automations
A status-driven notification can also trigger an automation. The status defines the condition, the notification responds to its transition, and the automation performs the configured action.
In the notification form, Trigger Automation reveals an Automation tab where you select the automation. Your implementation guide should define the intended action and responsibility for its outcome.
Use Enabled & Not Visible when the status is needed to trigger the response but should not appear as a visual KPI. The status must remain enabled to evaluate its conditions.
Using Statuses as KPI Indicators
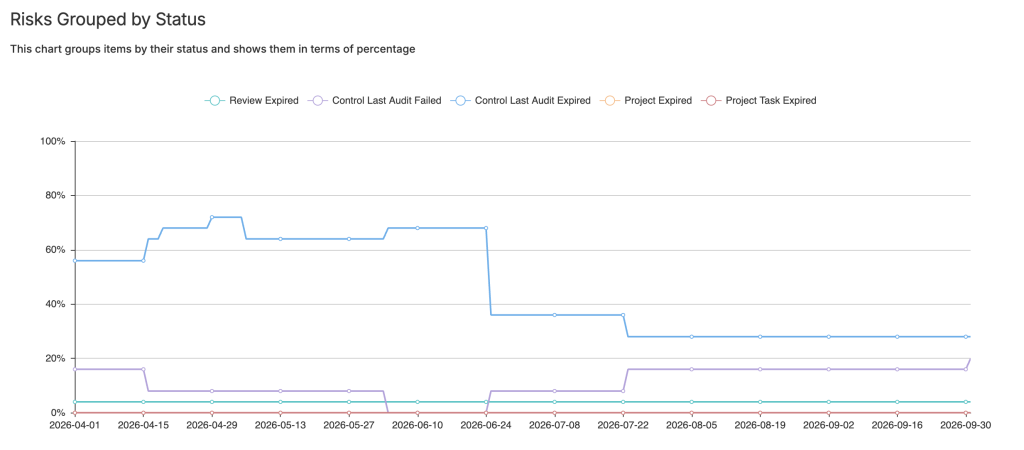
Statuses can represent conditions you want to measure. Reports can chart matching items over time, turning your rules into indicators of how your programme is performing.
Enterprise custom statuses let you define criteria such as low maturity, missing information or an issue in an associated record. A status-based chart measures the items meeting that definition; choose the chart and population that answer your question.
Use Reports and the appropriate Section report to summarise indicators. Define the population, condition and target before using an indicator as a KPI. Changes to conditions can affect comparisons with earlier periods.
Filtering Views by Status
Filters can include or exclude items according to their statuses. This lets you focus a view on the same indicators used in notifications and reports.
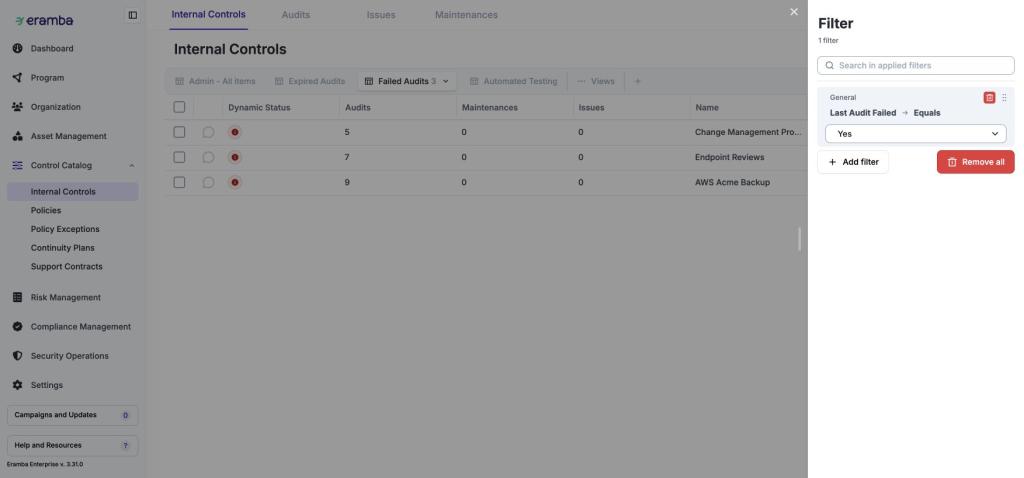
For example, a view using Last Audit Failed → Equals → Yes shows controls whose last audit failed. Save the filter as a view when you need to return to the same set of conditions regularly.
Use a report to understand the overall pattern and a filtered view to inspect the individual records behind it.
Choosing Your Indicators
Start with the situation you want to recognise and the decision or action it should support. Then decide whether the indicator needs a visible label, a filtered view, a chart, a notification or an automated response.
These uses can share the same status. Choose Enabled & Visible when users need a visual KPI, or Enabled & Not Visible when the status serves notifications or automations without a label. Disable statuses that are no longer needed to avoid unnecessary calculations.
In Community, work with the predefined statuses. In Enterprise, review those first and add custom indicators where your requirements go further. Keep names and meanings consistent, especially when they are inherited across modules.
Videos
- Create and test a custom Dynamic Status — review system statuses, configure a custom status, and check which items match.
- Configure status conditions — demonstrate fields, functions, and AND/OR logic.
- Use related statuses across modules — show how an indicator can depend on a status in a related module.
- Configure status-change notifications — select a status and transition, then configure email or REST webhook options.
- Trigger an automation from a status-change notification — connect the notification to an automation and verify its action.
- Build a status-based KPI chart — define the indicator, choose a section report, and interpret the chart over time.
- Create a filtered view using statuses — filter by status, save the view, and inspect the matching items.
Still have questions?
Write to support@eramba.org or ask the community on the forum.