Disclaimer
While fully functional, this feature is still experimental. It can be buggy, stop working and change.
This feature requires advanced technical skills in software development, system integration, and related technical domains. Eramba does not provide support for developing or troubleshooting custom automation code. If your code does not compile or behave as expected, this falls outside the scope of basic support.
Introduction
Automations in eramba allow users to run custom PHP code directly within eramba. The code is provided by the user and can include Composer dependencies. Automations give full control over what runs and when, without predefined workflows or fixed integrations.
Automations can run on a schedule (for example, daily) or in response to user-defined scenarios, such as when an item is created, edited, or when a specific attribute changes.
They are mainly used for integrating eramba with external systems, but can also execute any programmatic task, including validations, custom processing, or advanced use cases like using an LLM to review policies for spelling or consistency issues.
Course Introduction
Primarly this course requires you to undertand "Theory". Implementing a core eramba "Use Case" require this module, for that reason these "Use Case" guides make constant regerence to this course "Theory" and "How-To" sections.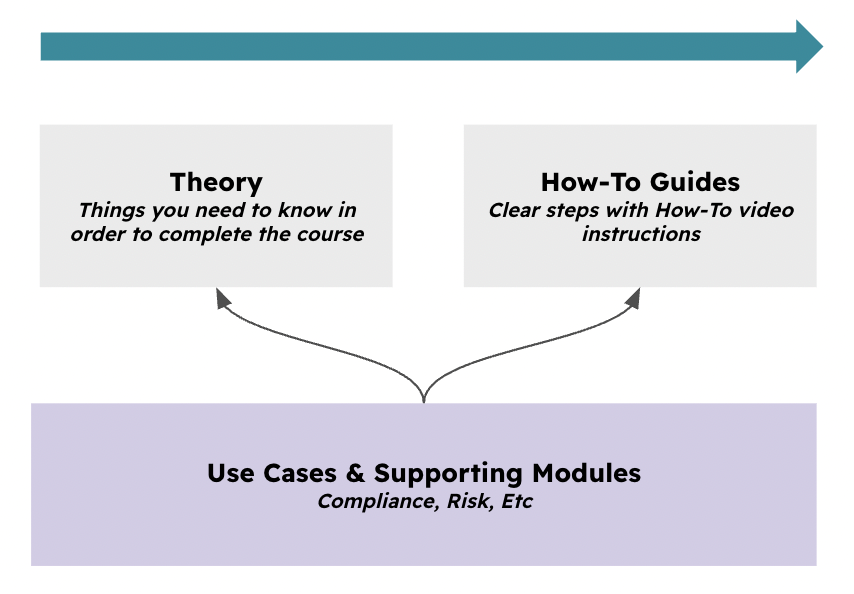
Typical Scenarios
This chapter shows practical ways to use automations:
-
Automatically test internal controls by connecting to AWS and verifying that storage volumes are encrypted
-
Automatically review policies and procedures for spelling or formatting issues using an LLM
-
Regularly sync Jira projects with eramba Projects (one-way or bi-directional)
-
Pull assets from a CMDB and keep them synchronized in eramba
-
Create or update tickets in an ITSM tool when risks, incidents, or control failures are detected in eramba
-
Push compliance or risk status from eramba into BI or reporting platforms for centralized dashboards
-
Run a custom risk calculation after a Risk is saved, using parameters from eramba and external systems
-
Parse online assessment responses and automatically create Third Party Risks
Supported Versions
Automations on Enteprise version alone.
Each Enterprise installation is limited to a maximum of five automation scripts across all modules. To protect system stability, automations are subject to enforced limits on execution time, network usage, and file storage.
Scope
For the time being, automations are limited to the following modules:
-
Control Catalogue / Internal Controls
-
Security Operations / Account Reviews
-
Compliance Management / Online Assessments
A total of 5 automations can be created across the system as a whole.
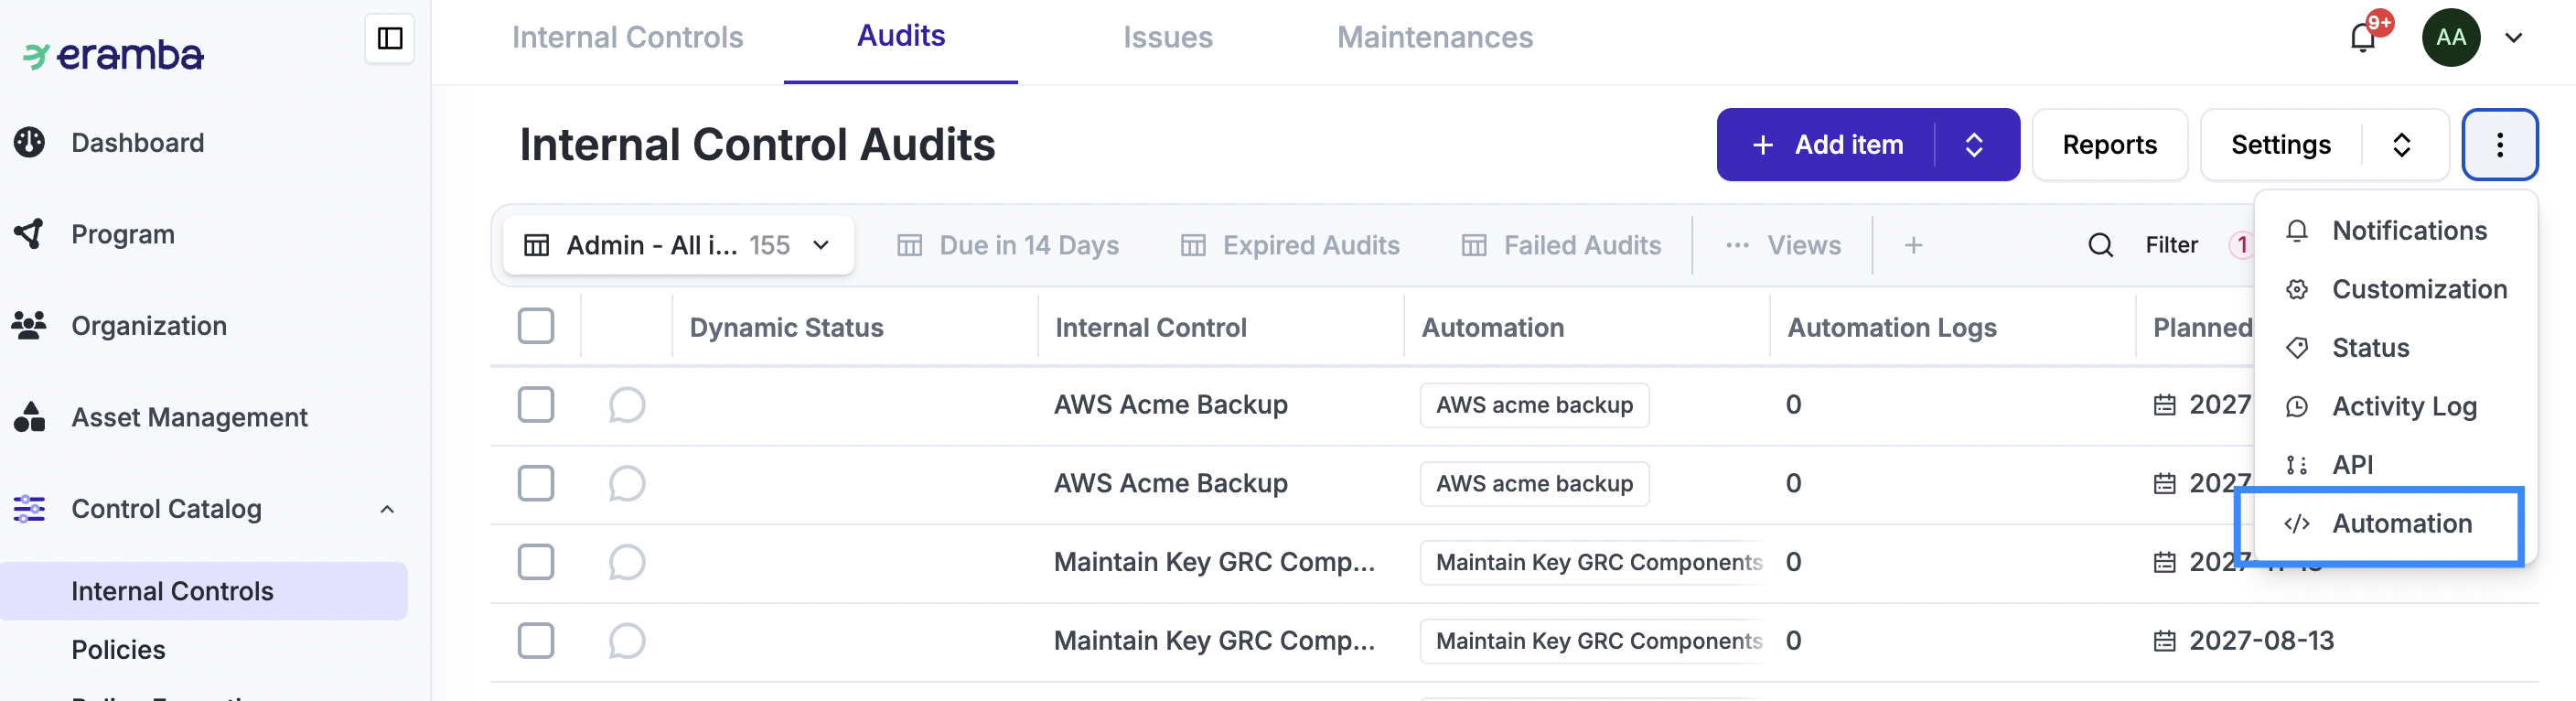
You can verify whether automations are enabled for a module by opening the module and checking the Common Features menu. If Automation is listed, the module supports automations.
Workshops
If you are an enterprise customer, you can purchase 8-hour implementation workshops delivered by a GRC professionals. Contact support@eramba.org for more information.
Theory
Execution Types
Before continuing, review the following Use Case documentation: Internal Controls and Account Reviews
Automations can run in different ways:
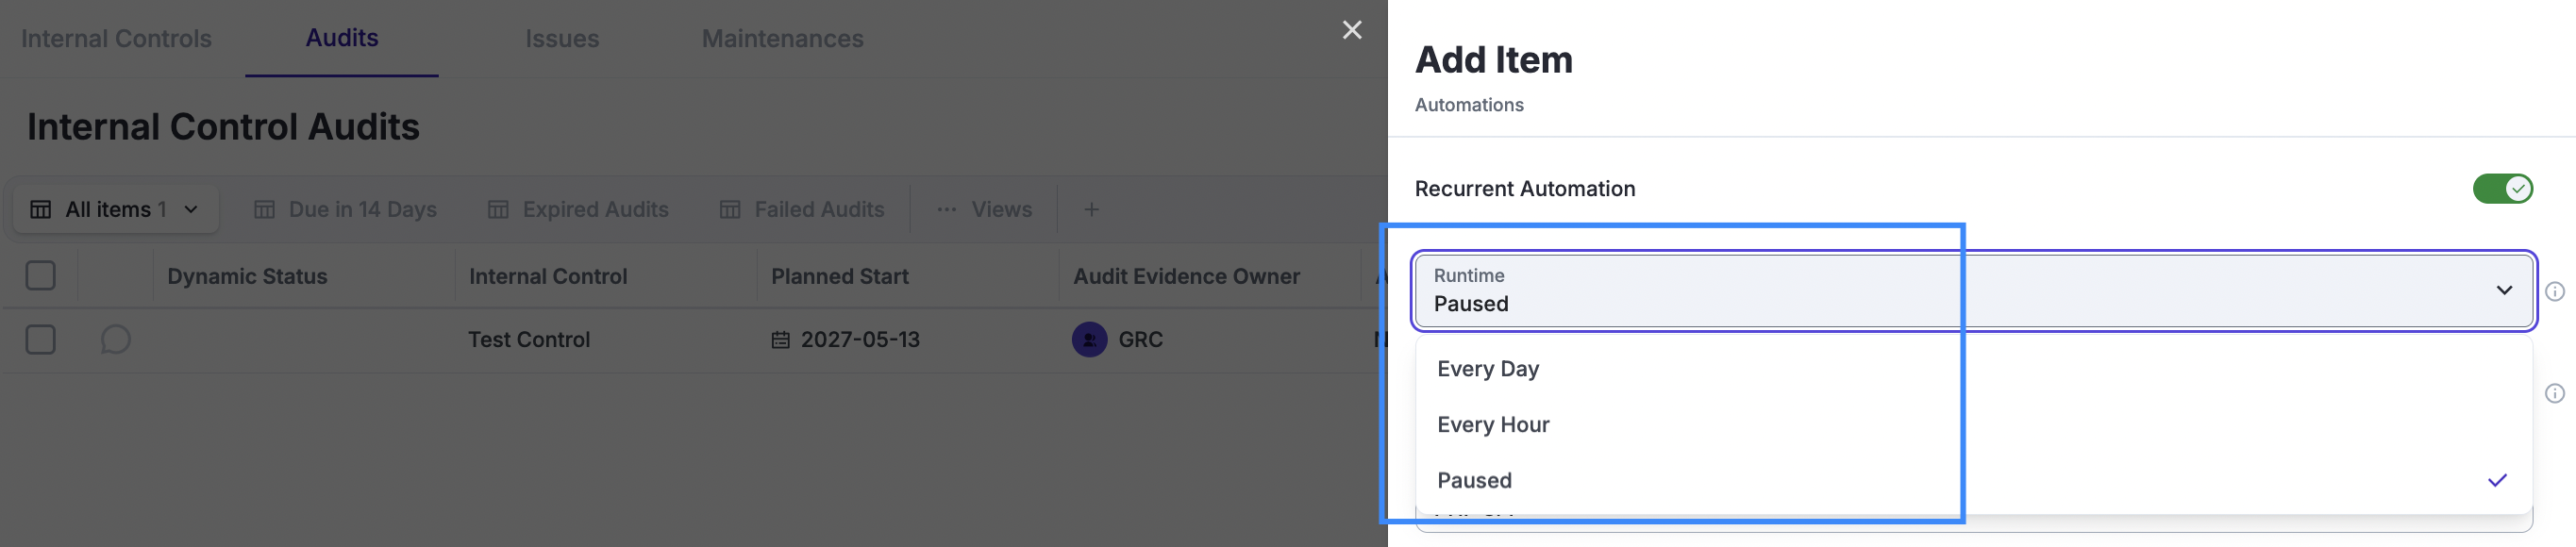
Run every hour/day — when creating automations, you can set the automation to run recurrently every hour, day, etc.
Triggered by a “Warning” notification — when a Warning, Comment & Attachment, or Awareness notification is triggered, you can define the notification to run an automation instead of sending an email.

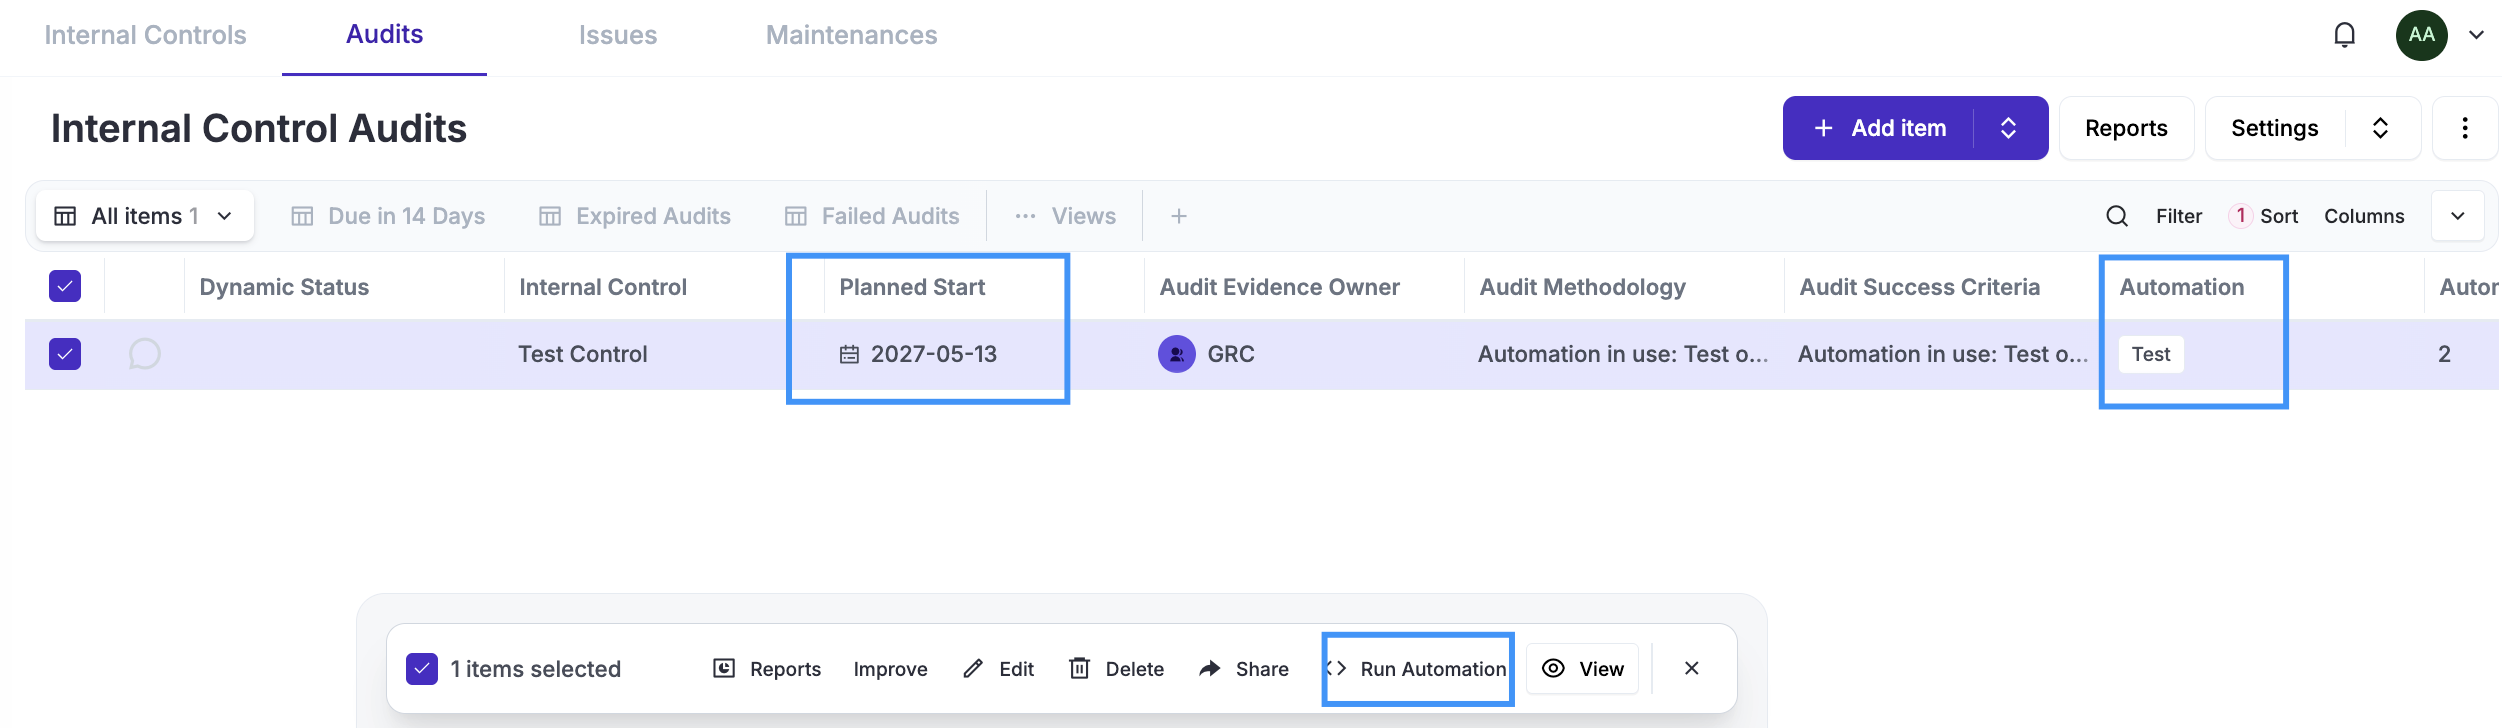
Executed automatically by an Internal Control Audit or Maintenance “Planned Date” — when creating Internal Controls, you can define under Audits or Maintenances that, instead of running these tasks manually, you want to use an automation. The automation must have been previously created under the “Audit” or “Maintenance” tab.
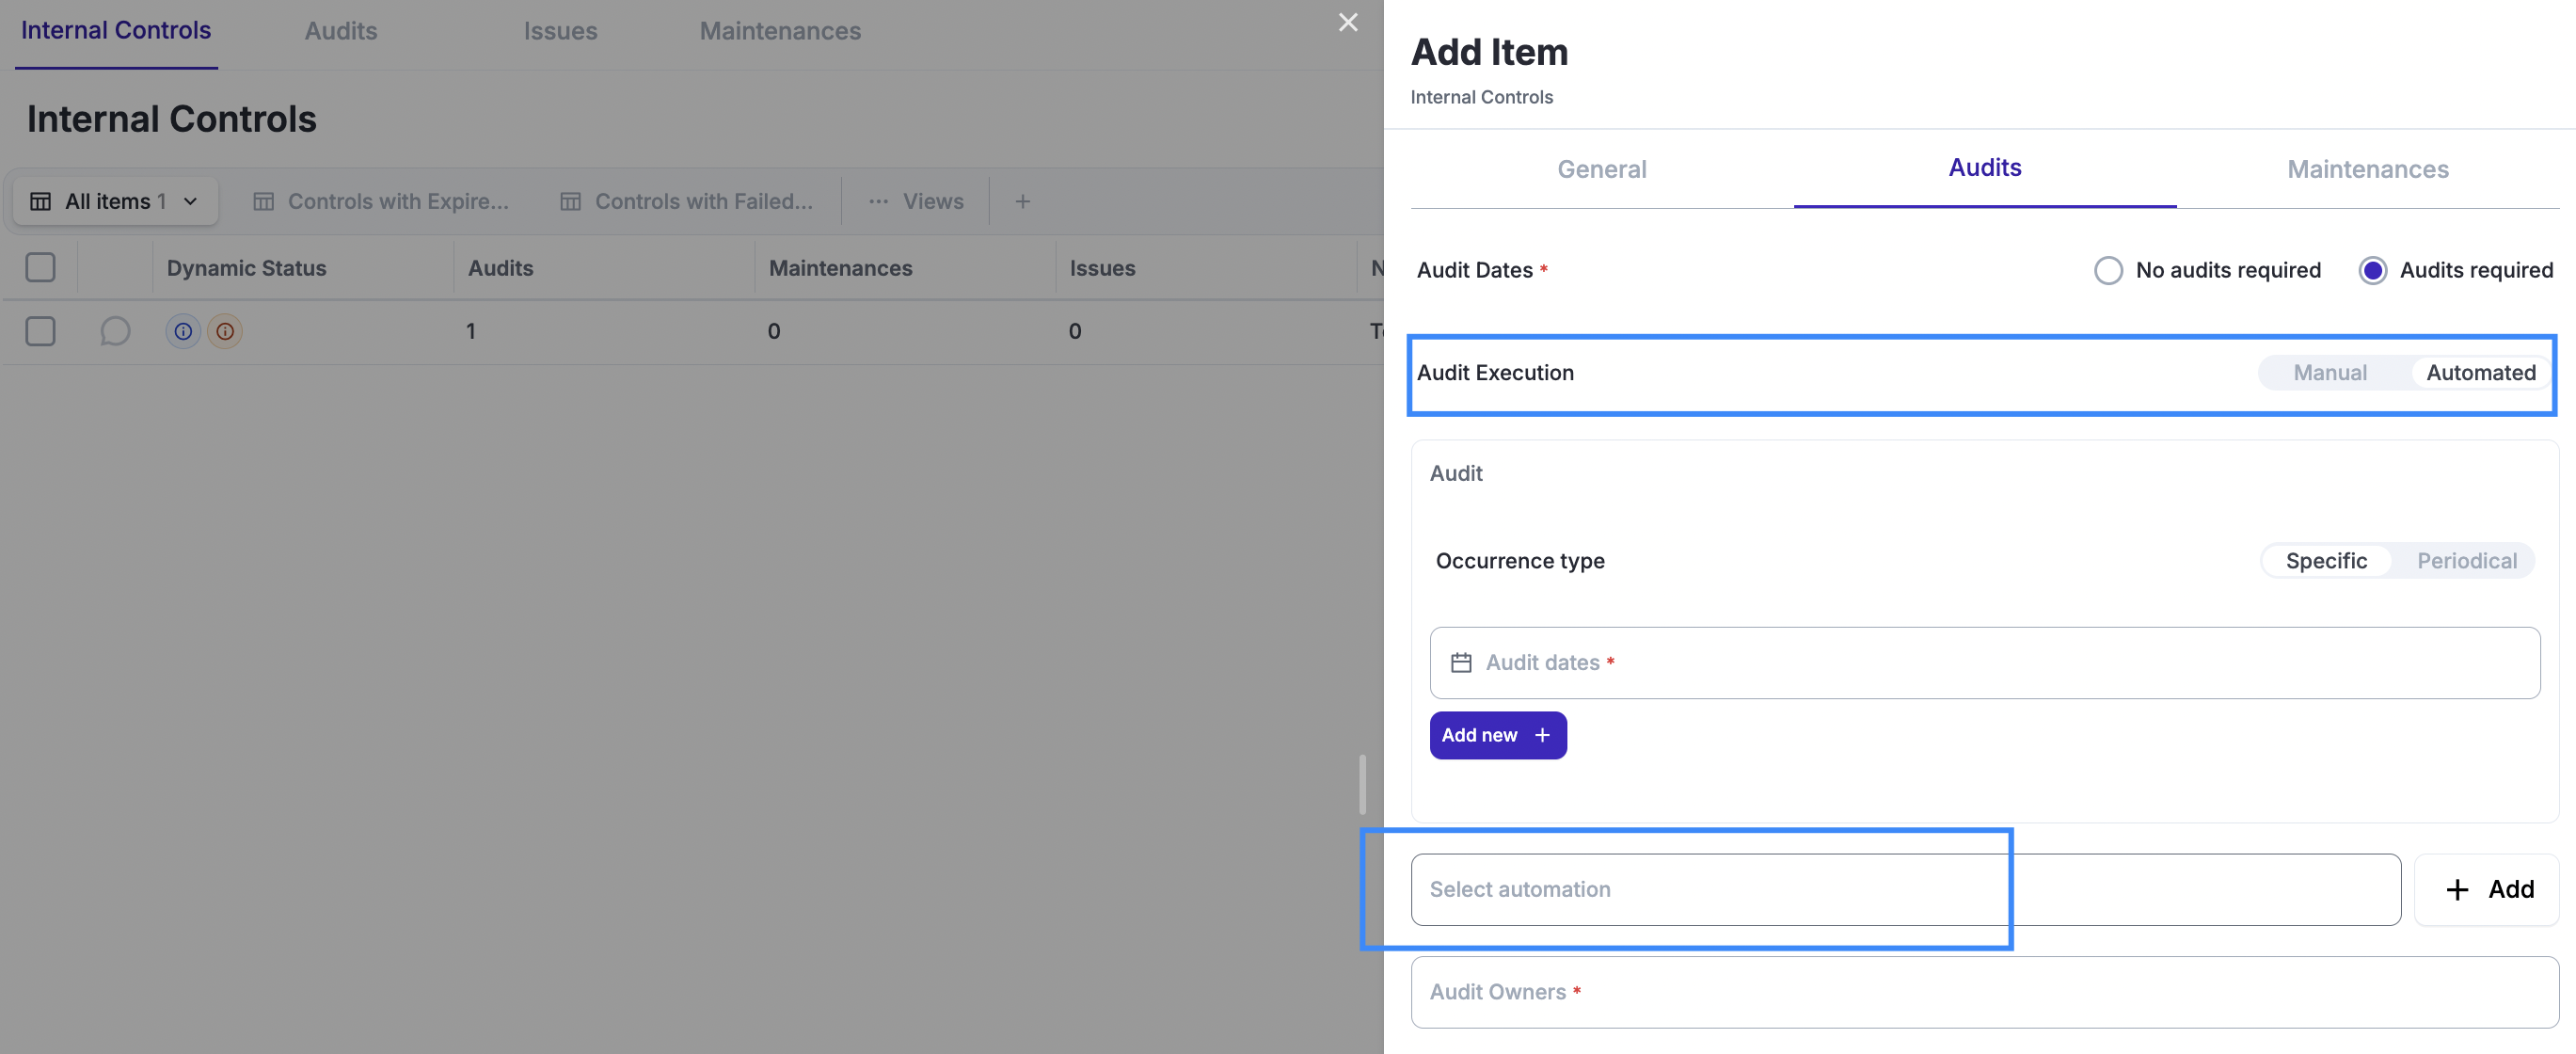
After saving the control, the Audit/Maintenance records will be created and associated with the automation you selected. While the automation will automatically run on the “Planned Date,” you can also override it and execute it anytime you want.
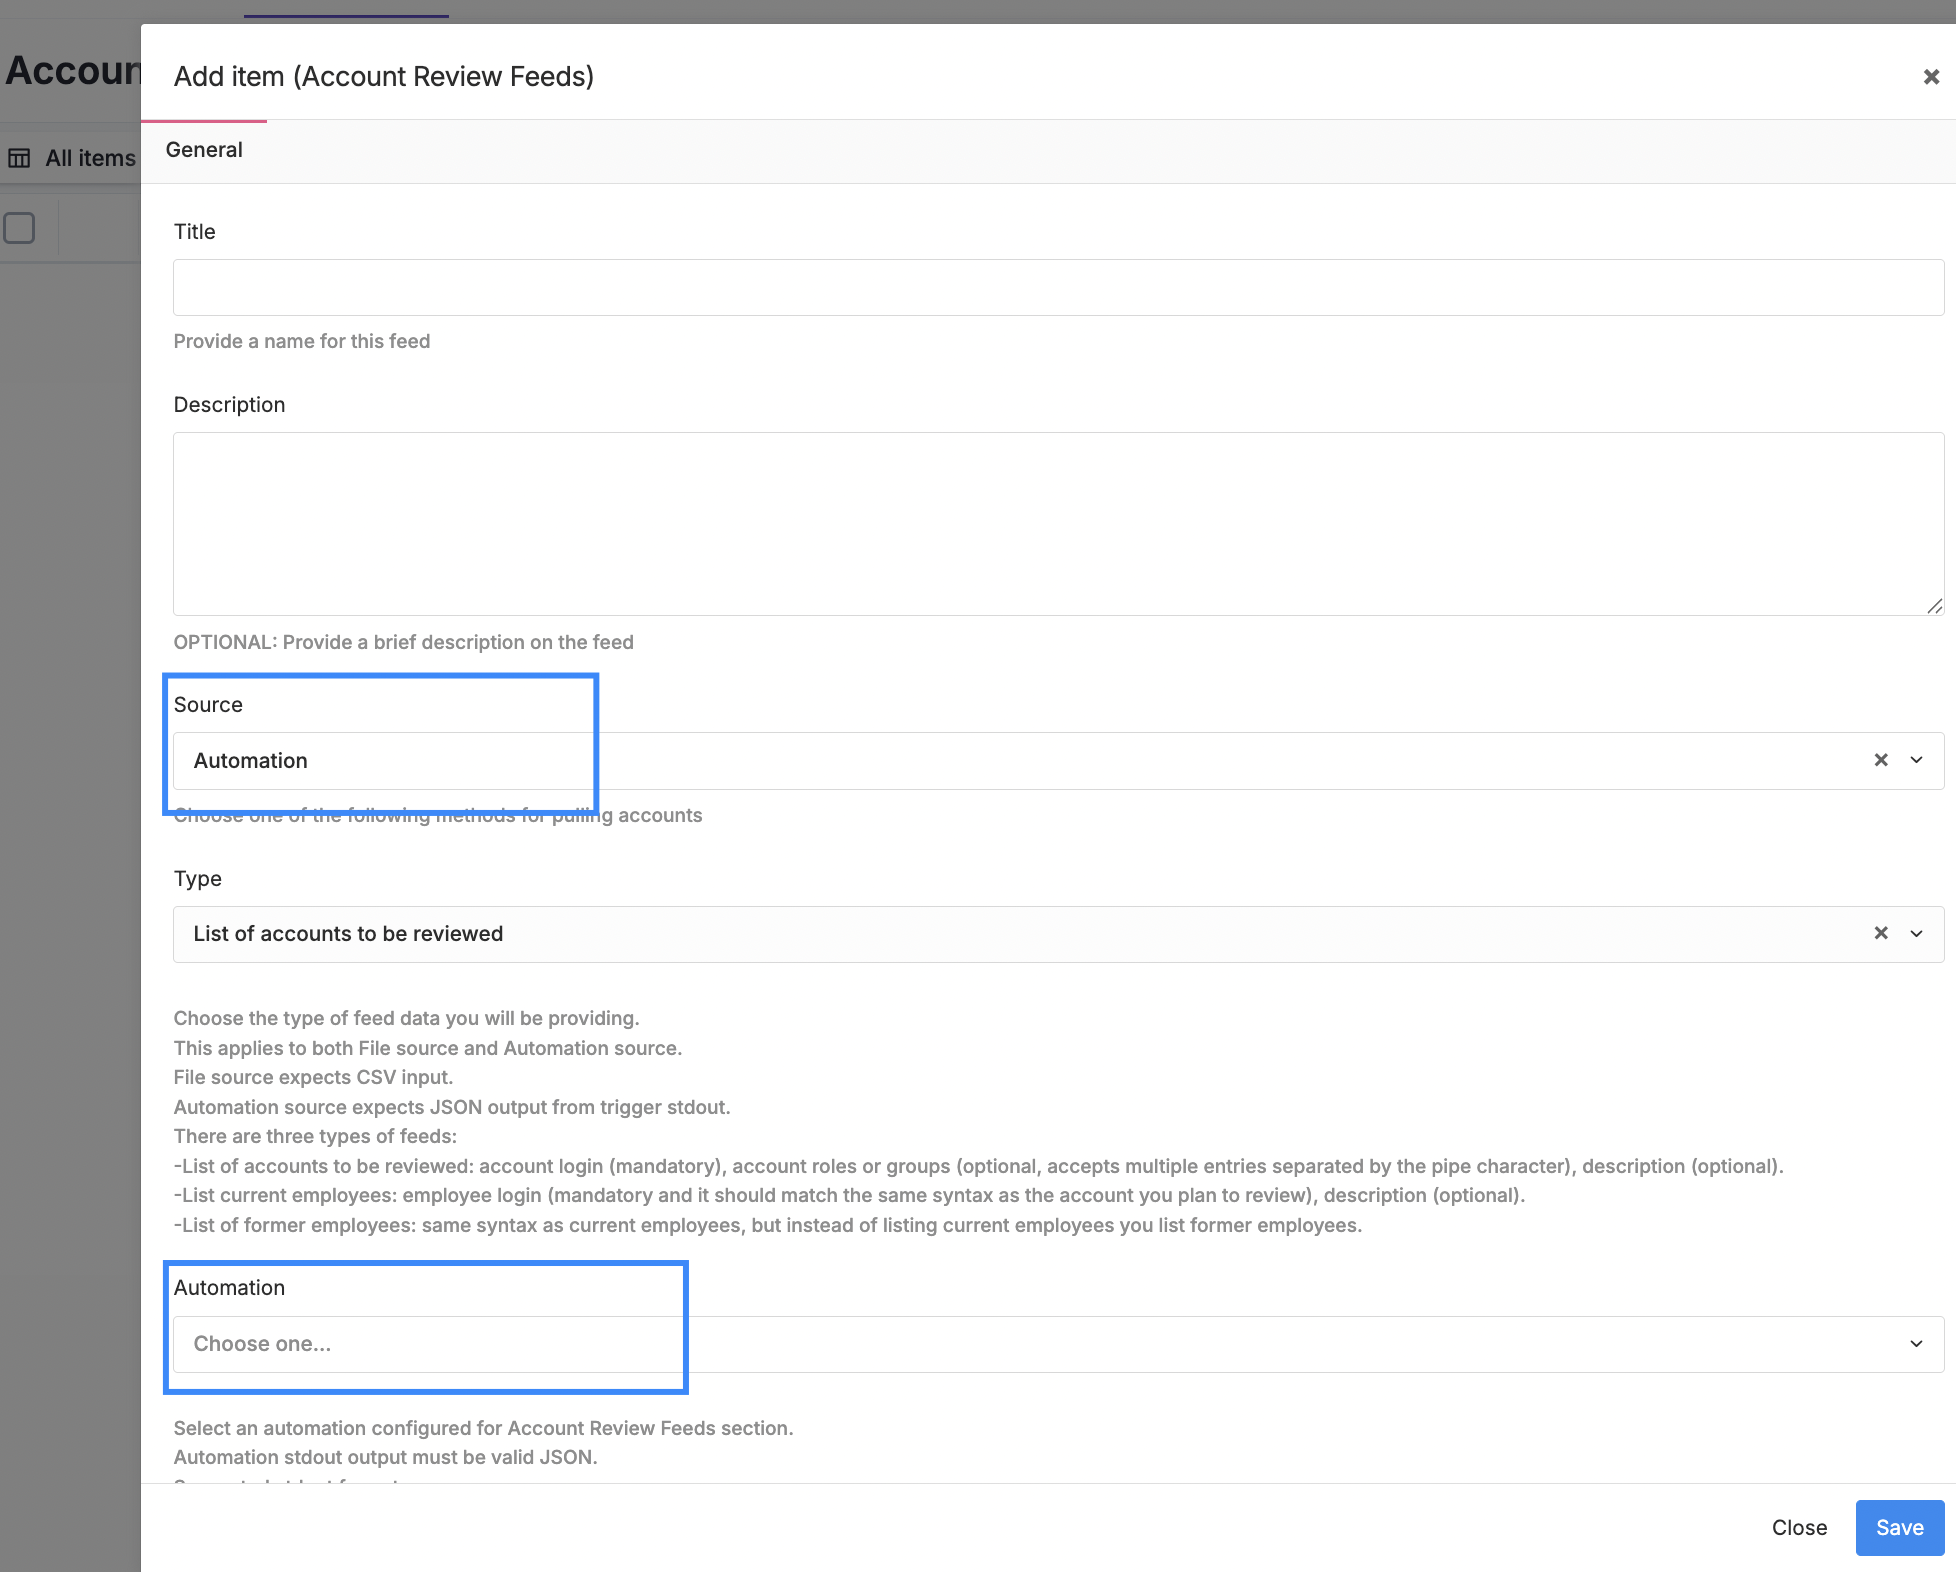
Executed automatically by an Account Review “Pull” request — in this scenario, the Account Review is configured to regularly run a “Pull,” which in turn runs a “Feed” that pulls accounts from systems. These feeds can source these accounts from automation scripts, if needed.
Automation Attributes
Automations are single-file PHP scripts that allow an optional JSON-formatted Composer file. Every time they execute, Composer will be installed or updated, and the PHP code will be executed.
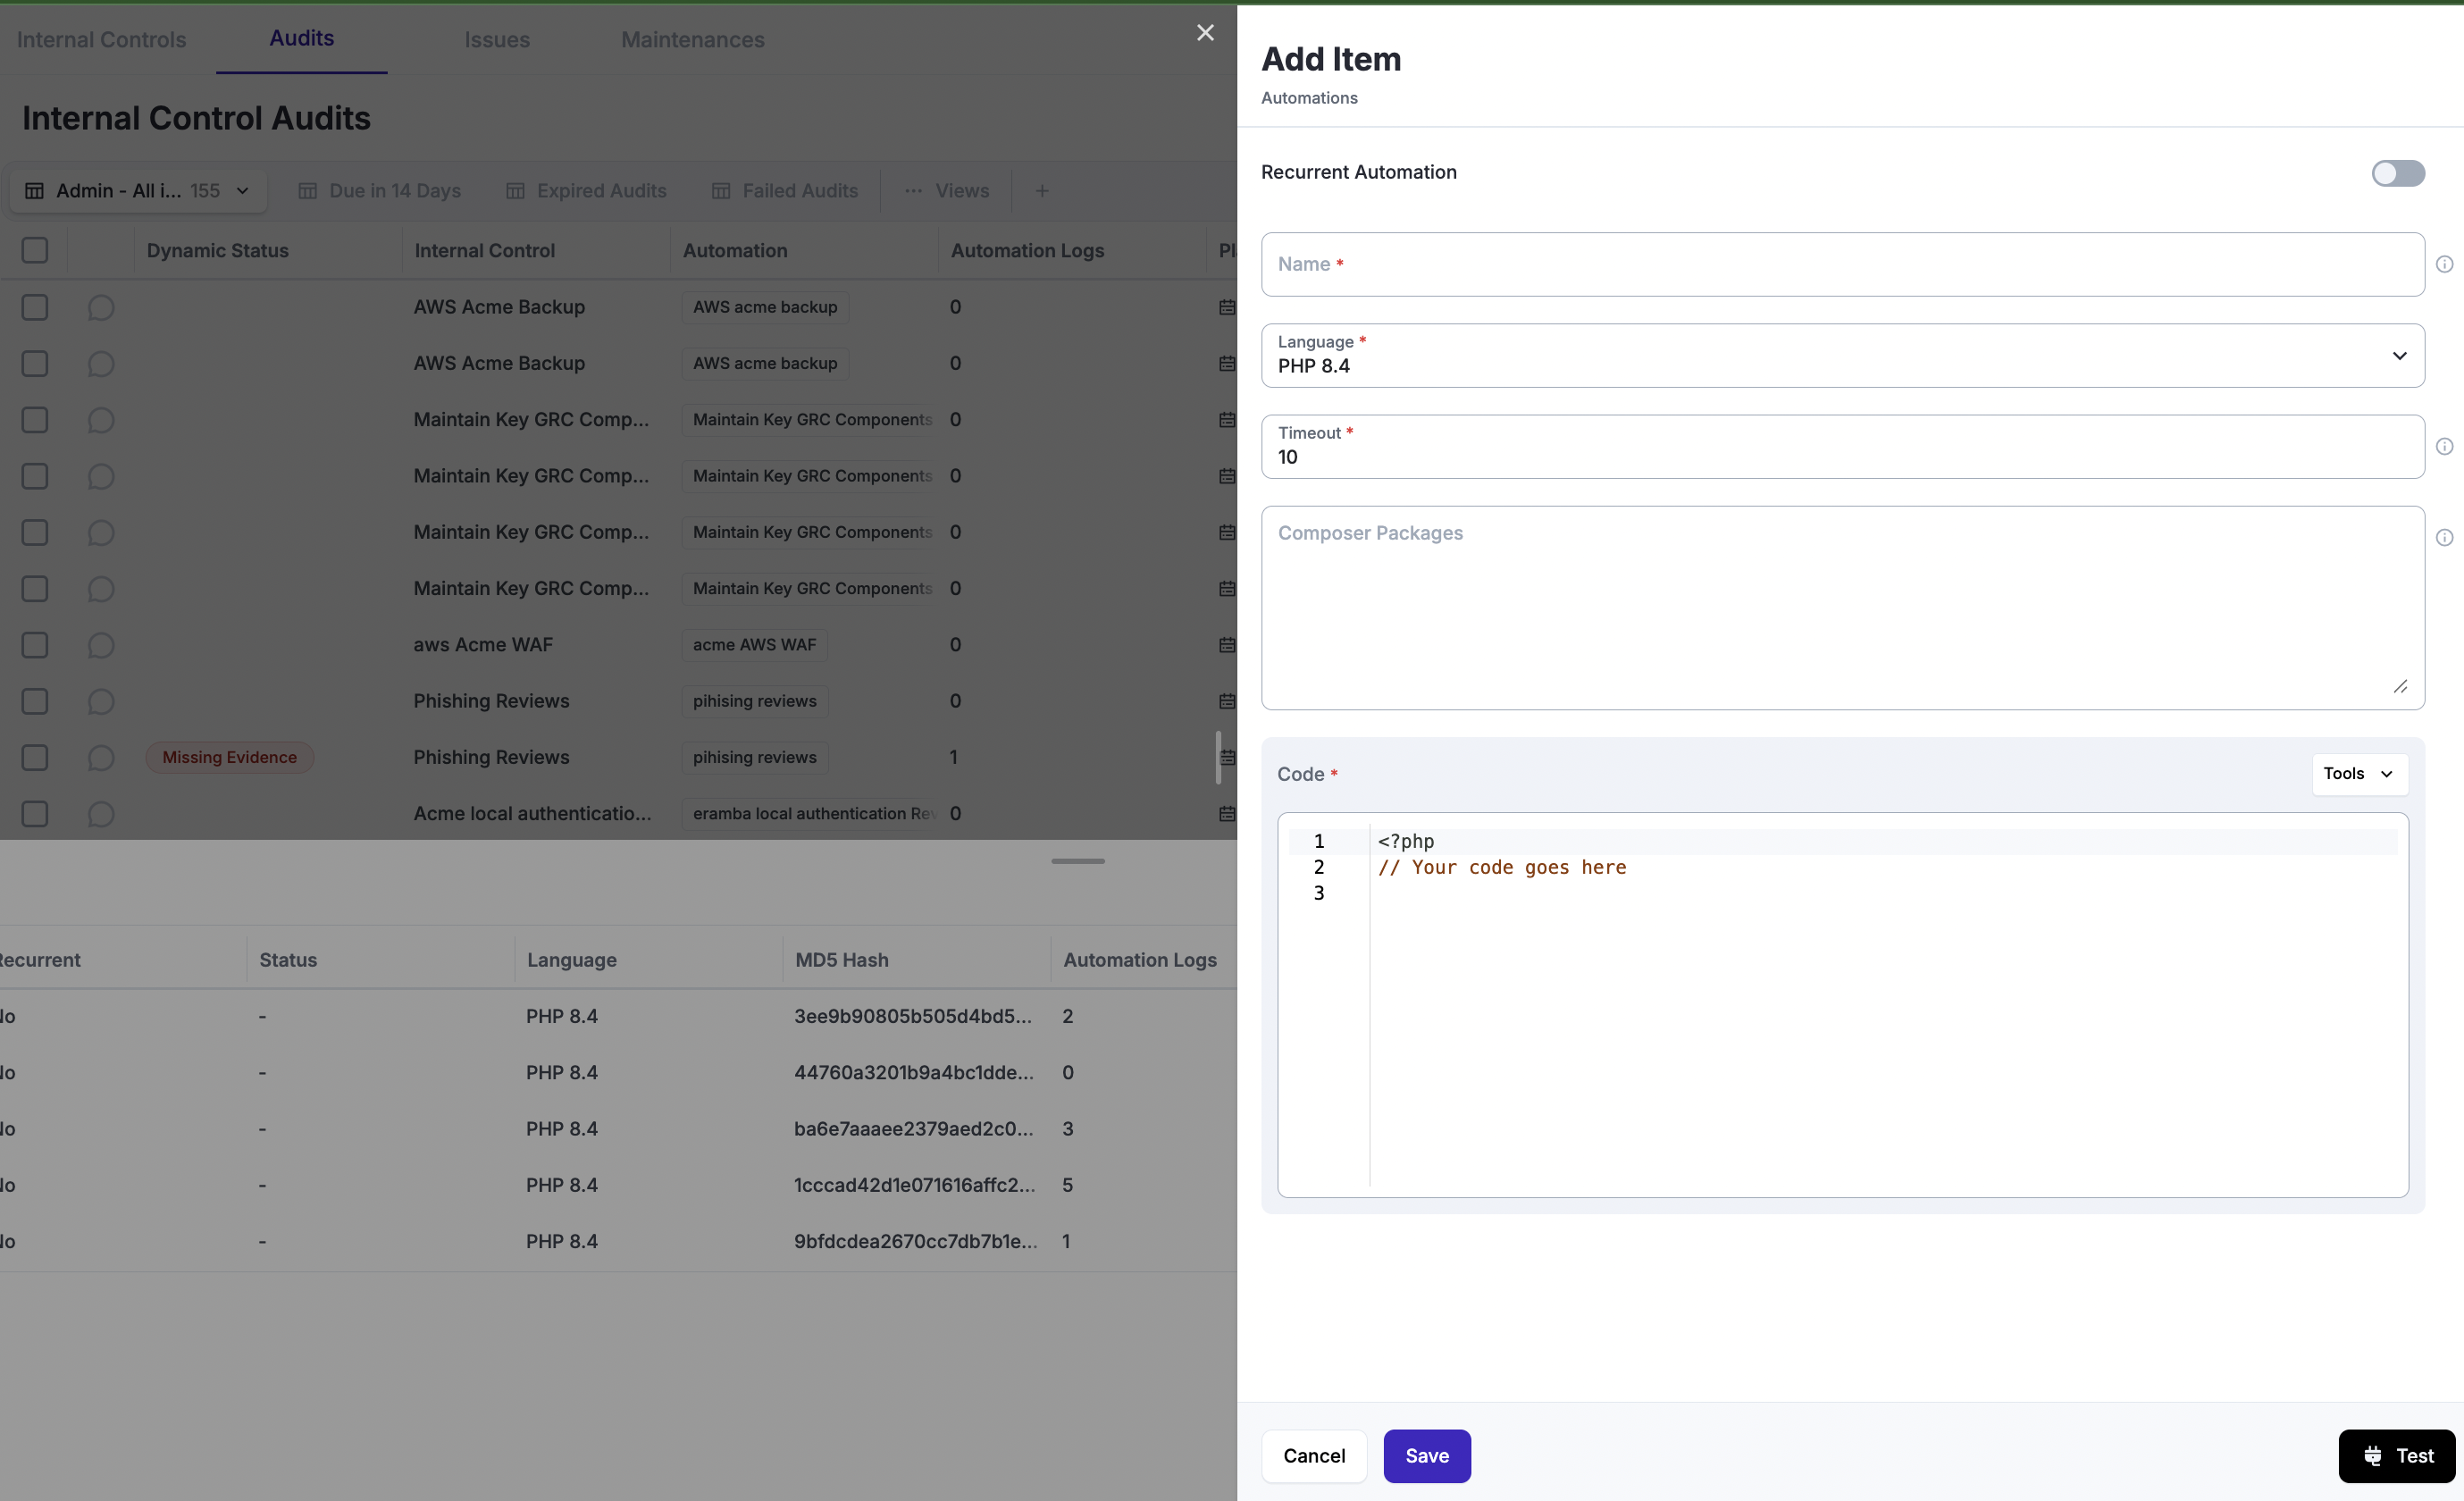
You will need to provide a name for the automation, define its timeout settings, and define whether the automation will run recurrently, such as every hour or every day, or only when an external event triggers it. These external events can be:
-
Warning Notifications
-
Scheduled Internal Control Audits or Maintenances
-
Account Review Feeds, triggered by the Account Review frequency.
When writing code, you have a set of "Tools" that will help you interact with eramba from your PHP script: Macros, Actions and Secrets.
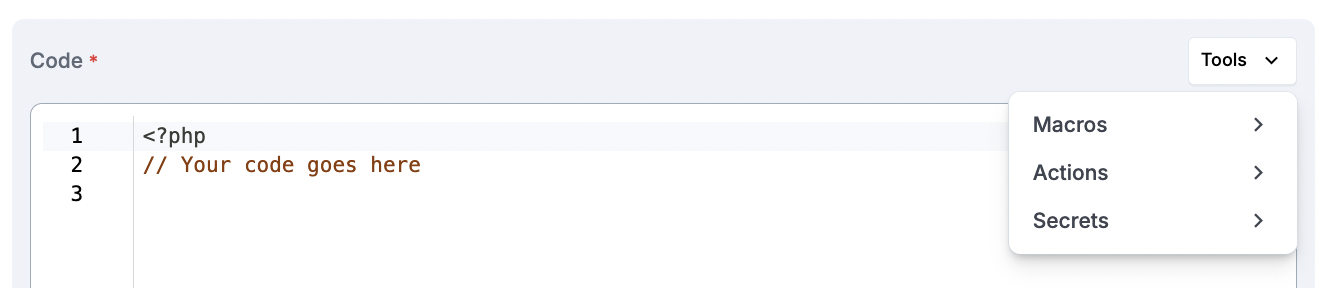
Macros are useful for reading attributes of the “item” that triggered the automation. For example, if an Online Assessment (OA) triggers an automation, the automation can read most attributes of the OA, such as Title, Description, ID, etc.

Actions are wrapper functions we developed to simplify interactions with items in the module where the automation runs. You can add and edit items. When these actions are inserted into the code, instructions are provided on how they should be used. You can also add comments and attachments, and even write to disk.
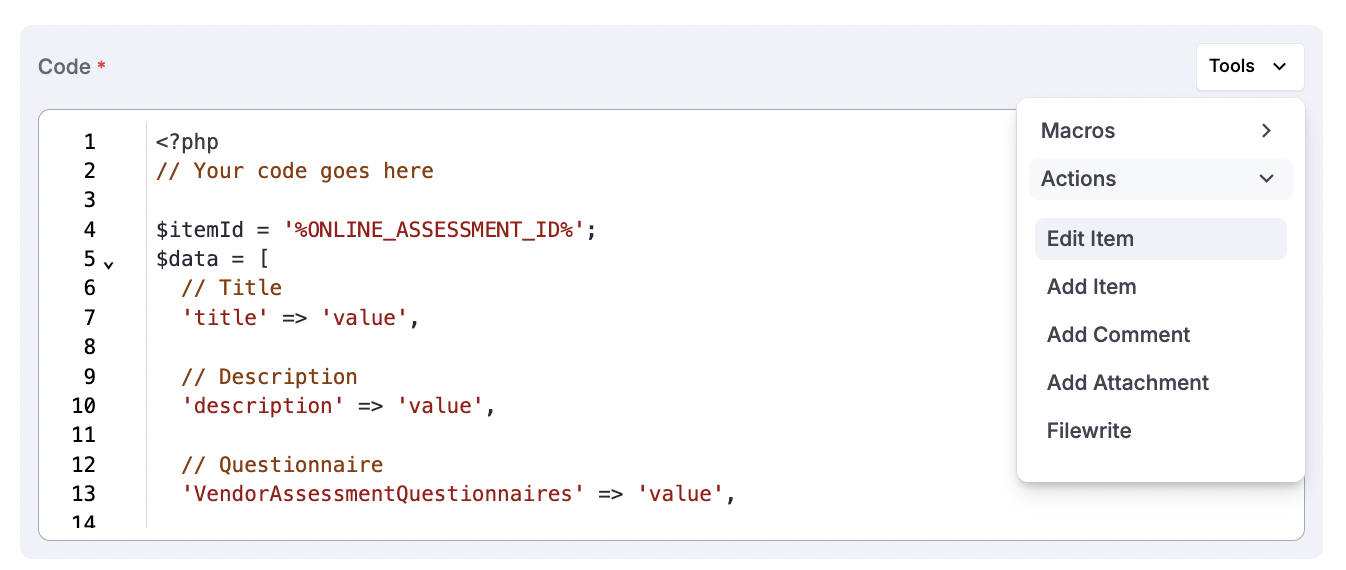
Writting to the disk is possible, but each automation has its own defined file where to write and there is cap on the maximum filesize. Automations can read and write these files in between them.
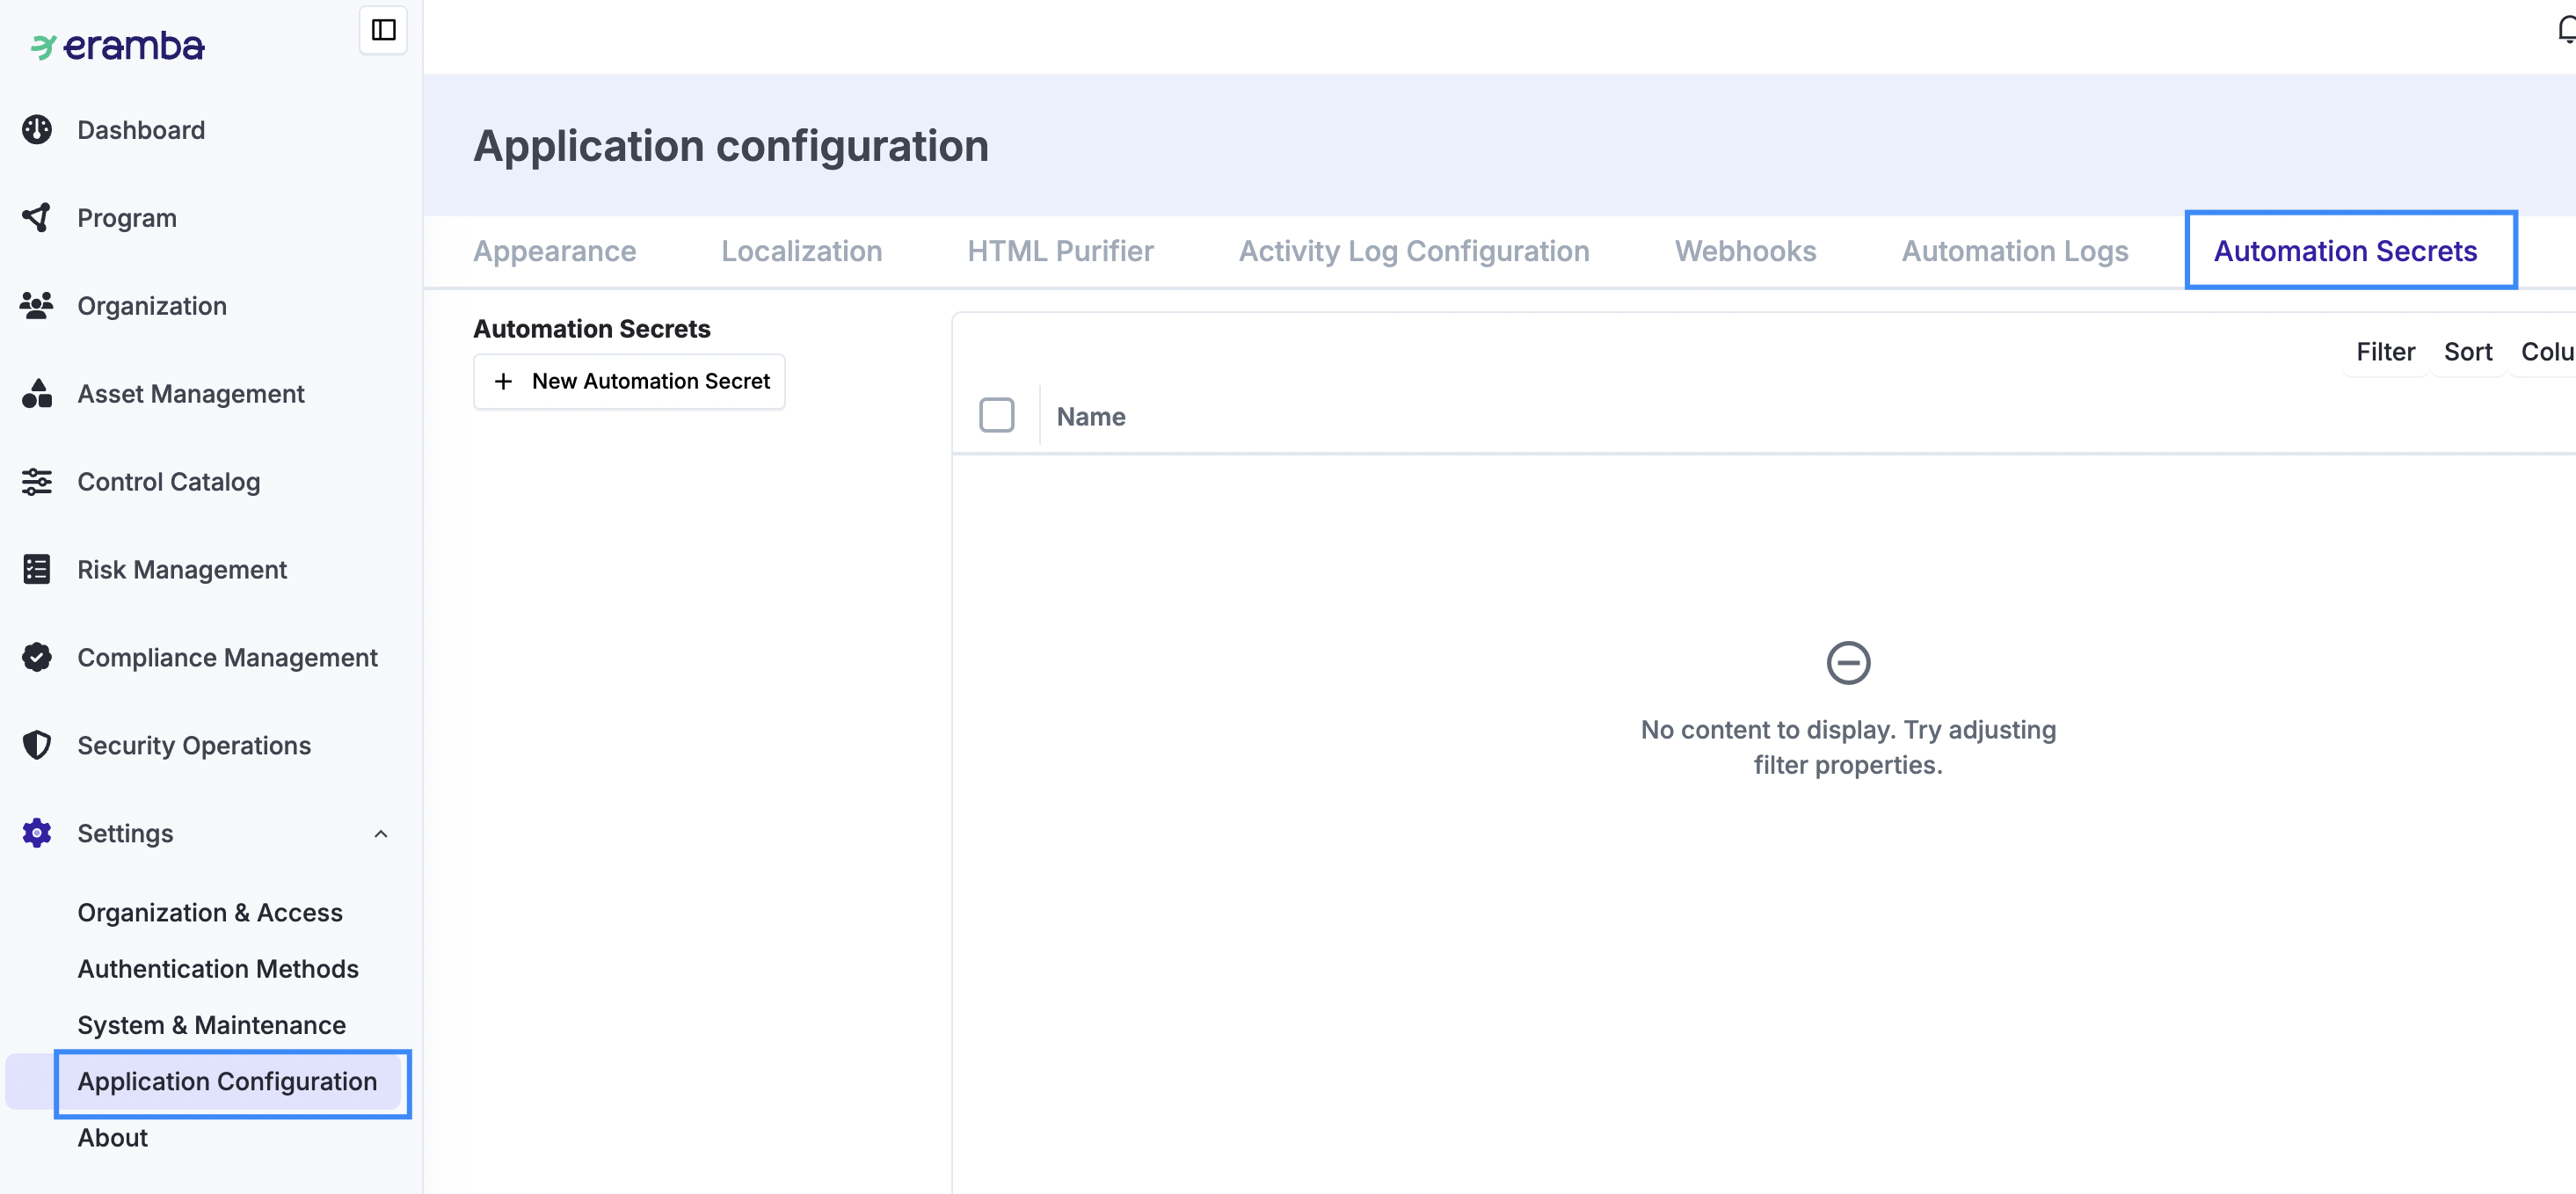
Secrets are used to provide your script with information you do not want to store in the script, such as tokens, credentials, URLs, etc. Secrets are defined in Settings / Application Configuration / Automation Secrets and can be loaded into the script using the “Tool” option.
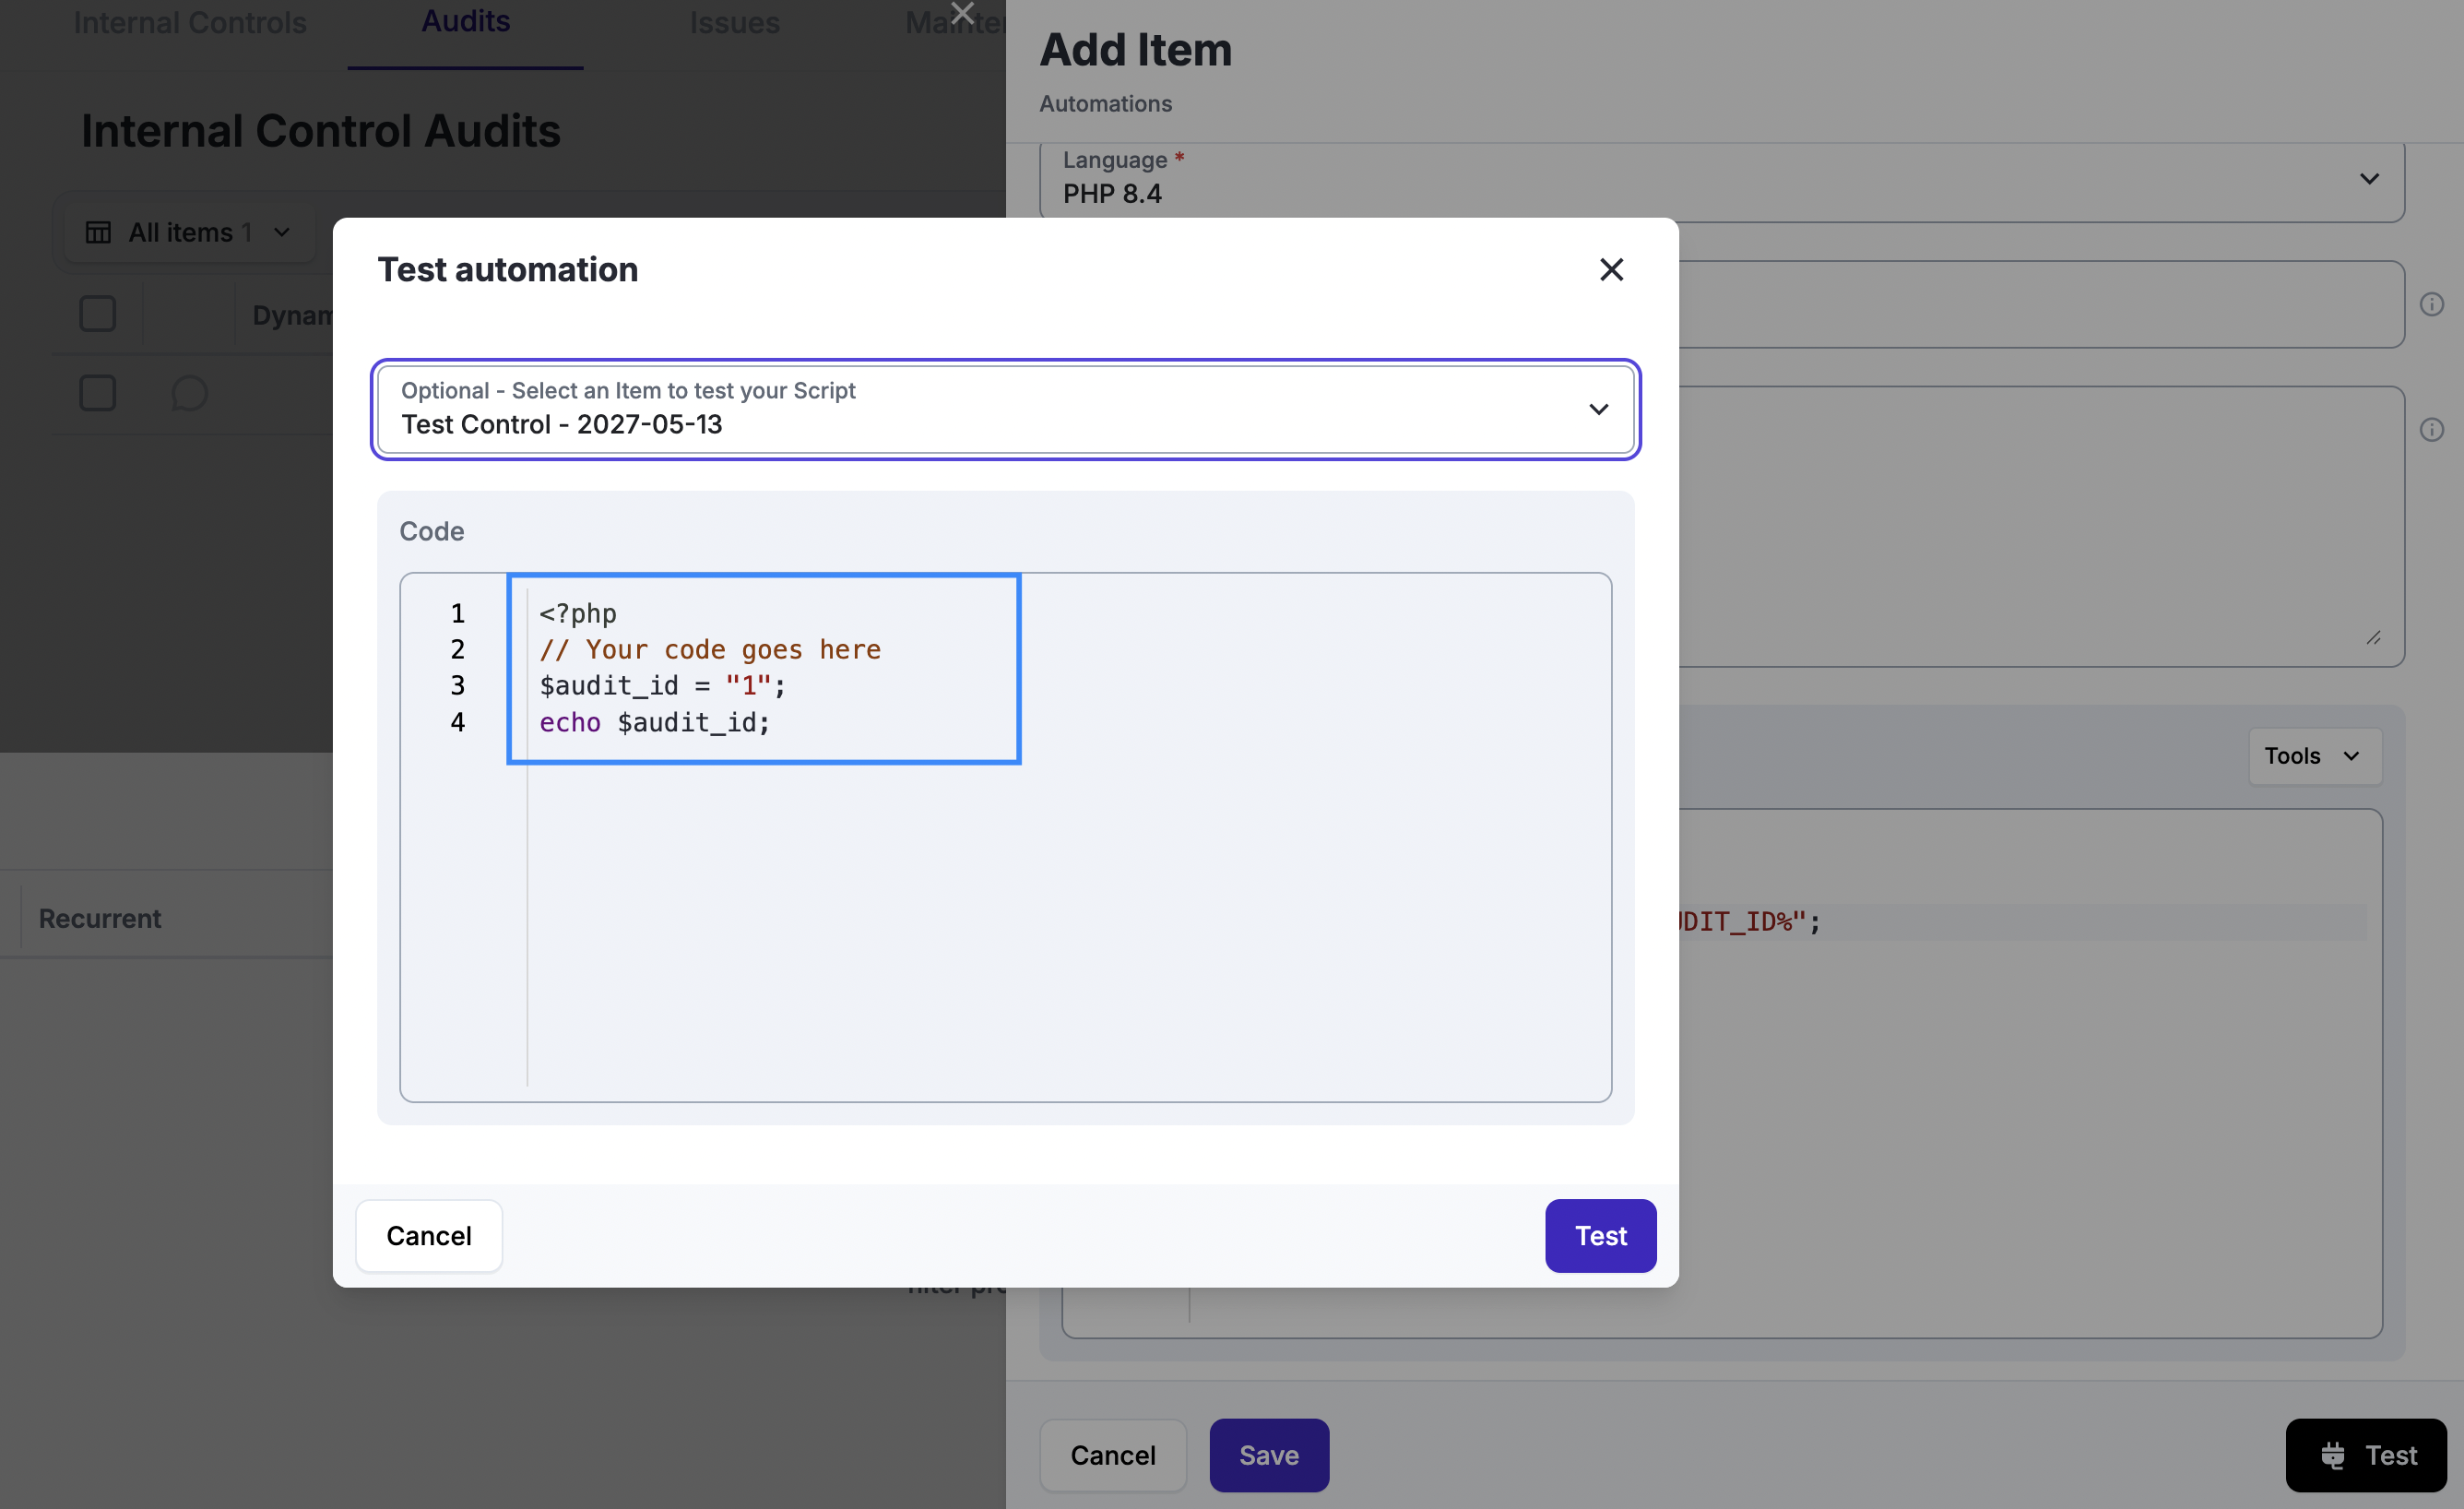
At any time you can test your automation code by clicking on "Test". You can optionally select an item from the module against which to run the automation, or you can simply run it. Testing against a specific item is useful if the end goal of your automation is to interact with these items.
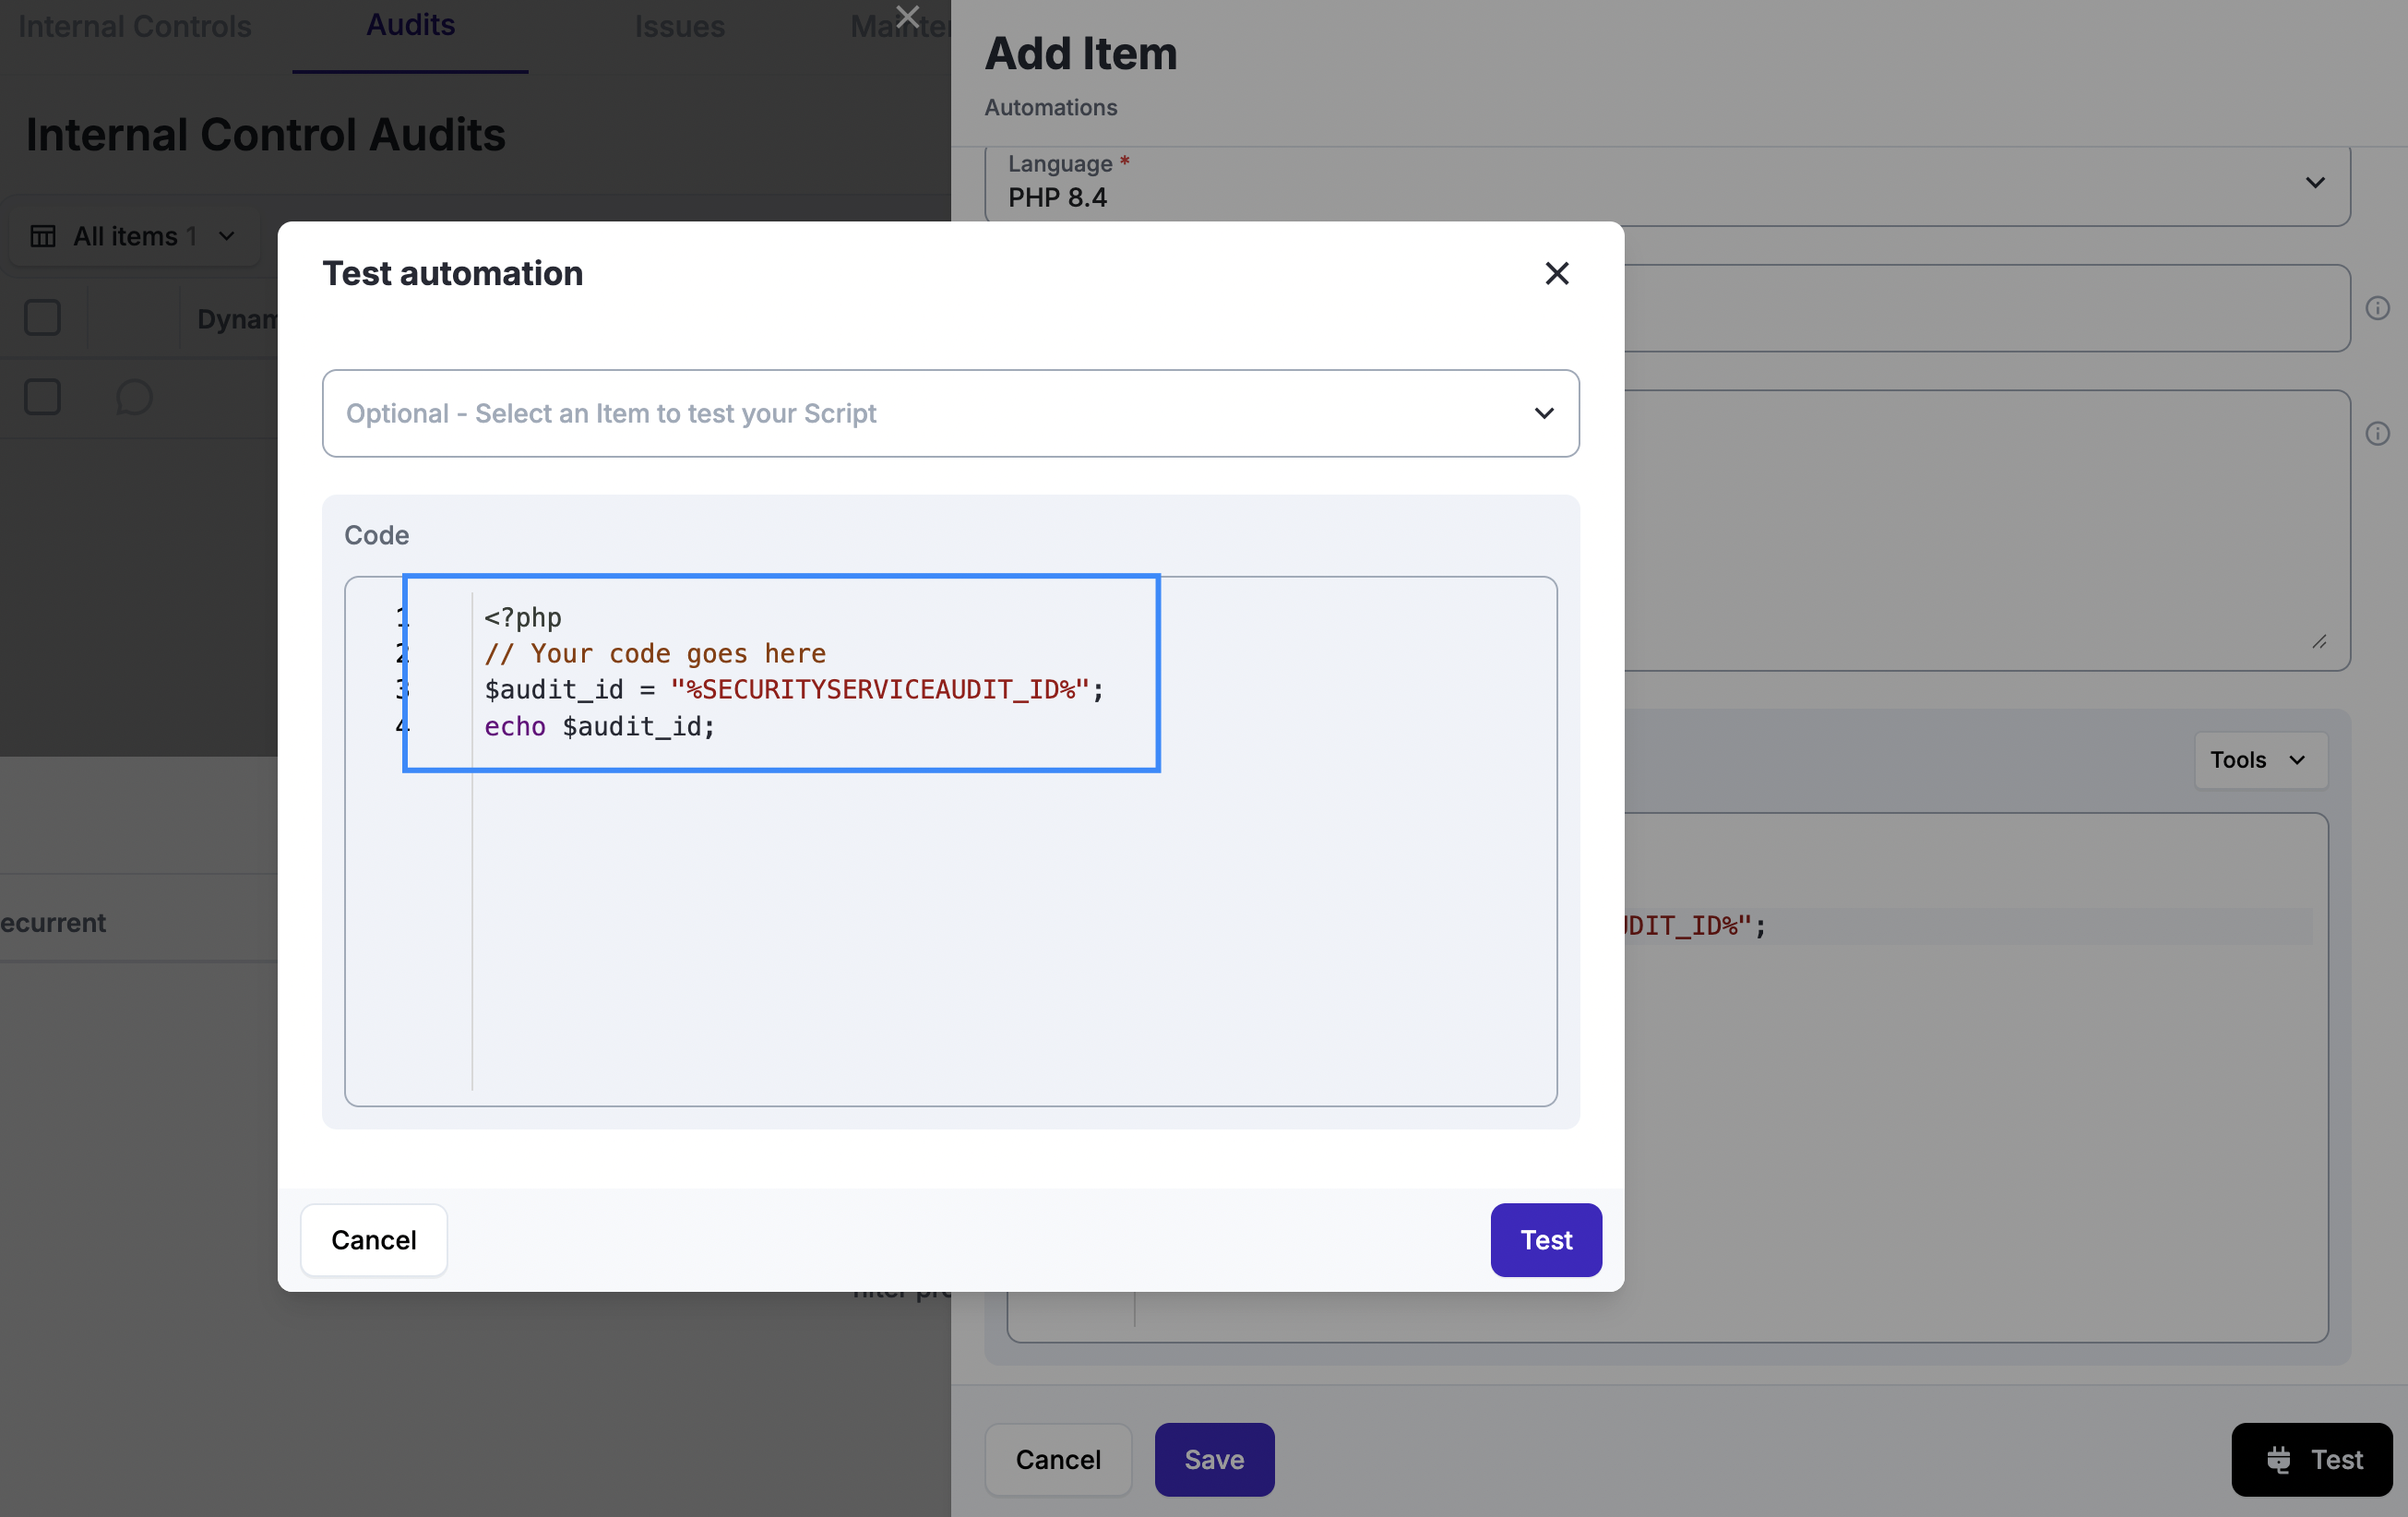
After selecting an item in the module, an Audit in this case, you can see that the audit macro switched to the ID of the selected control. It is important to use quotation marks to enclose the macro; otherwise, the script will fail.
When clicking on "Test" the code will run and produce three outputs: STDOUT, STDERR and EXIT Code. You can use this to debug the code.
Automations run inside a dedicated, hardened container. Internet is available for outgoing connections using TCP connections on ports 80 and 443, subject to bandwidth limits and number of concurrent active connections.
Logs
Every time a script runs (including test runs) it generates logs that are stored under Settings / Application Configuration / Automation Logs.
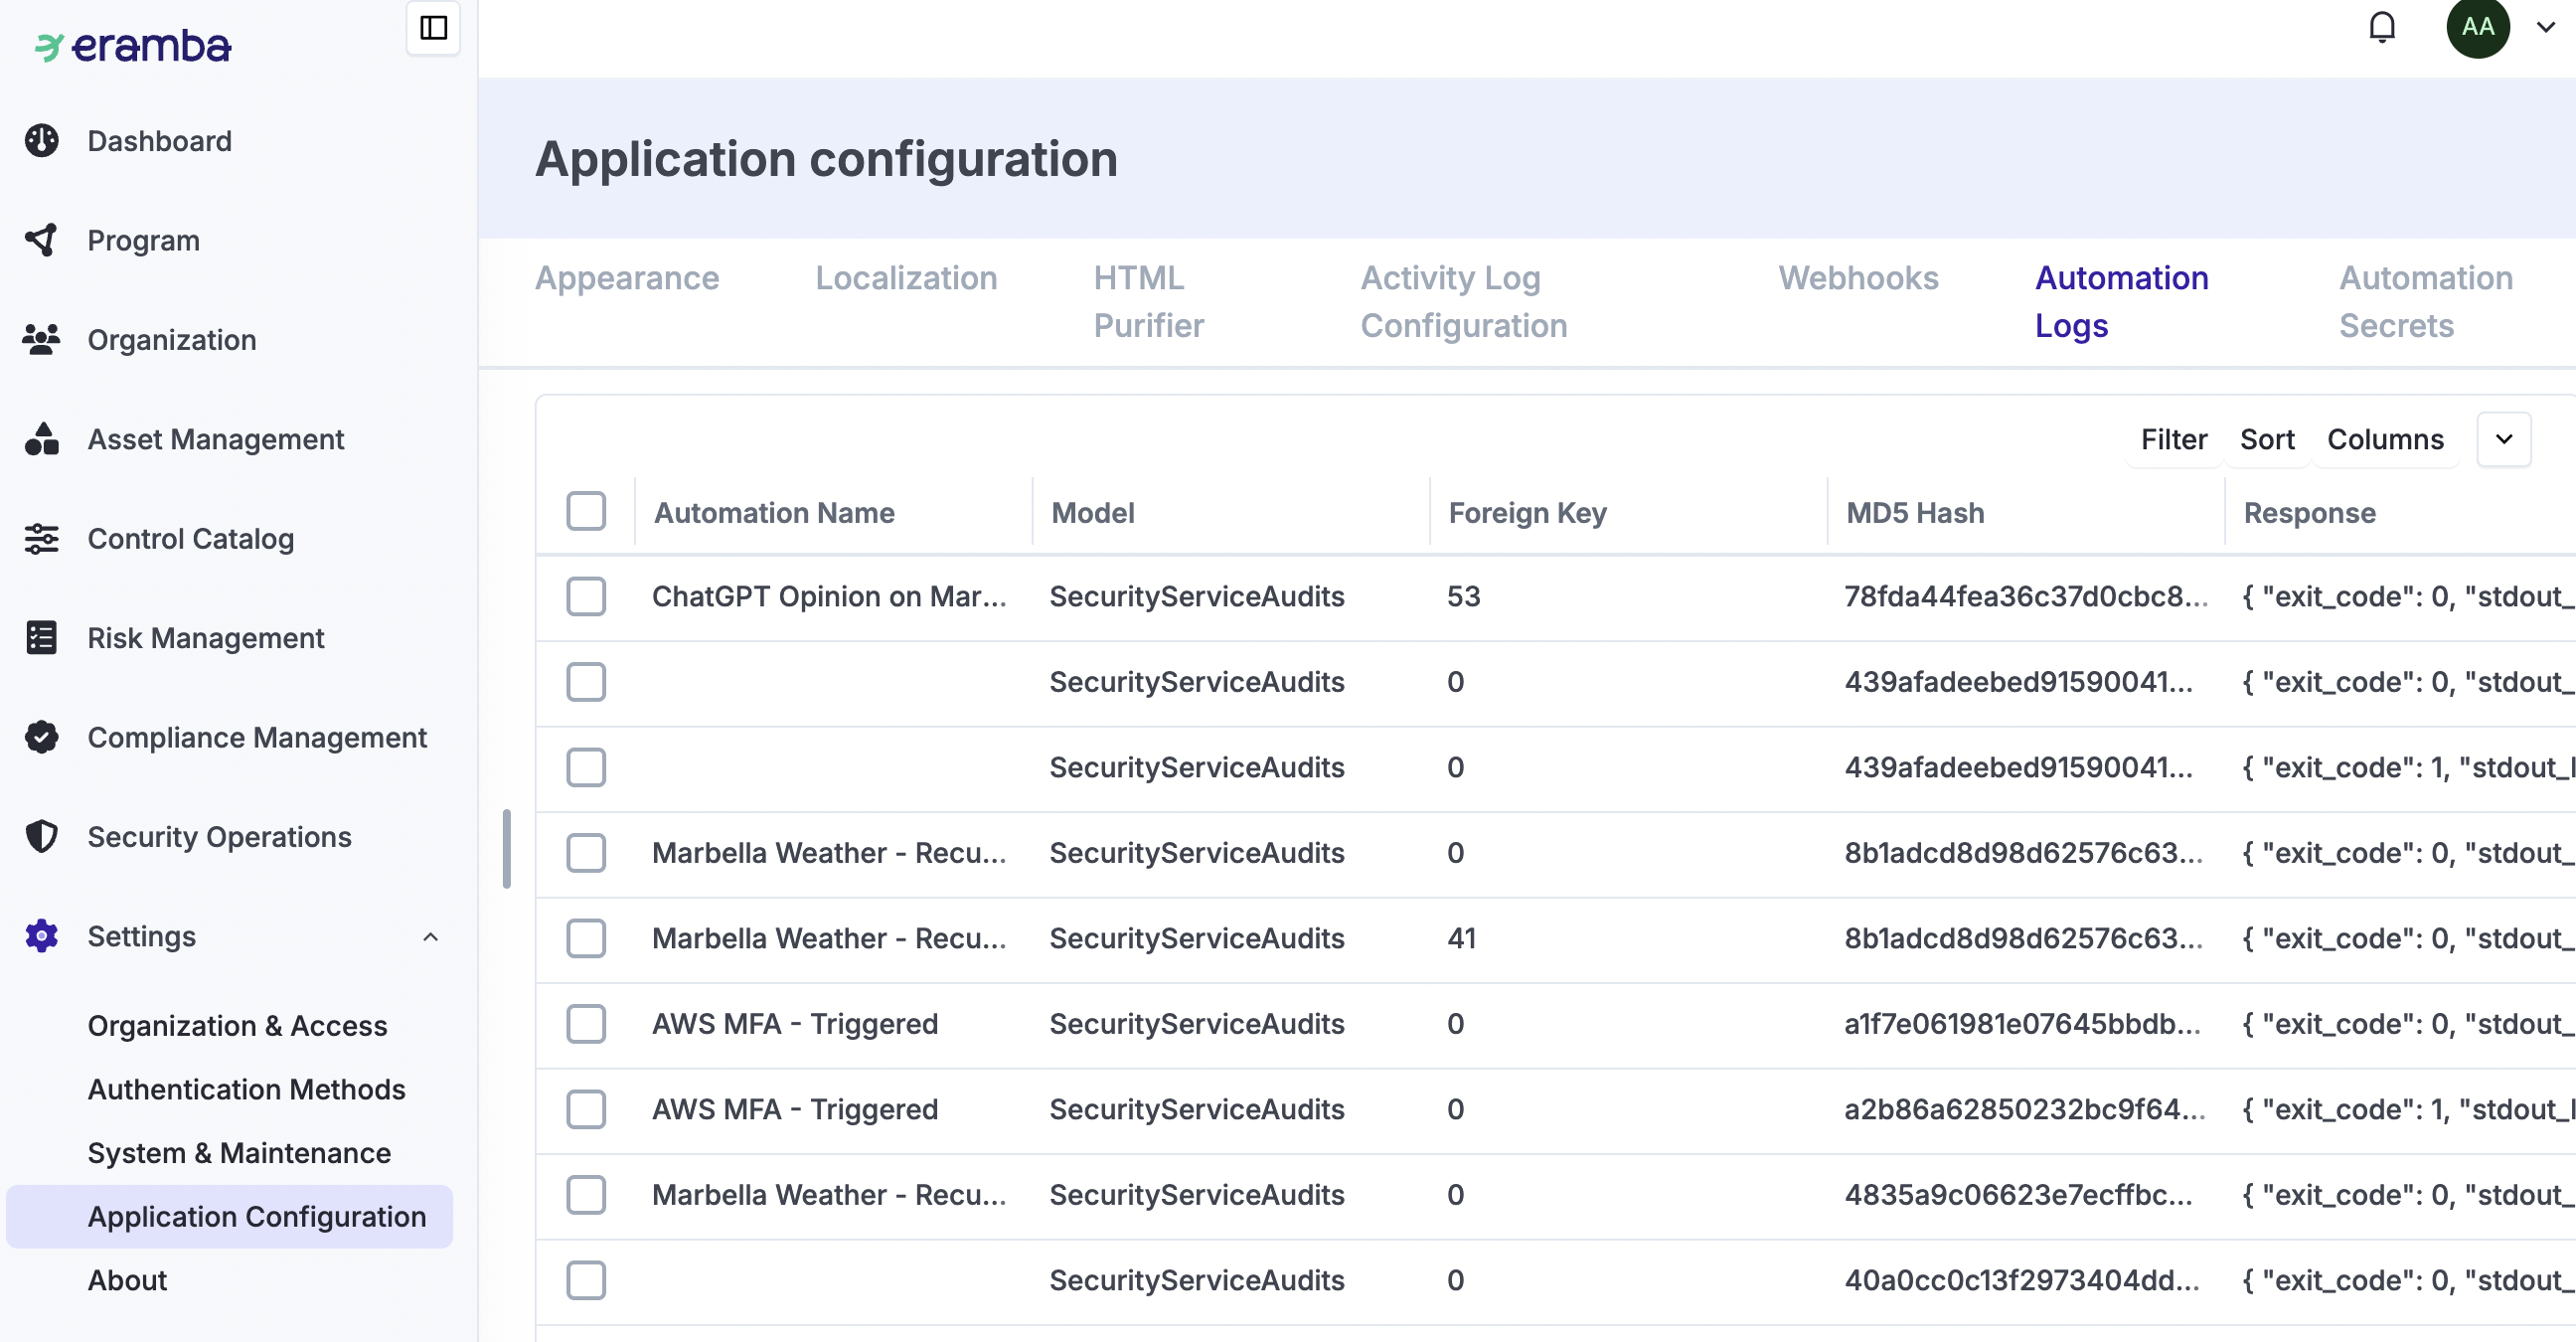
If the automation execution code is not 0, meaning it was not successful, an email will be sent automatically to all email accounts belonging to members of the “Admin” group, notifying them about the issue. This requires your email settings to be working properly.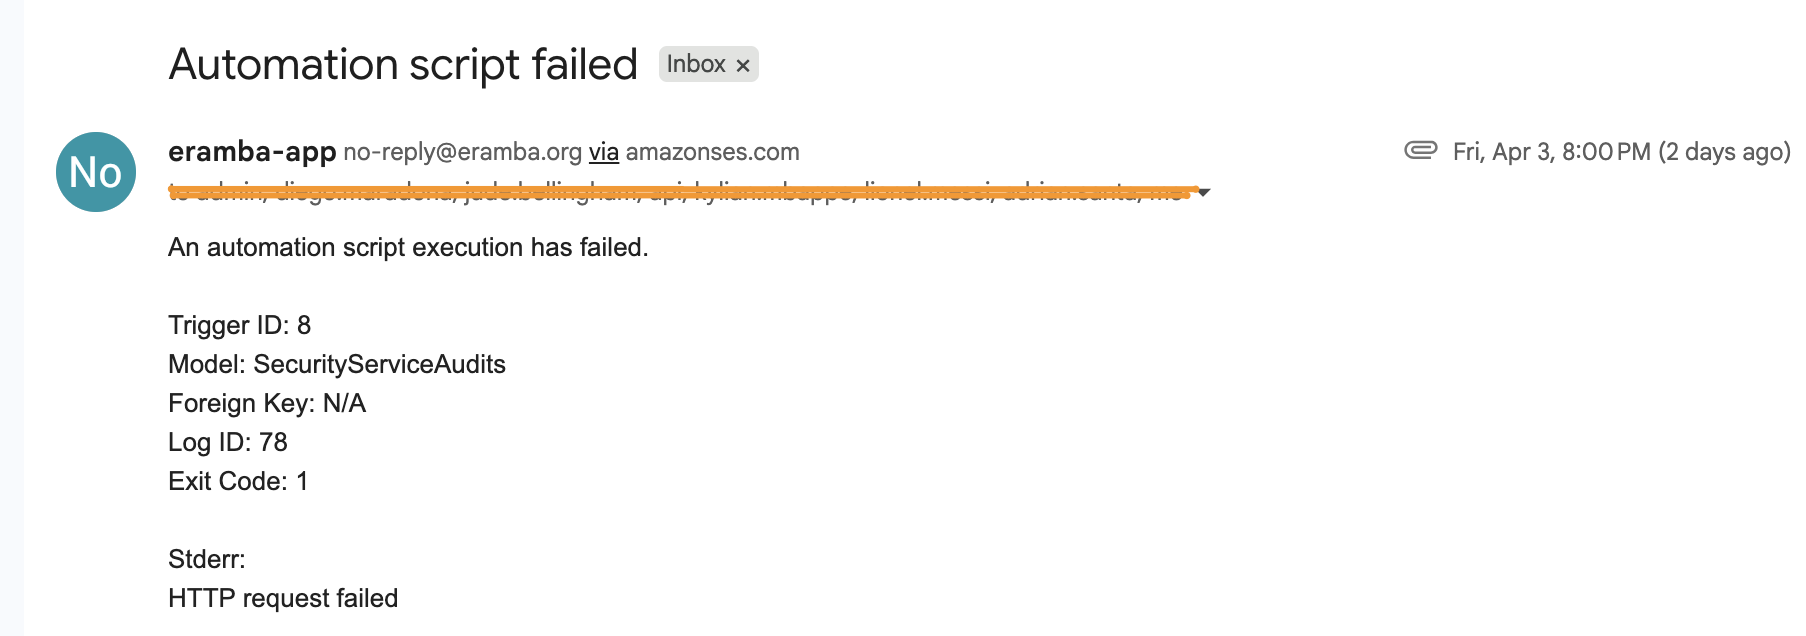
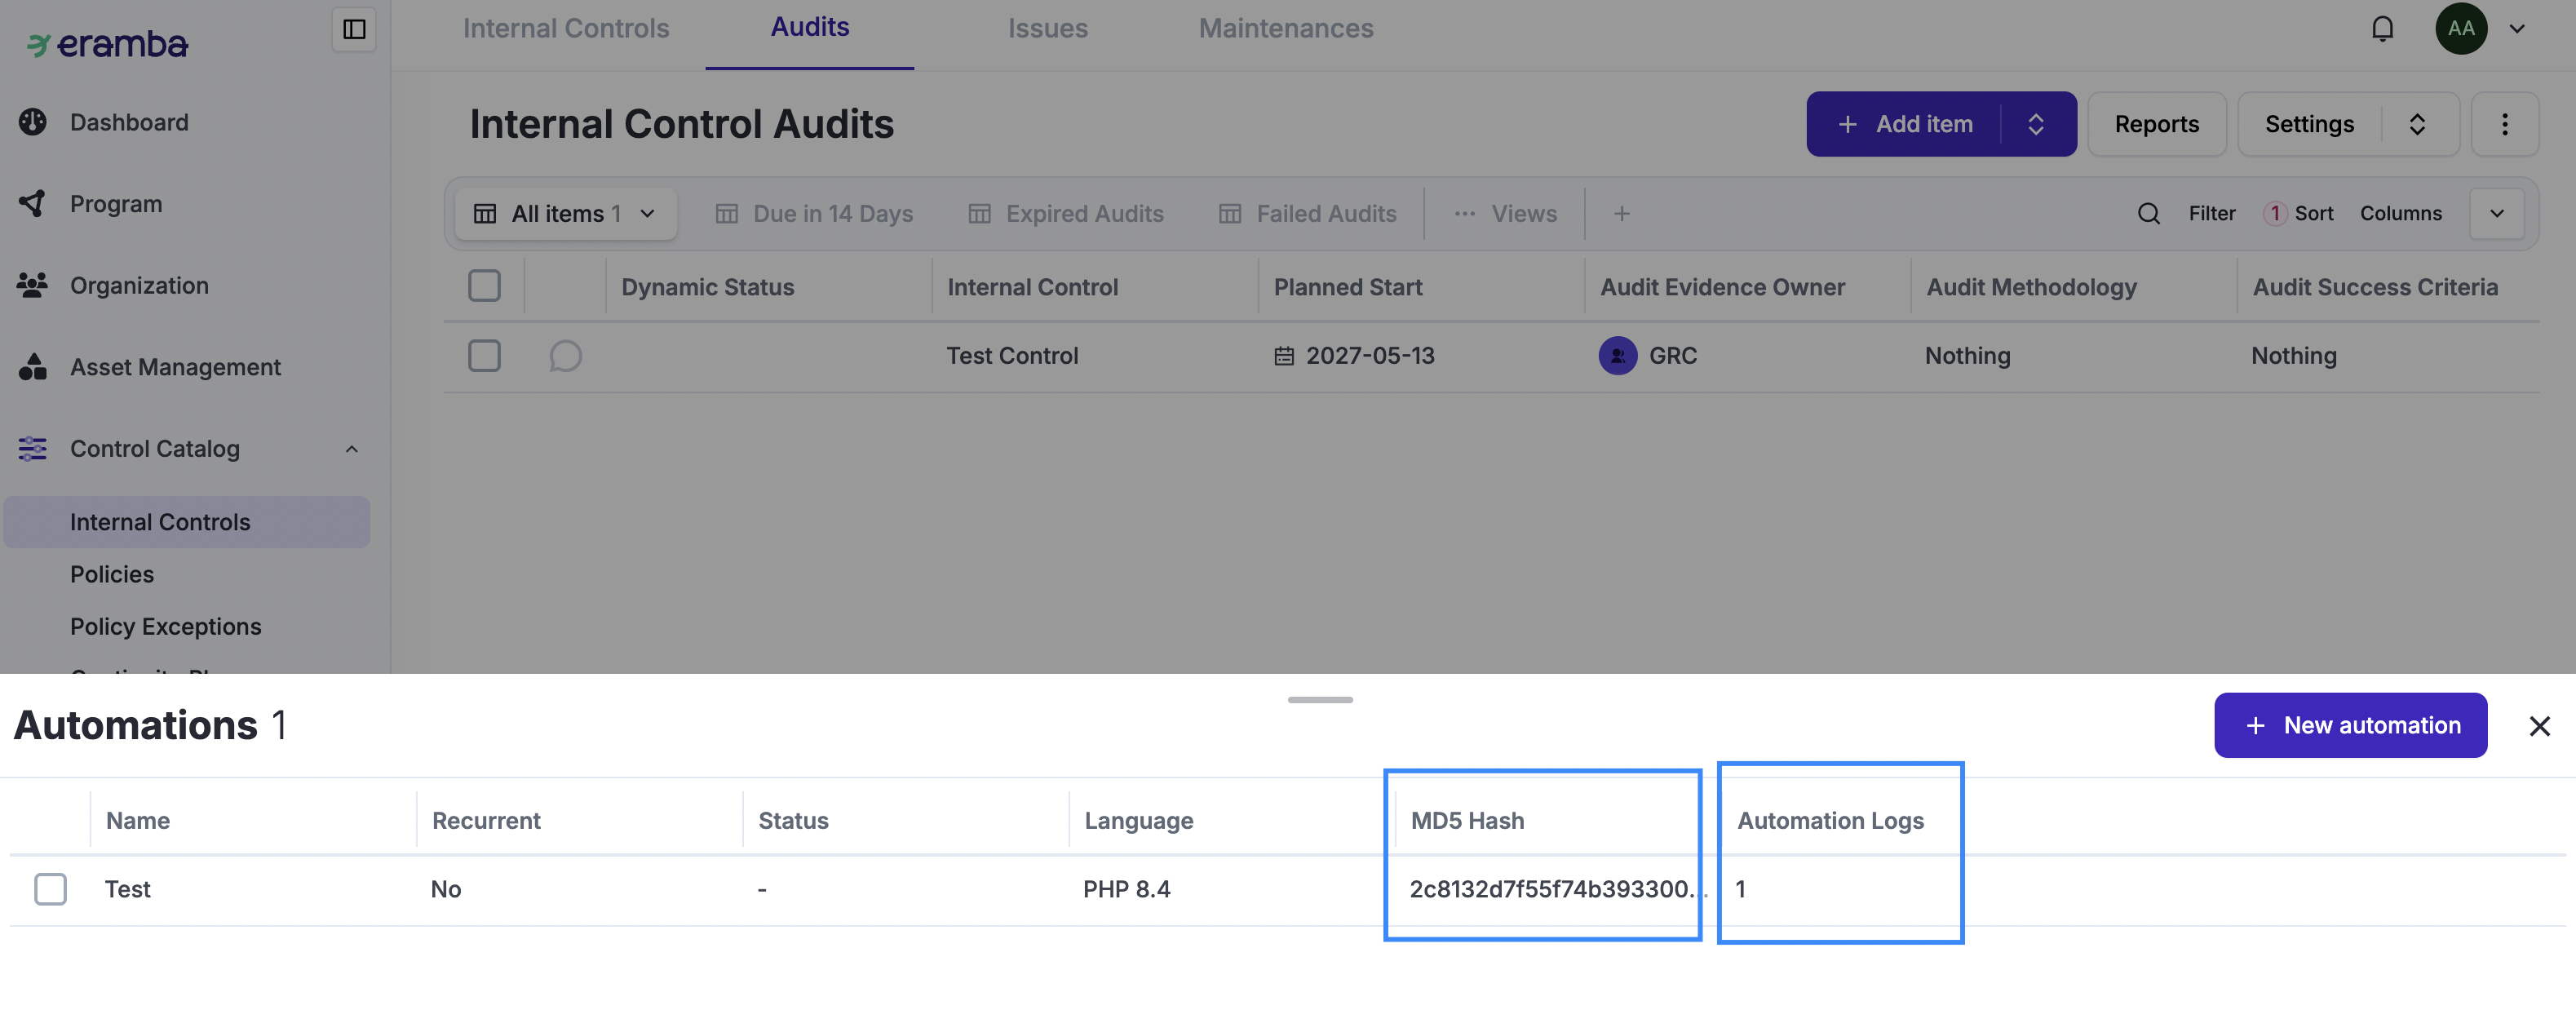
When listing automations, you will see a unique MD5 hash generated using the script and Composer code. This helps maintain traceability of automation executions. This way, you can demonstrate to your auditors whether the automation code changed in any way.
Examples
We provide a simple, publicly available repository of code that helps you test each of the “Tool” wrapper options: https://github.com/eramba/templates/tree/master/Automation
LLMs
Most if not all the automation code can be produced by any LLM (ChatGPT, Claude, Gemini, Etc) so there is no need of great software skills. Simple prompt such as the following can produce an almost ready automation:
I need to create an automation for eramba in order to test an internal control:

1- it must be a single file php script
2- it can use a json based composer file as an option
3- I will provide the following variables: Internal Audit ID, AWS Access Code, AWS Access Key, AWS Region and AWS_Volume_Tag_Regex
4- The code will connect to AWS pull all EC2 volumes that match the regex optionally defined in AWS_Volume_Tag_Regex (otherwise match everything) and for each one of them validate if backups are enabled or not
5- That list plus a summary of your findings must be put into a single variable
6- This variable needs to be output as standard output
The code produced will require adjustments, such as:
-
Replacing the variables for secrets
-
Replacing the variable for the Internal Audit ID for a macro that reads that ID
-
Taking the output of step #6 to complete the “Edit” wrapper function to update an audit record.