Course Introduction
Eramba uses web forms to add data to the system. These forms can be customized by the user by adding, removing, renaming, and reorganizing the fields and the tabs that group them.
In addition, this feature allows users to build their own custom relationships between modules.
Primarly this course requires you to undertand "Theory". Implementing a core eramba "Use Case" require this module, for that reason these "Use Case" guides make constant regerence to this course "Theory" and "How-To" sections.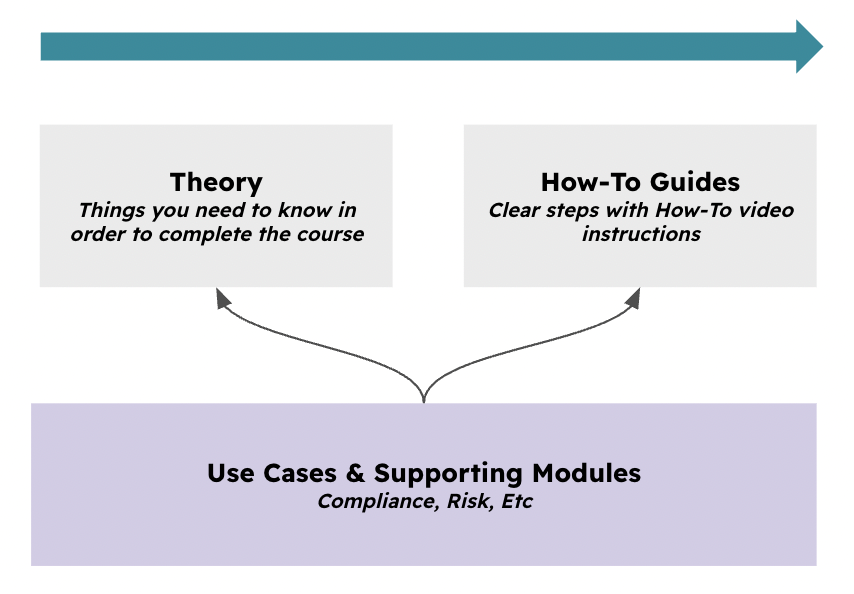
Typical Scenarios
This chapter demonstrates practical ways to use customizations:
-
Hide fields from forms that are not relevant or used by your organization.
-
Create custom tabs to organize information according to your workflow or process needs.
-
Add custom fields to capture additional data specific to your organization.
-
Rename fields, including their name and description, to better reflect your organizational terminology.
-
Reorganize fields by moving them up or down to match workflow priorities.
-
Build non-standard associations between modules.
Supported Versions
Customizations are available in both on-premise and cloud deployments, and are available in Enterprise only.
Scope
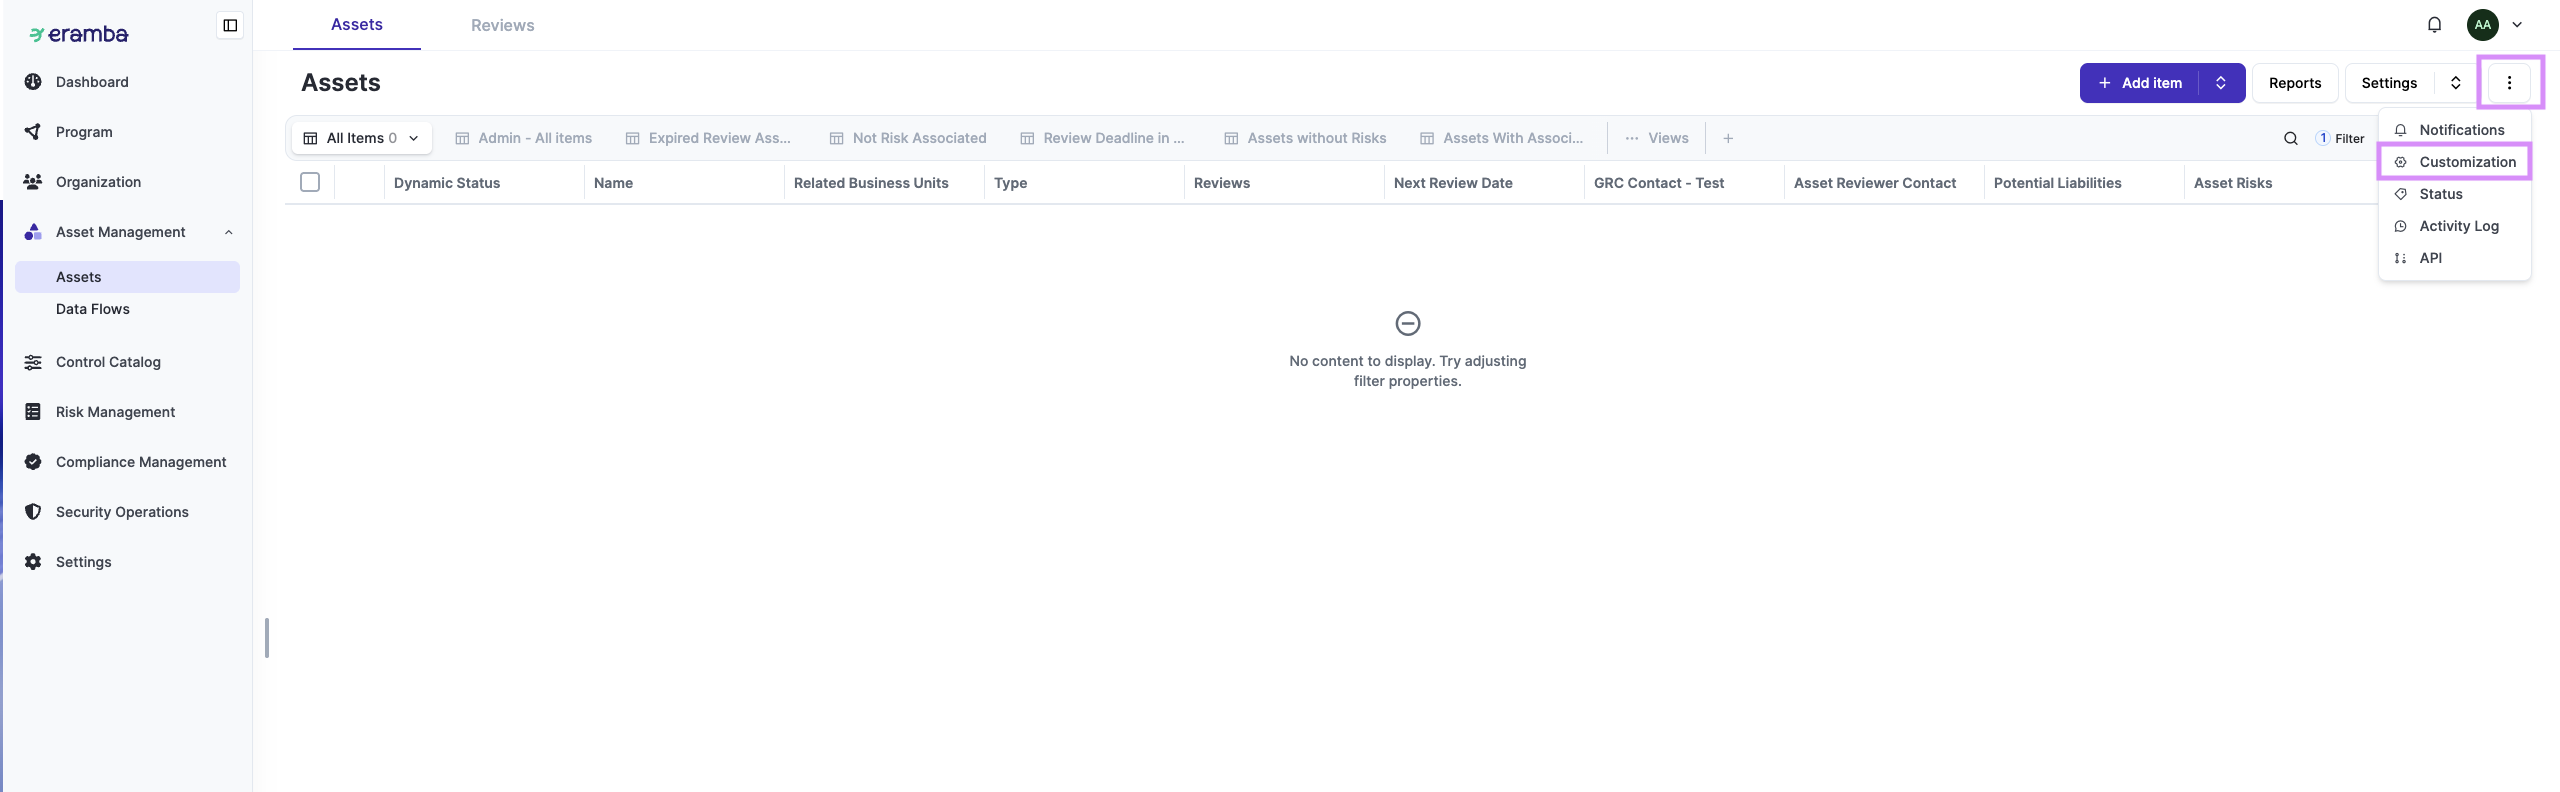
Customizations are available in almost every module. You can verify whether a module supports Customizations by opening the module and clicking the Common Features button (the three dots in the top-right corner). If Customizations is listed, the module supports it.
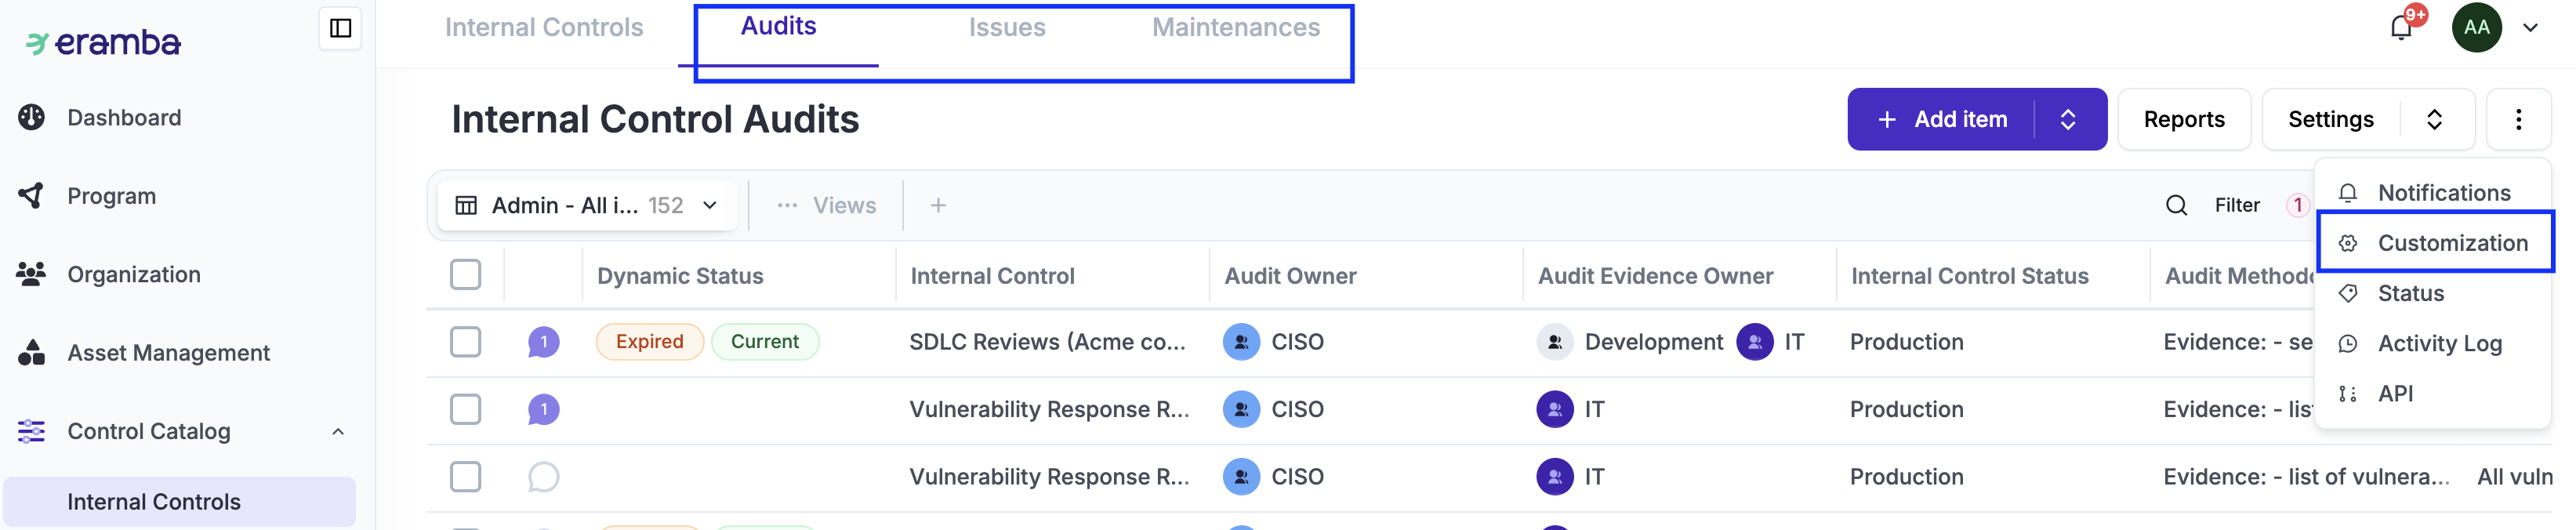
It is important to note that not only main modules have customisations, but also sub-modules. For example, in the Internal Control module, you could also customise the forms used in Audits, Issues, or Maintenance.
Theory
Fields
When accessing the “Customisation” module, you will see all fields listed for that module. The user interface is pretty explicit: you can rename fields, hide fields, and rearrange the order of fields. Some fields cannot be hidden because they are required by the software.

You can always reset field customizations to the default settings by clicking “Reset”. You can add new “Tabs” and new “Fields” to the form. The following is a list of the field types you can add:
-
Short Text – Text field for brief information.
-
Paragraph – Text field for longer information or notes.
-
Date – A field to store date values. This will display a date picker with today’s date pre-selected.
-
Dropdown – Allows selecting only one option at a time from a predefined list. We strongly advise you to always create an option “Undefined,” as this is typically very useful. Once you start using the dropdown on at least one item, you can no longer change its options.
-
Dropdown – Multiple Select – Allows selecting multiple options from a predefined list. We strongly advise you to always create an option “Undefined,” as this is typically very useful. Once you start using the dropdown on at least one item, you can no longer change its options.
-
Numeric – Integer – Stores whole number values.
-
Numeric – Float – Stores decimal number values.
-
Custom Role – A field to assign roles for adding users and groups. This role is often used to customise approval, review, and notification workflows. For example, you could have a missing role in a form called “Approver.”
Custom Relationships
When clicking on "Add" new fields, in some modules you will have the option to add "Custom Relationships".
For example, if you link the module Business Units/Process to the module Asset Management / Asset, then on the Asset module you will see a field called “Process” with a list of the processes created in Business Units/Process (you will not see anything on the Process module).
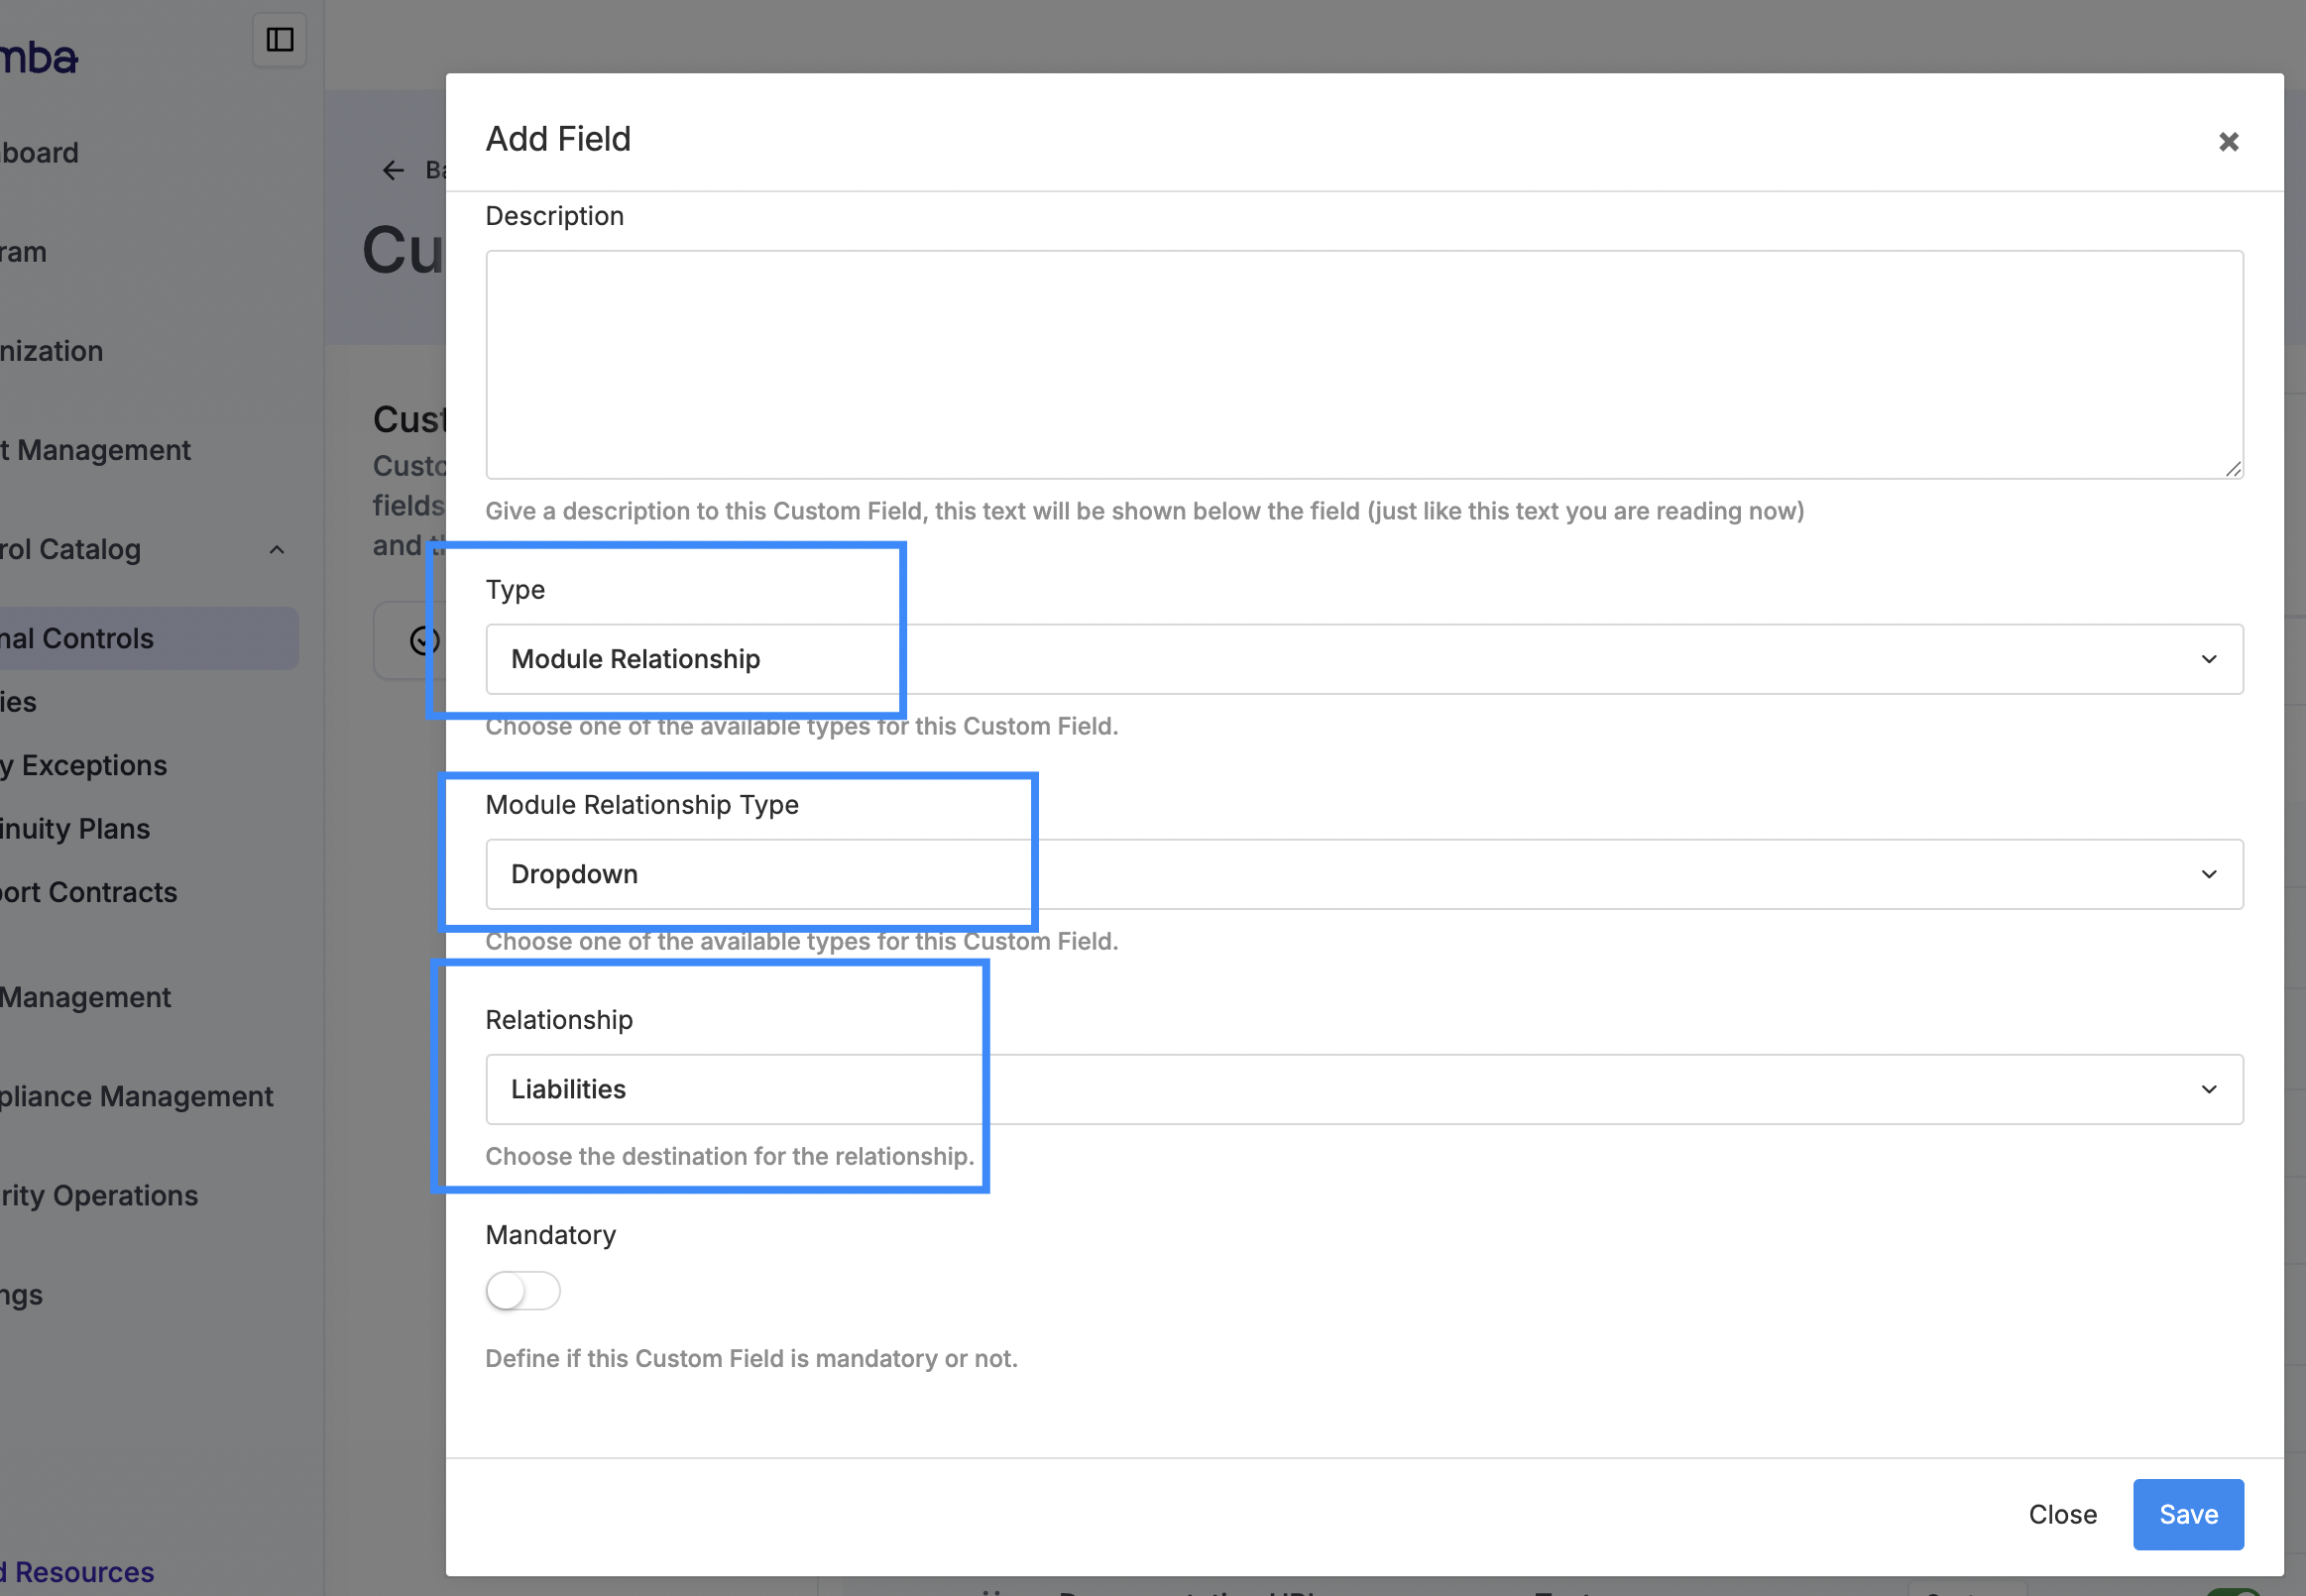
As shown in the diagram above, you can select a single or multiple dropdown, allowing the user to select one or more items from the related module. Views will be adjusted to include an additional column, not displayed by default, named “Process.”
This feature is not available in all modules and will create a field on each side of the relationship. There is a hard limit on the number of custom relationship fields that can be created across eramba.
Recommendations
The following is a list of key concepts you need to understand in order to effectively manage customizations:
-
We strongly suggest you define customisations just after creating a test item and before you mass import or create items in the module. While customisations can be applied at any time, it is harder to put them in place (or remove them) once a lot of data is in the system, since all records might need to be updated.
-
You can think of fields in a form as “columns” in a spreadsheet. Decide in advance which fields you will use.
-
Once you define dropdown or multiple dropdowns and items have been created on the module, the dropdown options can no longer be modified.
-
Hide unnecessary default fields to simplify implementation and daily operations (this can reduce complexity by approximately 20%).
-
There is a limit to how many custom fields can be created: new custom fields limit is 30 per module, new custom tabs limit is 4 per module, and linkages between modules are limited to 5 overall.
Considerations
-
Columns will be automatically updated after fields are renamed but they won't reflect new or hidden fields, you need to manually adjust them.
-
You can use custom fields in combination with Dynamic Statuses.
-
Custom Roles can be used to define advanced Workflow approvals.
-
Table Widget reports can display your custom fields.
-
You can access your custom fields with APIs and Automations.
How-To Guides
Create Custom Field
Create Module Relationship
Missing