Introduction
This guide explains how to install, configure, update, troubleshoot, back up, migrate, and monitor an on-premise eramba deployment using Docker. It covers both Community and Enterprise editions.
What This Guide Covers
This guide supports the following common scenarios:
- Installing a new Community or Enterprise instance using Docker.
- Configuring email, time zone, branding, and translations after the first login.
- Activating an Enterprise licence.
- Applying eramba application updates safely.
- Diagnosing container, database, authentication, browser-session, PDF-export, and CSV issues.
- Backing up and restoring the database and uploaded files.
- Migrating from Community to Enterprise, between servers, or from on-premise to SaaS.
- Reviewing container, activity, login, and application logs.
Deployment Scope
The installation procedure applies to on-premise Community and Enterprise editions. The Docker stack can run on suitable infrastructure in AWS, Azure, or your own premises.
VMware installation is also supported, but it is documented in a separate course.
Required Skills and Support
Operating eramba on-premise requires Linux knowledge, a properly managed Docker environment, and careful ongoing administration. If your organization does not have these capabilities, involve your IT department.
Community installations are not eligible for installation-related support. Review the eramba FAQ Click here to understand the available options.
Enterprise customers experiencing problems can contact support@eramba.org. Installation is not normally part of the support service, although the team may assist under certain conditions described in the FAQ.
Prerequisites and Planning
- Prepare a Docker host with sufficient CPU, memory, swap, and storage.
- Review any Linux Security Modules enabled on the host, including SELinux and AppArmor. Their policies can interfere with the cron container and stop it from running
- Decide the public URL that users will use to access eramba.
- Decide whether to use HTTP or HTTPS with your own TLS certificate.
- Confirm that your server can reach eramba's support server and the repositories required during the first build.
Deployment Architecture
The eramba Docker repository deploys the following core components:
- eramba: the application.
- MySQL: the application database.
- Redis: application caching.
- Cron: scheduled and batch processes.
- Triggers caddy: container where automations are run.
- Caddy: the public HTTPS entry point, using Caddy to route requests to the eramba application and MCP server.
- MCP server: the MCP service used by eramba’s LLM integration.
Server Requirements
The Docker engine must make the following resources available to the containers.
| Minimum | Recommended |
|---|---|
| 64-bit kernel and CPU virtualization support. | 64-bit kernel and CPU virtualization support. |
| 1 vCPU. | 2 vCPUs. |
| At least 4 GB RAM plus 10 GB swap. | 8 GB RAM. |
Allow at least 3 GB of storage for eramba data, including the database and uploaded attachments.
Linux Security Modules / RHEL
Check whether the Docker host enforces SELinux, AppArmor, or another Linux Security Module. These controls can block access required by the containers even when the Docker configuration itself is correct.
Pay particular attention to the cron container. A restrictive policy can prevent scheduled and batch processes from running or accessing the files they require. Check Cron not Ok for further guidance
Podman
Podman is not officially supported by eramba. You are welcome to try running eramba on Podman, but as it falls outside of our regular testing process, we cannot guarantee it will work as expected. Please note that if you encounter any installation or infrastructure issues related to Podman, we will not be able to provide support. The officially supported container runtime is Docker Engine.
Network Requirements
The containers must be able to reach eramba's update servers. Connectivity is required to register the application, obtain updates, and send error logs. eramba cannot operate fully offline.
Test connectivity to eramba support server:
curl https://support-v3.eramba.org/ping.htmlWhen the environment is built for the first time, Docker must download images and packages. Allow outbound HTTP and HTTPS access (ports 80 and 443) to:
eramba.org
docker.com
docker.io
github.com
ghcr.io
githubusercontent.com
After the environment has been pulled and built, this broad access can be disabled and access limited to the eramba support server.
support-v3.eramba.orgIf the environment is behind a proxy, configure both the eramba `.env` file and the Docker client. Refer to the Docker proxy documentation for Docker client configuration.
Docker Engine
This guide assumes that a Docker engine is already running. If it is not, install it by following the official Docker Engine documentation
Docker must be running successfully before continuing.
Installation
1. Download the eramba Docker Repository
Community and Enterprise installations both require the eramba Docker repository. Download it or clone it from GitHub:
git clone https://github.com/eramba/dockerEnter the downloaded directory:
cd dockerIf installing on Windows, make sure that the eramba files and entrypoints use LF line endings rather than CRLF.
2. Configure Database Credentials
Edit .env and replace the default database passwords:
DB_PASSWORD=Your_DB_user_P@ssw0rd
MYSQL_ROOT_PASSWORD=Your_MysQl_ROOt_P@ssw0rd
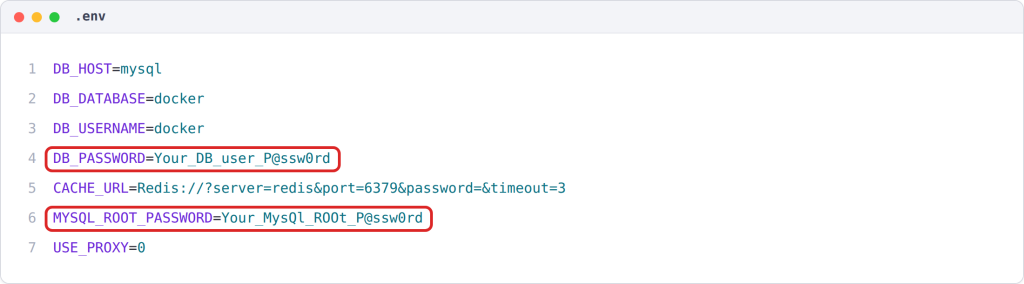
If you want to use special characters like "$", make sure to wrap the password in single quotes.
3. Generate Secrets
Before starting the containers, generate a unique secret:
openssl rand -hex 32In .env, replace the placeholder value of OAUTH2_INTROSPECTION_CLIENT_SECRET with the generated value.

4. Configure a Proxy (Optional)
If required, edit .env and set:
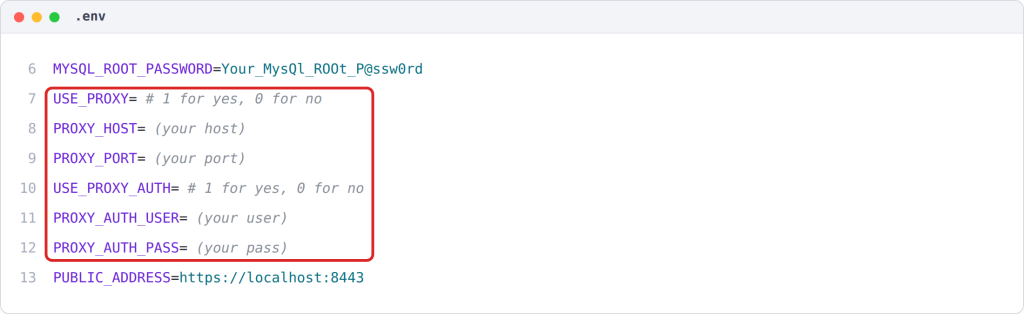
The Docker client must also be configured to use the proxy. Please refer to the docker documentation here.
5. Configure Domain/Address
In .env, set PUBLIC_ADDRESS to the full HTTPS URL users will use to access eramba. Use your server’s IP address or DNS name and include the public port.
For example, if your domain is grc.example.com and you want to use port 9443:
PUBLIC_ADDRESS=https://grc.example.com:9443The default is https://localhost:8443. Replace localhost with your server’s IP address or DNS name when accessing eramba from another computer.
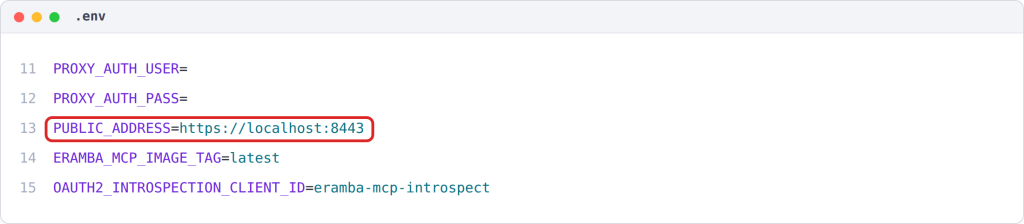
Configure this before deploying the containers. An incorrect public address can cause a greyed-out screen when saving settings or clicking "Add Item" buttons.
6. Configure HTTPS and Apache
In docker-compose.simple-install.yml, find the existing public_proxy service near the end of the file. Its default port mapping is:
    ports:
      - "8443:443"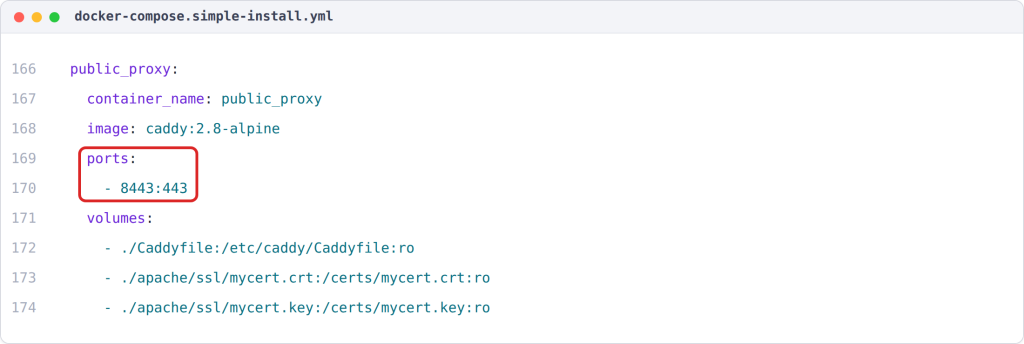
Change only the number on the left (8443). This is the port users connect to on your server. Keep the number on the right (443) unchanged: it is the HTTPS port inside the proxy container.
For example, to use port 9443, change the mapping to:
    ports:
      - "9443:443"
This must match the port in PUBLIC_ADDRESS from step 5.
The supplied setup uses a self-signed certificate, which causes a browser warning. To use your own certificate, replace these files in the Docker repository:
apache/ssl/mycert.crt
apache/ssl/mycert.key
Keep the filenames mycert.crt and mycert.key to use the existing configuration. If you use different filenames, update the corresponding certificate mounts under both eramba and public_proxy in docker-compose.simple-install.yml.
7A. Compose and start the container (Community)
This step only applies if you are installing the community version and is not required for the enterprise version.
Start the Community deployment:
docker compose -f docker-compose.simple-install.yml up -d7B. Load and Start Enterprise (Enterprise)
Download the Docker image from the eramba download portal using the key you received when purchasing the software.
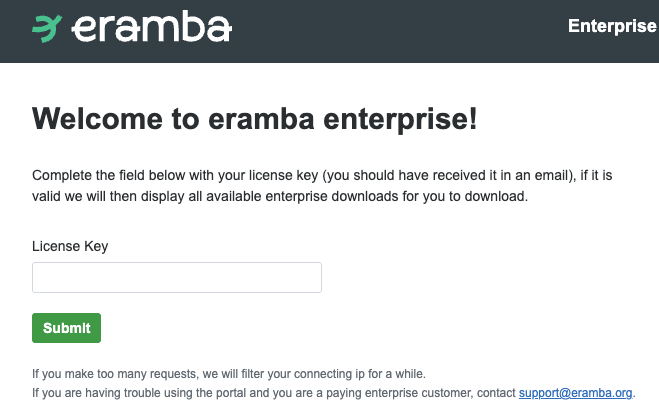
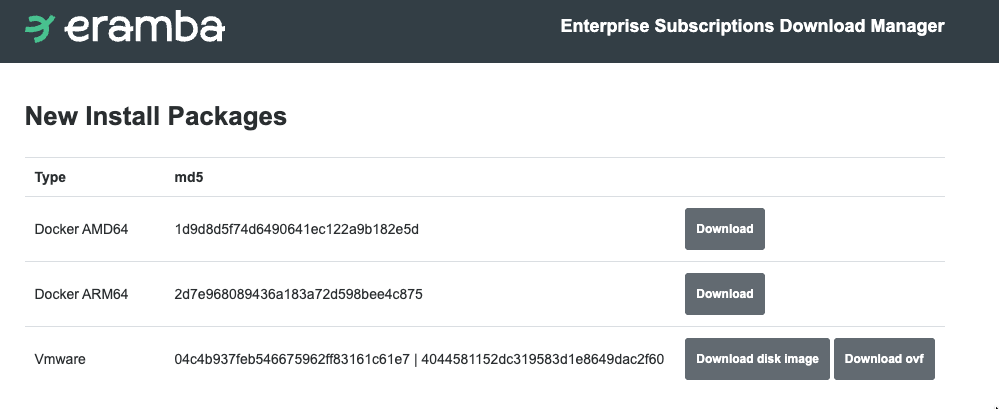
If you are hosting this on a server, you can transfer the image using SFTP or SCP.
Load the image that matches the host architecture.
AMD64:
docker load --input eramba-enterprise-latest-amd64.tarARM64:
docker load --input eramba-enterprise-latest-arm64.tarRun the following command to compose and start the containers.
docker compose -f docker-compose.simple-install.yml -f docker-compose.simple-install.enterprise.yml up -d8. Verify Container Initialization
Watch the Eramba container log while the containers, networks, and volumes are being created and initialized.
docker logs erambaThe containers run several initialization processes. Wait for the eramba container to complete them before opening the application. Apache is normally the final process to start. A hostname warning does not necessarily prevent startup.
A completed initialization may include output similar to:
Starting the init process...
Database is currently not empty.
Database appears to be up to date.
Running post process...
All done.
AH00558: apache2: Could not reliably determine the server's fully qualified domain name, using 172.19.0.4. Set the 'ServerName' directive globally to suppress this message
[Mon Nov 14 08:30:35.120253 2022] [ssl:warn] [pid 1] AH01909: 172.19.0.4:443:0 server certificate does NOT include an ID which matches the server name
AH00558: apache2: Could not reliably determine the server's fully qualified domain name, using 172.19.0.4. Set the 'ServerName' directive globally to suppress this message
[Mon Nov 14 08:30:35.158371 2022] [ssl:warn] [pid 1] AH01909: 172.19.0.4:443:0 server certificate does NOT include an ID which matches the server name
[Mon Nov 14 08:30:35.162398 2022] [mpm_prefork:notice] [pid 1] AH00163: Apache/2.4.53 (Debian) PHP/8.1.7 OpenSSL/1.1.1n configured -- resuming normal operations
[Mon Nov 14 08:30:35.162443 2022] [core:notice] [pid 1] AH00094: Command line: 'apache2 -D FOREGROUND'
9A. Complete the First Login (Community)
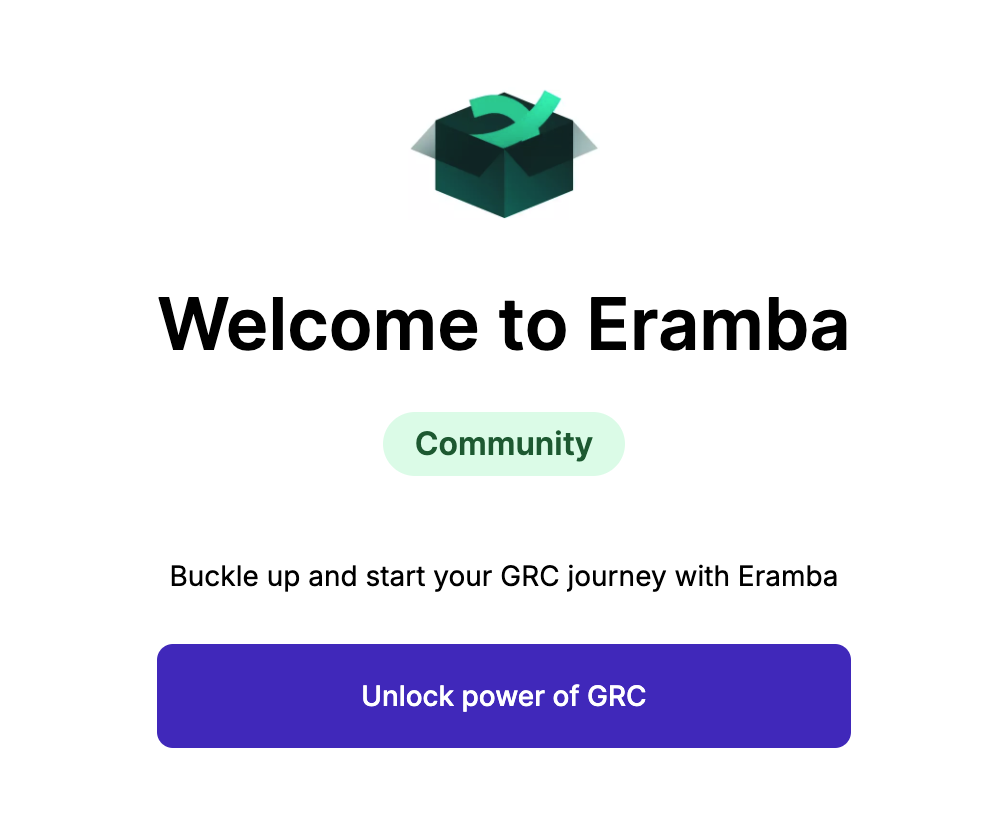
Open your configured IP address from step 5 in a browser. By default it is localhost, but it will differ depending on how you configured step 5.
https://localhost:8443Or your configured DNS name (FQDN), for example:
https://yourdns.comSelect Unlock power of GRC and provide:
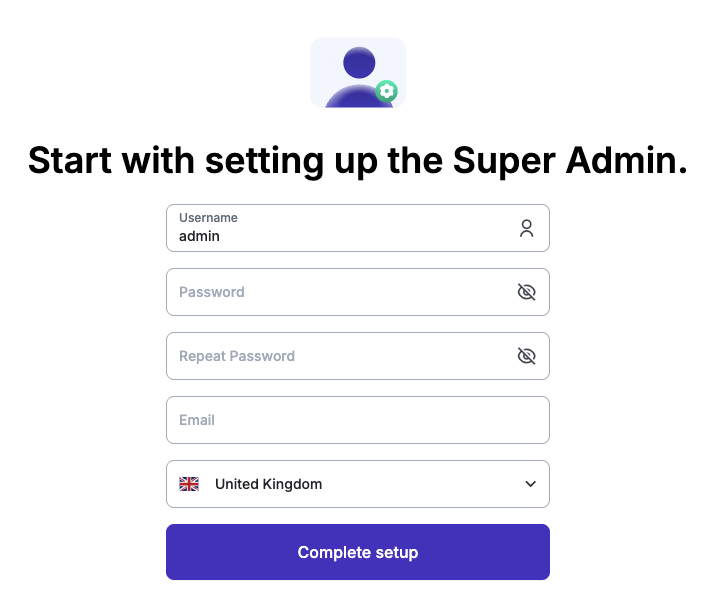
- Password.
- Admin email.
- Country.
Eramba sends an activation token to the email address entered. Complete activation using that token.
Keep in mind that each account requires a unique email address, so if you use your personal email here you will not be able to use it for another account. This account is intended to work as a break glass account.
9B. Complete the First Login (Enterprise)
Open your configured IP address from step 5 in a browser. By default it is localhost, but it will differ depending on how you configured step 5.
https://localhost:8443Or your configured DNS name (FQDN), for example:
https://yourdns.comSelect Unlock power of GRC and provide:
- Admin email.
- Password.
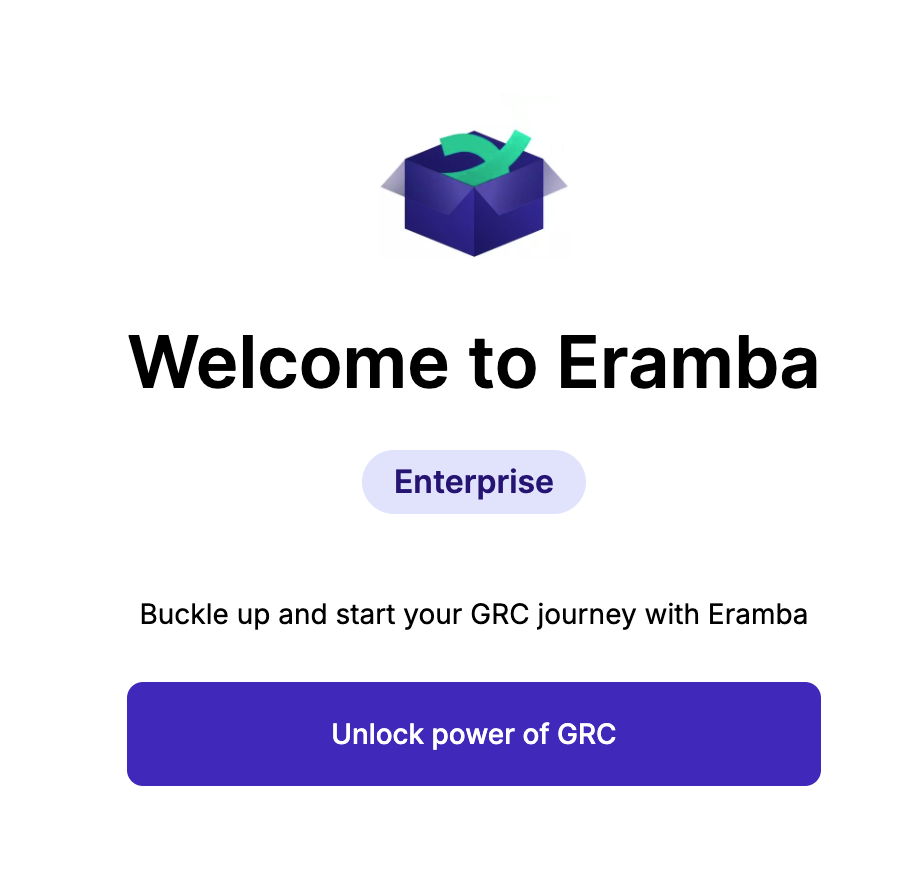
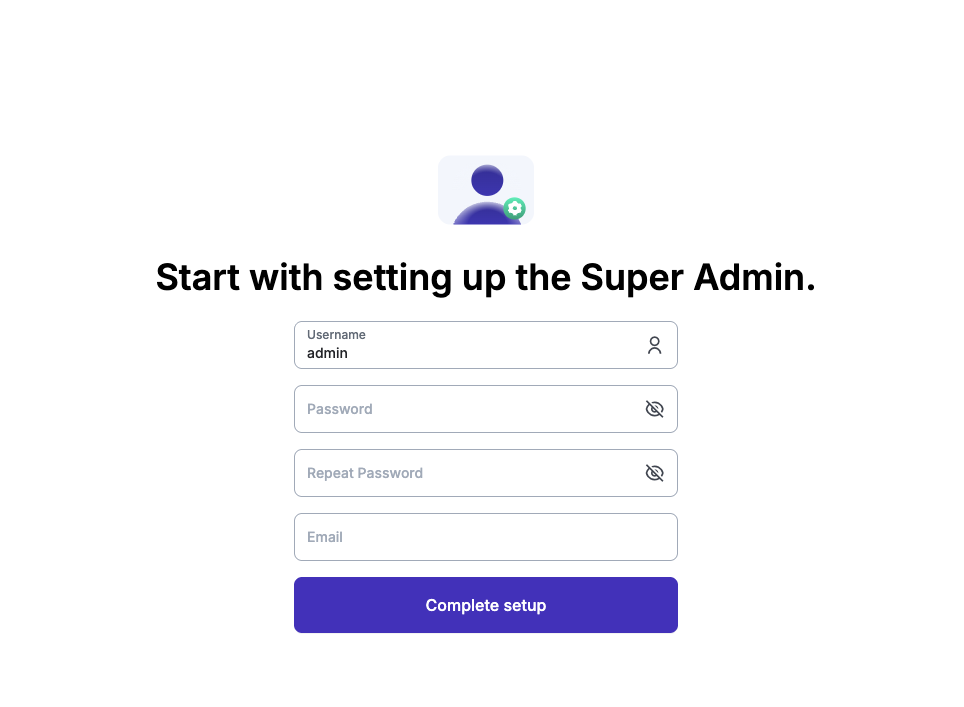
Keep in mind that each account requires a unique email address, so if you use your personal email here you will not be able to use it for another account. This account is intended to work as a break glass account.
Post-Installation Configuration
After installation and first login, complete the following tasks:
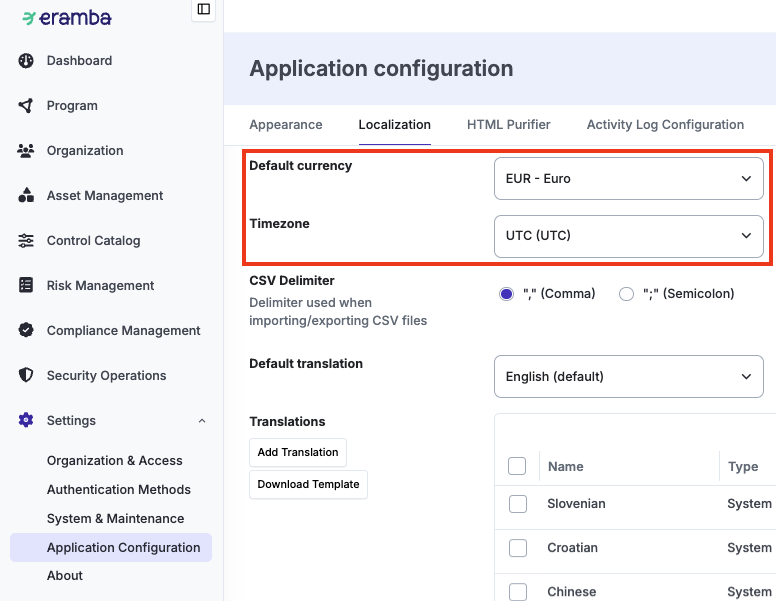
1. Time Zone and Currency
Navigate to Settings > Application Configuration > Localization and configure the correct time zone and currency.
2. Languages and Translations
English is the base language, however eramba already includes a wide variety of built-in languages. Users can select their preferred language from the dropdown in the top right corner of the login form.
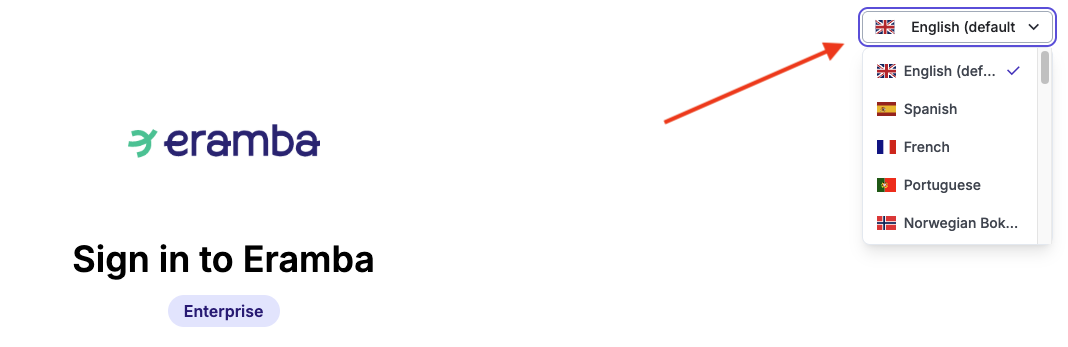
If you would like to create a custom language or translation, eramba supports localization through POT and PO files. Download the POT template from Settings > Application Configuration > Localization, translate its strings using a PO editor such as Poedit, then upload and activate the resulting PO file.
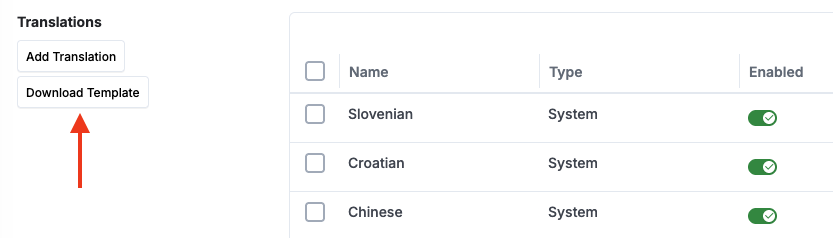
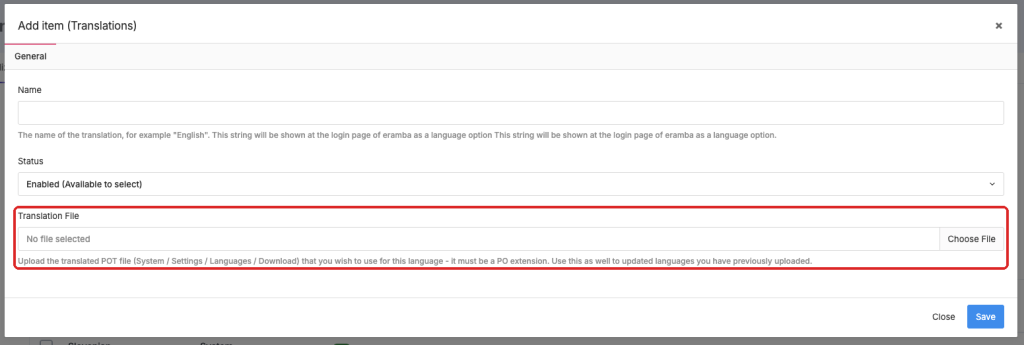
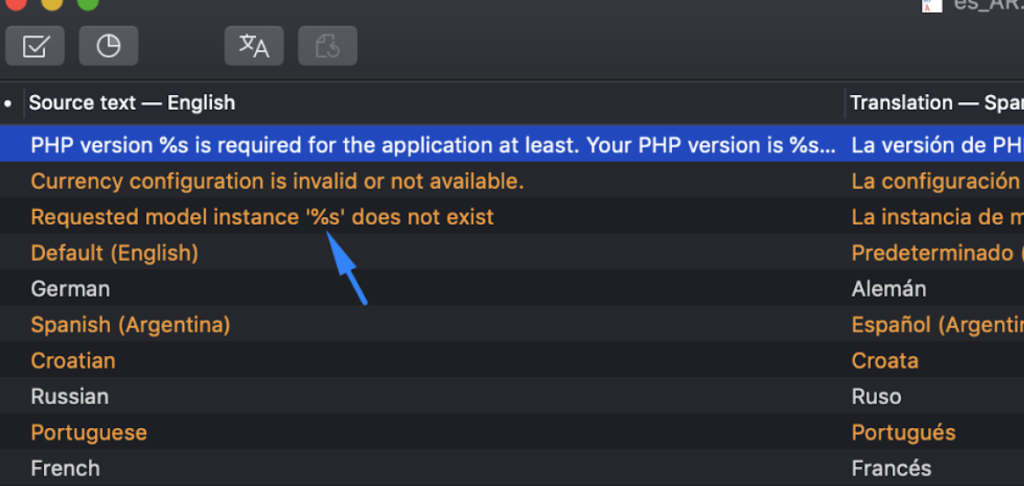
Keep in mind that special variables embedded in source strings, such as %s, should never be translated.
Built-in translations can also be hidden from the login page at any time by toggling the Enabled slider.
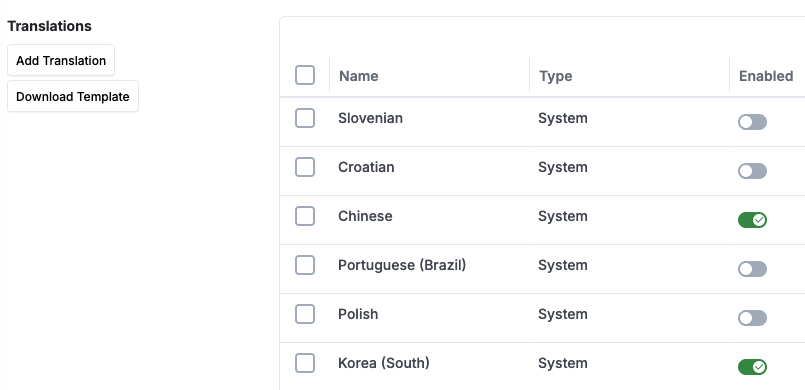
If you are using a custom translation, when a new eramba release is published, new or updated strings may be introduced. To keep your translation current, merge the latest POT template into your existing PO file using your PO editor, then edit the translation entry in eramba and upload the revised file.
3. Custom Logo (Optional)
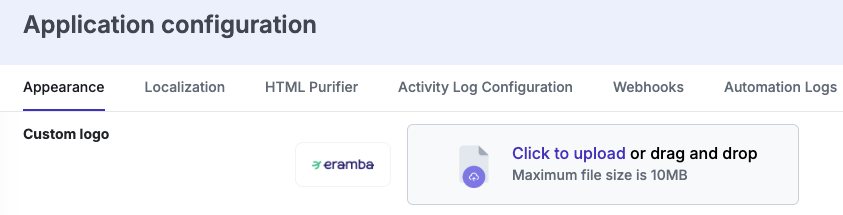
Navigate to Settings > Application Configuration > Appearance and replace the default logo with your organization's own logo. We recommend using an image with a transparent background.
4. Email Configuration (Enterprise)
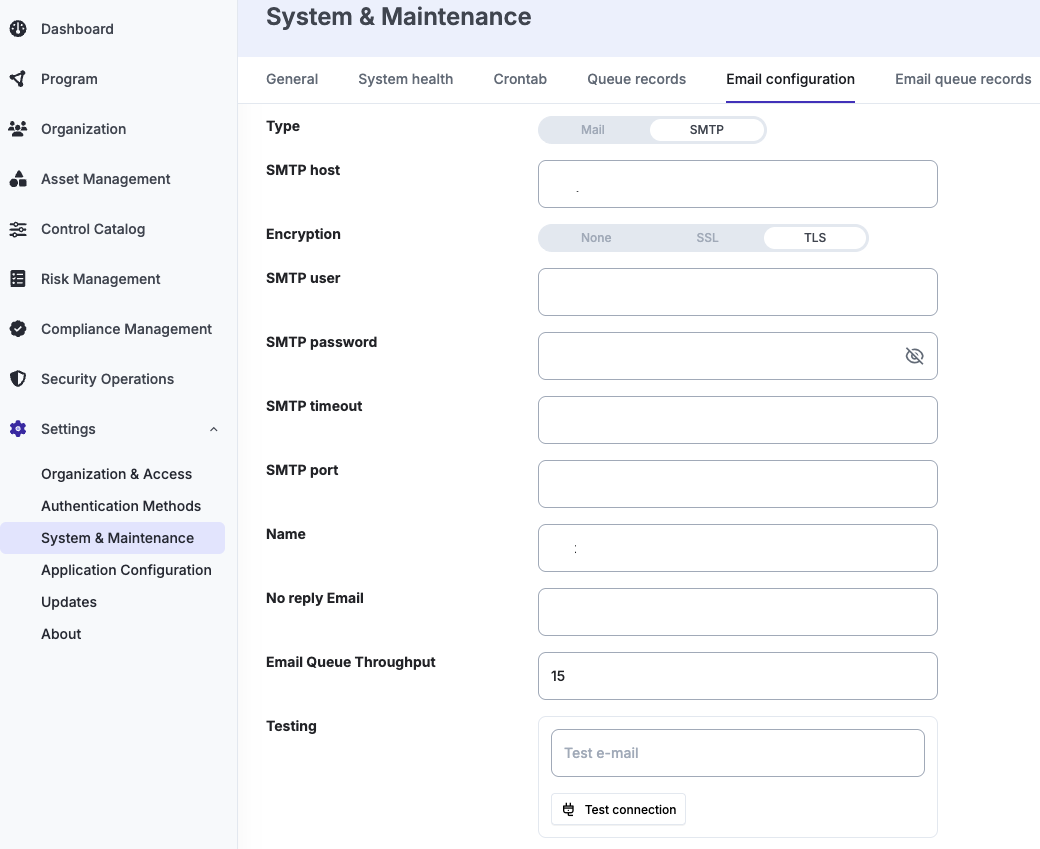
Navigate to Settings > System & Maintenance > Email Configuration and define how eramba should handle outgoing email. Two sending methods are available:
- Mail will use the mailing capabilities of the server where eramba is installed, meaning a mail service must be present on that server. The Docker container will also need to be configured to relay email through your own SMTP server.
- SMTP will connect directly to an external SMTP server, which will then be responsible for relaying and sending the emails.
Once all fields have been filled in, you can verify the setup by sending a test email to any address using the Test Connection button.
5. Enterprise Activation
Enterprise users must enter the license key provided at the time of purchase under Settings > About and click Activate. A successful activation will produce a confirmation notification.
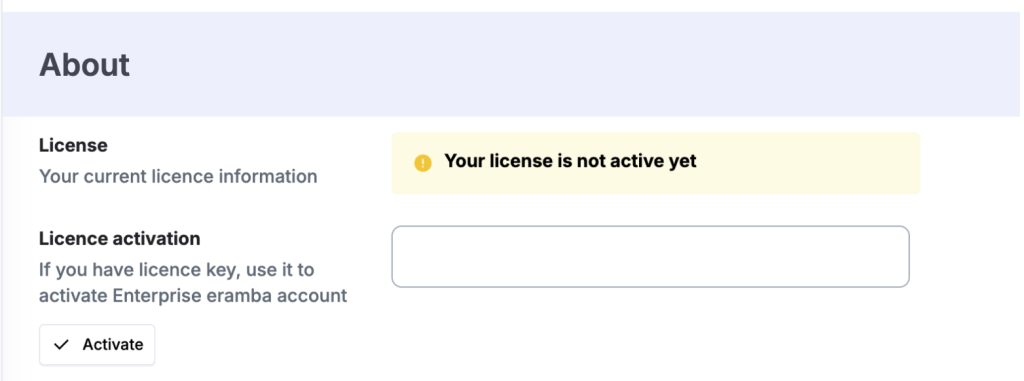
If activation fails, contact support@eramba.org and include a screenshot of the System > About page.
6. System Health
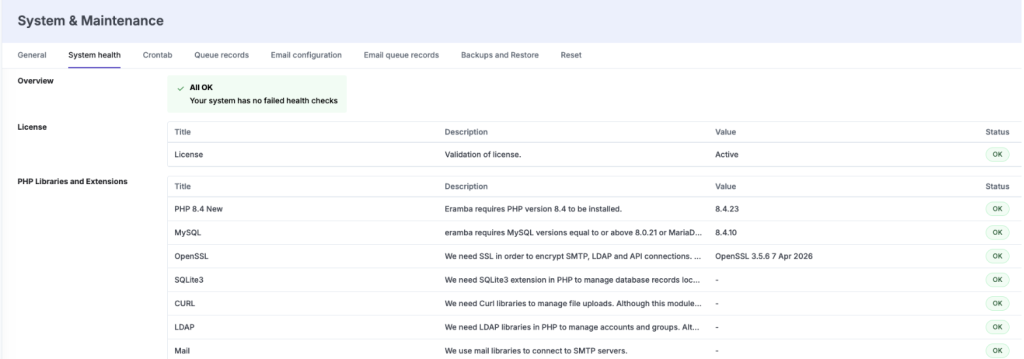
Navigate to Settings > System & Maintenance > System Health to review the system parameters and ensure everything is marked as OK.
If any of those parameters are marked as NOT OK, eramba will not work as expected. In that case, administrators will automatically receive an email informing them that the system requires attention and that fixes need to be applied.
7. Verify the Installation
Before considering the installation complete, work through the following checklist and confirm that every point has been addressed:
- Verify that the public URL loads correctly from a user network.
- Confirm that the browser presents the intended TLS certificate, if HTTPS is being used.
- Confirm that the Admin account is able to log in successfully.
- Send a test email from Email Configuration and verify it is received. (Enterprise)
- Confirm that the configured time zone is correct.
- Confirm that the license is active. (Enterprise)
- Review Settings > System & Maintenance > System Health, every item should be marked as OK.
- Create a dummy item to verify that the system is functioning as expected.
Maintenance
Updates
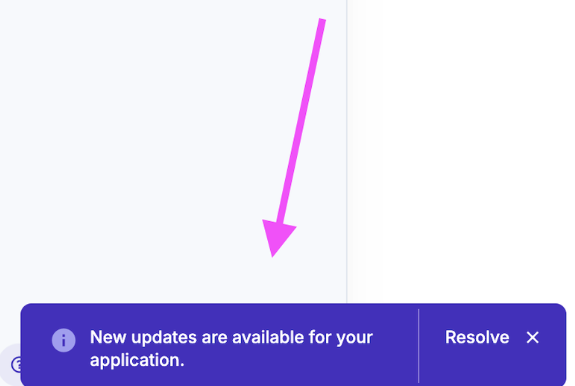
Eramba releases updates frequently. Users are notified about available updates by email and through the eramba forum. Members of the Admin group will also see a warning inside eramba whenever the installed version is not updated.
Before applying an update, make sure the following has been completed:
- Navigate to Settings > System & Maintenance > System Health and confirm that all statuses are green.
- Resolve every item marked as Not OK before continuing.
- Confirm that outbound connectivity to the eramba support server is working.
- Confirm that a valid license is in place. (Enterprise)
- Create a current backup of both the database and attachments.
There are two ways to update eramba:
- Through the UI
- Changing the Docker image
UI Update
- Navigate to Settings > Updates and review the pending updates.
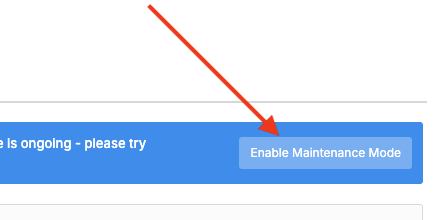
- Enable Maintenance Mode to prevent other users from accessing eramba during the update.
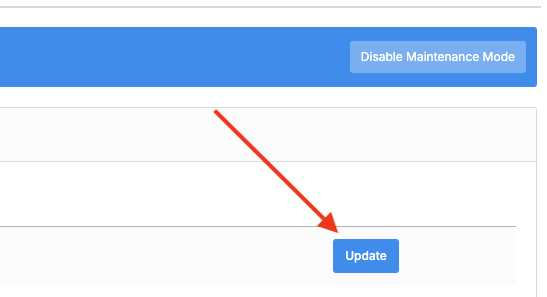
- Apply the next available update and monitor its logs.
- If several updates are pending, apply them one by one as versions cannot be skipped.
- Once the update completes successfully, log in again.
The standard in-UI update process works for the vast majority of releases. However, when infrastructure-level changes are introduced, such as updates to the containers, PHP, MySQL, or Redis versions, an image switch will be required instead. It is important to always check the release notes before updating, as they will clearly indicate whether an image switch is needed for that particular release.
Image Switch Update
Some releases require a Docker image switch due to changes at the PHP, Apache, or image level. Updates must always be performed version by version. Do not jump directly from an older release to the latest release.
IMPORTANT: Image switch updates must be applied sequentially, meaning you will need to go through each version one by one. For example, if you are currently on version 3.26.6, you will need to switch to the 3.27.0 image. Skipping versions and jumping directly to the latest image will cause the application to stop working.
Community:
Stop and remove the containers without removing volumes or user data:
docker compose -f docker-compose.simple-install.yml downList Docker volumes and identify the
_appvolume (default namedocker_app), then remove it:docker volume rm docker_appRemove the locally stored latest image:
docker image rm ghcr.io/eramba/eramba:latestPull the required next version, replacing
{tag}with that version number:docker pull ghcr.io/eramba/eramba:{tag}Tag the pulled image as
latest:docker tag ghcr.io/eramba/eramba:{tag} ghcr.io/eramba/eramba:latestStart the containers:
docker compose -f docker-compose.simple-install.yml up -d
Enterprise:
Stop and remove the containers:
docker compose -f docker-compose.simple-install.yml -f docker-compose.simple-install.enterprise.yml downRemove the
_appvolume and both locally stored latest images:docker volume rm docker_app docker image rm ghcr.io/eramba/eramba:latest docker image rm ghcr.io/eramba/eramba-enterprise:latestDownload the required
{tag}Enterprise image from the eramba download portal and load it according to your host architecture.AMD64:
docker load --input eramba-enterprise-{tag}-amd64.tarARM64:
docker load --input eramba-enterprise-{tag}-arm64.tarTag the Enterprise image as
latest:docker tag ghcr.io/eramba/eramba-enterprise:{tag} ghcr.io/eramba/eramba-enterprise:latestStart the containers:
docker compose -f docker-compose.simple-install.yml -f docker-compose.simple-install.enterprise.yml up -d
Changing Environment Variables
Eramba passes the configured environment variables defined in .env to the Docker containers. If any of these values need to be changed, the containers must be stopped first.
Once the changes have been made, the containers can be started again. Any changes made will not be picked up until the containers are restarted.
Community
- Stop Community
docker compose -f docker-compose.simple-install.yml down- Start Community
docker compose -f docker-compose.simple-install.yml up -dEnterprise
- Stop Enterprise
docker compose -f docker-compose.simple-install.yml -f docker-compose.simple-install.enterprise.yml down- Start Enterprise
docker compose -f docker-compose.simple-install.yml -f docker-compose.simple-install.enterprise.yml up -d
Changing Mysql Password
The MySQL password is generated when the application is composed for the first time. If you would like to use a custom password, it should be changed in the .env file before running the initial compose.
If you need to change the password after the first compose has already been run, updating the .env file alone is not enough, as that will not update the password inside the database itself. In that case, the password must first be changed directly inside the MySQL container.
docker exec -it mysql mysql -u root -pALTER USER 'docker'@'%' IDENTIFIED BY 'your_new_password';Once that has been done, the .env file can then be updated to reflect the new password.
Uptime
To monitor your eramba uptime status, you can use the following endpoint:
https://www.your-eramba-domain.com/hello.txtBackup & Restore
Backing Up the Database and Attachments
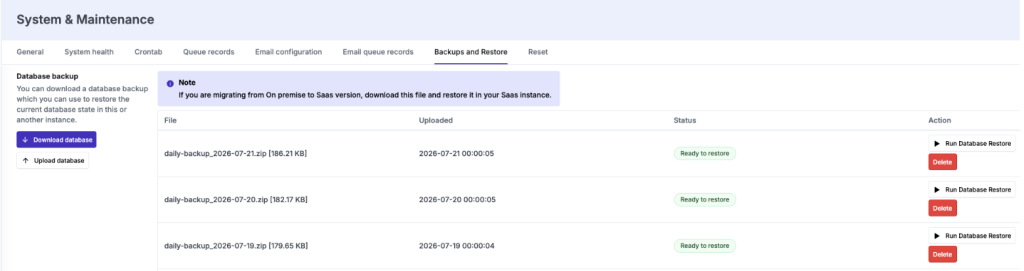
eramba runs a daily cron process that automatically creates a database backup every day. On-demand backups can also be generated at any time from Settings > System & Maintenance > Backups and Restore.
Select Download Database to obtain a complete database dump as a zipped SQL file, and Download Files to obtain all uploaded attachments.

Restoring a Backup
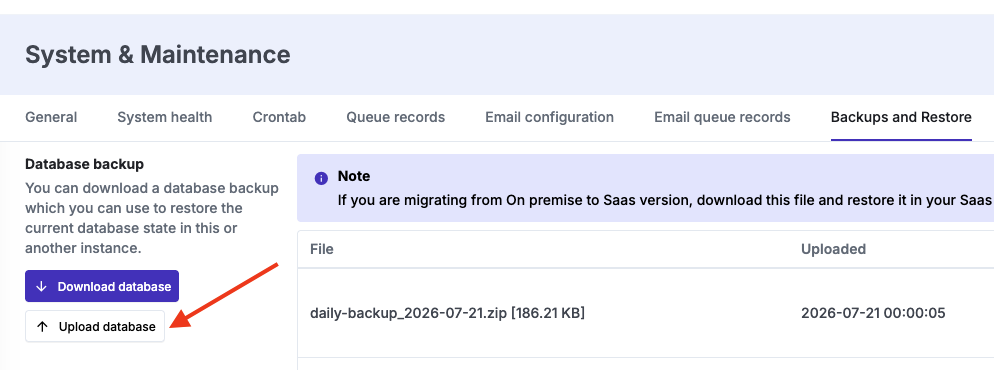
Backups can be imported into a newly installed system that contains no existing data. It is important that the source and target application versions are identical, as the database schema must match for the import to work correctly.
When importing a backup, the entire database on the target system is completely wiped and replaced with the contents of the backup being imported. This means that all users, configuration settings, and the license will be overwritten to exactly match those from the backup.
Any existing data on the target system will be lost upon import. The same applies to the license: if the target system has an active license and the backup being imported contains a different one, it will be replaced. If the backup carries a different license, make sure to deactivate the existing license before importing the backup.
To import a backup, navigate to Settings > System & Maintenance > Backups and Restore.
Migration
Resetting the Application ID
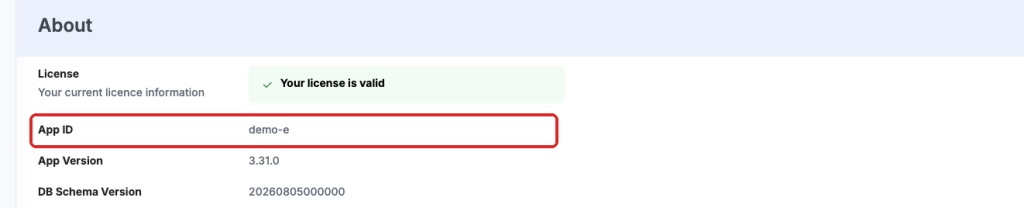
Every eramba instance receives a unique application ID at first login, which can be viewed under Settings > About. Two active systems must never share the same application ID, as duplicate IDs will prevent updates from being delivered and Enterprise keys from being validated.
After migrating, reset the application ID on the target system:
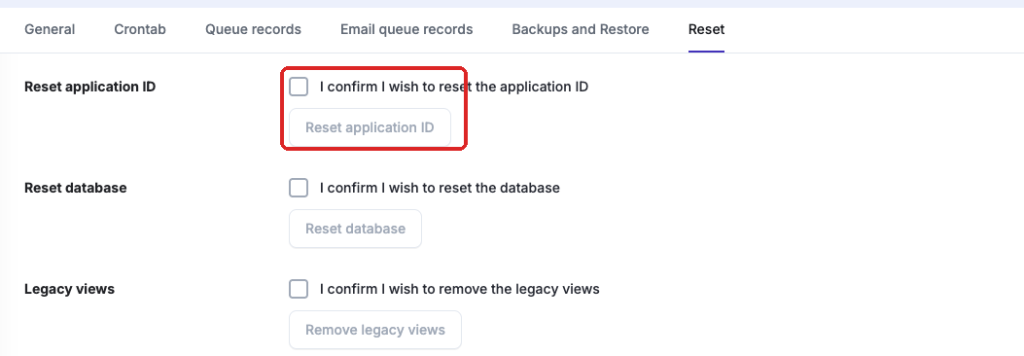
- Navigate to Settings > System & Maintenance > Reset.
- Select Reset Application ID and click Reset application ID.
- Log out and log back in with the Admin account.
- Confirm that the application ID now differs from its previous value.
Migrating Community to Enterprise
- Install the enterprise version.
- Confirm the Community and Enterprise versions match under Settings > About. If they don't, you'll need to update whichever is behind. Updating Community needs no license; updating Enterprise requires you to activate the license first, and you must remove it again once the update is done.
- Export the database and files from the Community instance.
- Import both backups into the new Enterprise instance.
- Reset the application ID on the Enterprise target.
- Register the new instance under Settings > About.
Migrating to a New Server or Between Environments (Prod / Dev)
Any existing data on the target system will be overwritten upon import. The same applies to the license: if the target instance has an active license and the backup being imported contains a different one, the existing license will be replaced. In that case, make sure to deactivate the license on the target instance before importing the backup.
- Install the appropriate Community or Enterprise edition on the new server or Docker host.
- Confirm the versions match under Settings > About. If they don't, you'll need to update whichever is behind. Updating Enterprise requires you to activate the license first, and you must remove it again once the update is done.
- Export the database and files from the old system.
- Import the database into the new system and restore it.
- Log in to confirm everything is working correctly.
- Import the files into the new system and restore them.
- Since the import also carries over the license and application ID, If you need to run both simultaneously (for example, when migrating between production and development environments), you will need to reset the application ID and use a separate unused license.
- Reset the application ID on the new target instance. This will remove the imported license and generate a new application ID.
- Register the new instance with a separate unused license under Settings > About.
Migrating SaaS to On-Premise
- Make sure you have Admin credentials for both the on-premise and SaaS instances.
- Update the on-premise instance to the latest version and confirm it matches the SaaS instance version.
- Export the database and files from the SaaS instance.
- If the on-premise instance has already been used and contains existing data (having only the default admin account is fine), reset its database before importing. You can do this under Settings > System & Maintenance > Reset > Reset Database.
- Import the SaaS database into the on-premise instance and restore it.
- Log in to confirm everything is working correctly.
- Import the SaaS files and restore them.
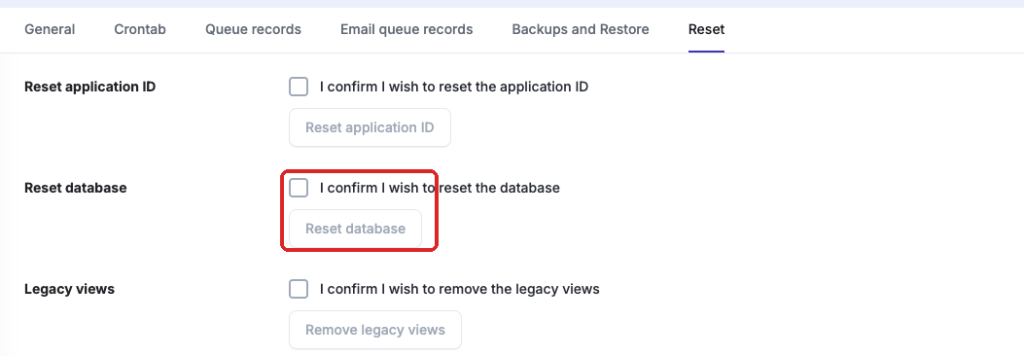
After migration, keep the following in mind:
- You will need email settings in order to receive email notifications. See Email Configuration
- If users authenticate through LDAP, SAML, or Google OAuth, update the provider configuration to use the new on-prem instance URL.
Migrating On-Premise to SaaS
- Make sure you have Admin credentials for both the on-premise and SaaS instances.
- Update the on-premise instance to the latest version and confirm it matches the SaaS instance version.
- Export the database and files from the on-premise instance.
- If the SaaS instance has already been used and contains existing data, reset its database before importing. You can do this under Settings > System & Maintenance > Reset > Reset Database.
- Import the on-premise database into the SaaS instance and restore it.
- Log in to confirm everything is working correctly.
- Import the on-premise files into the SaaS instance and restore them.
After migration, keep the following in mind:
- Email notifications will be sent from eramba's SaaS mail servers using
no-reply@eramba.org. Previous email settings can no longer be used. - If users authenticate through LDAP, SAML, or Google OAuth, update the provider configuration to use the new SaaS instance URL.
- Account Review scripts can no longer run on the same filesystem as eramba. Use the eramba APIs to upload feeds or use automations.
Troubleshooting
Cron Not OK
If the cron is failing, this is an infrastructure issue rather than a software one. There are a few common causes to look into:
Linux security modules such as SELinux or AppArmor are the most typical culprit, particularly on RHEL-based systems. If either of these is enabled, check their audit logs to confirm whether they are blocking any Docker or cron-related processes. For SELinux, review the audit log for denials:
ausearch -m avc -ts recentFor AppArmor, check the system log:
grep apparmor /var/log/syslogIf either module is found to be interfering, review the policy configuration and add the necessary exceptions.
Other possible cause is incorrect modifications to the default Docker Compose file, or incorrect environment variable values (special characters or unexpected spaces).
If there is an actual error with the cron service, the following logs are worth checking:
docker logs cronInside the cron container:
/var/log/cron.log
/var/mail/www-data
Forgotten Password
Email Reset
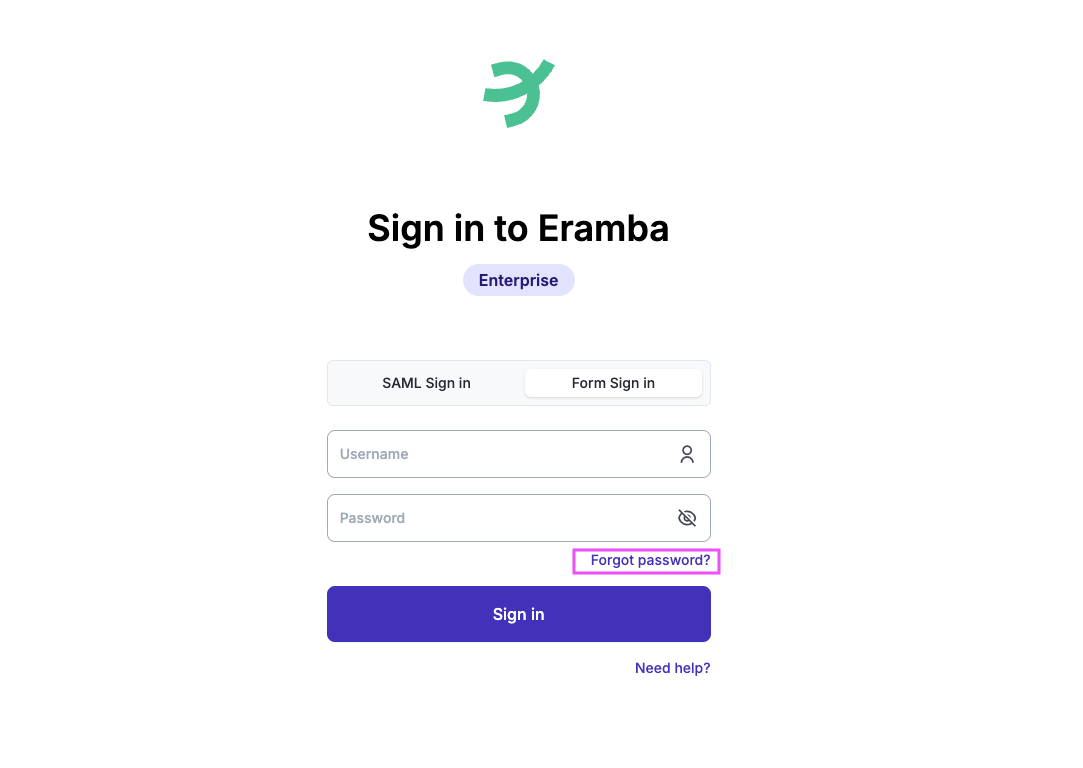
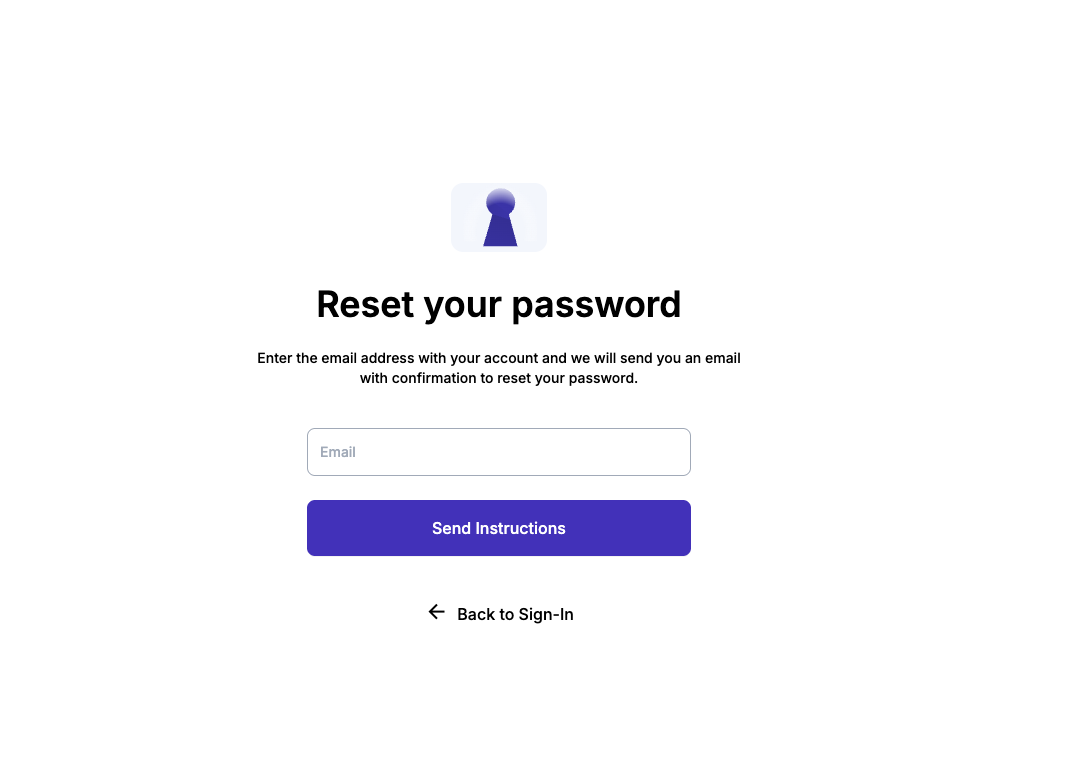
Use the Forgot Password option on the login page when the account has an associated email address and the system email configuration is working. Eramba will send a password reset email automatically.
Backend Reset
- For SaaS, contact support@eramba.org.
- For on-premise versions 3.20.0 and later, see following steps
Enter the eramba container:
docker exec -it eramba bash
Navigate to the application upgrade directory:
cd /var/www/eramba/app/upgrade
Run the following command, replacing the example values with the intended username and a strong password:
bin/cake reset_password admin alphanumeric1
Database Connection Errors
After a new installation, the eramba log may report Connection to MySQL could not be established. On some host operating systems other than Ubuntu, this may be caused by directory permission issues.
Start by inspecting the MySQL container log:
docker logs mysql
If permission errors are present, set 755 permissions recursively on the docker/mysql directory:
chmod 755 docker/mysql -R
Then start the deployment again using the appropriate Community or Enterprise command.
Missing or Invalid CSRF Cookie
A CSRF Invalid Token message can appear after login in the following situations:
- An action was clicked repeatedly before the page finished loading.
- The same browser is logged in to eramba with the same or different accounts.
- The database was restored or reset.
Clearing the browser's eramba cookies and sessions will normally resolve the issue.
Grey Screen when adding Items (Incorrect Public Address)
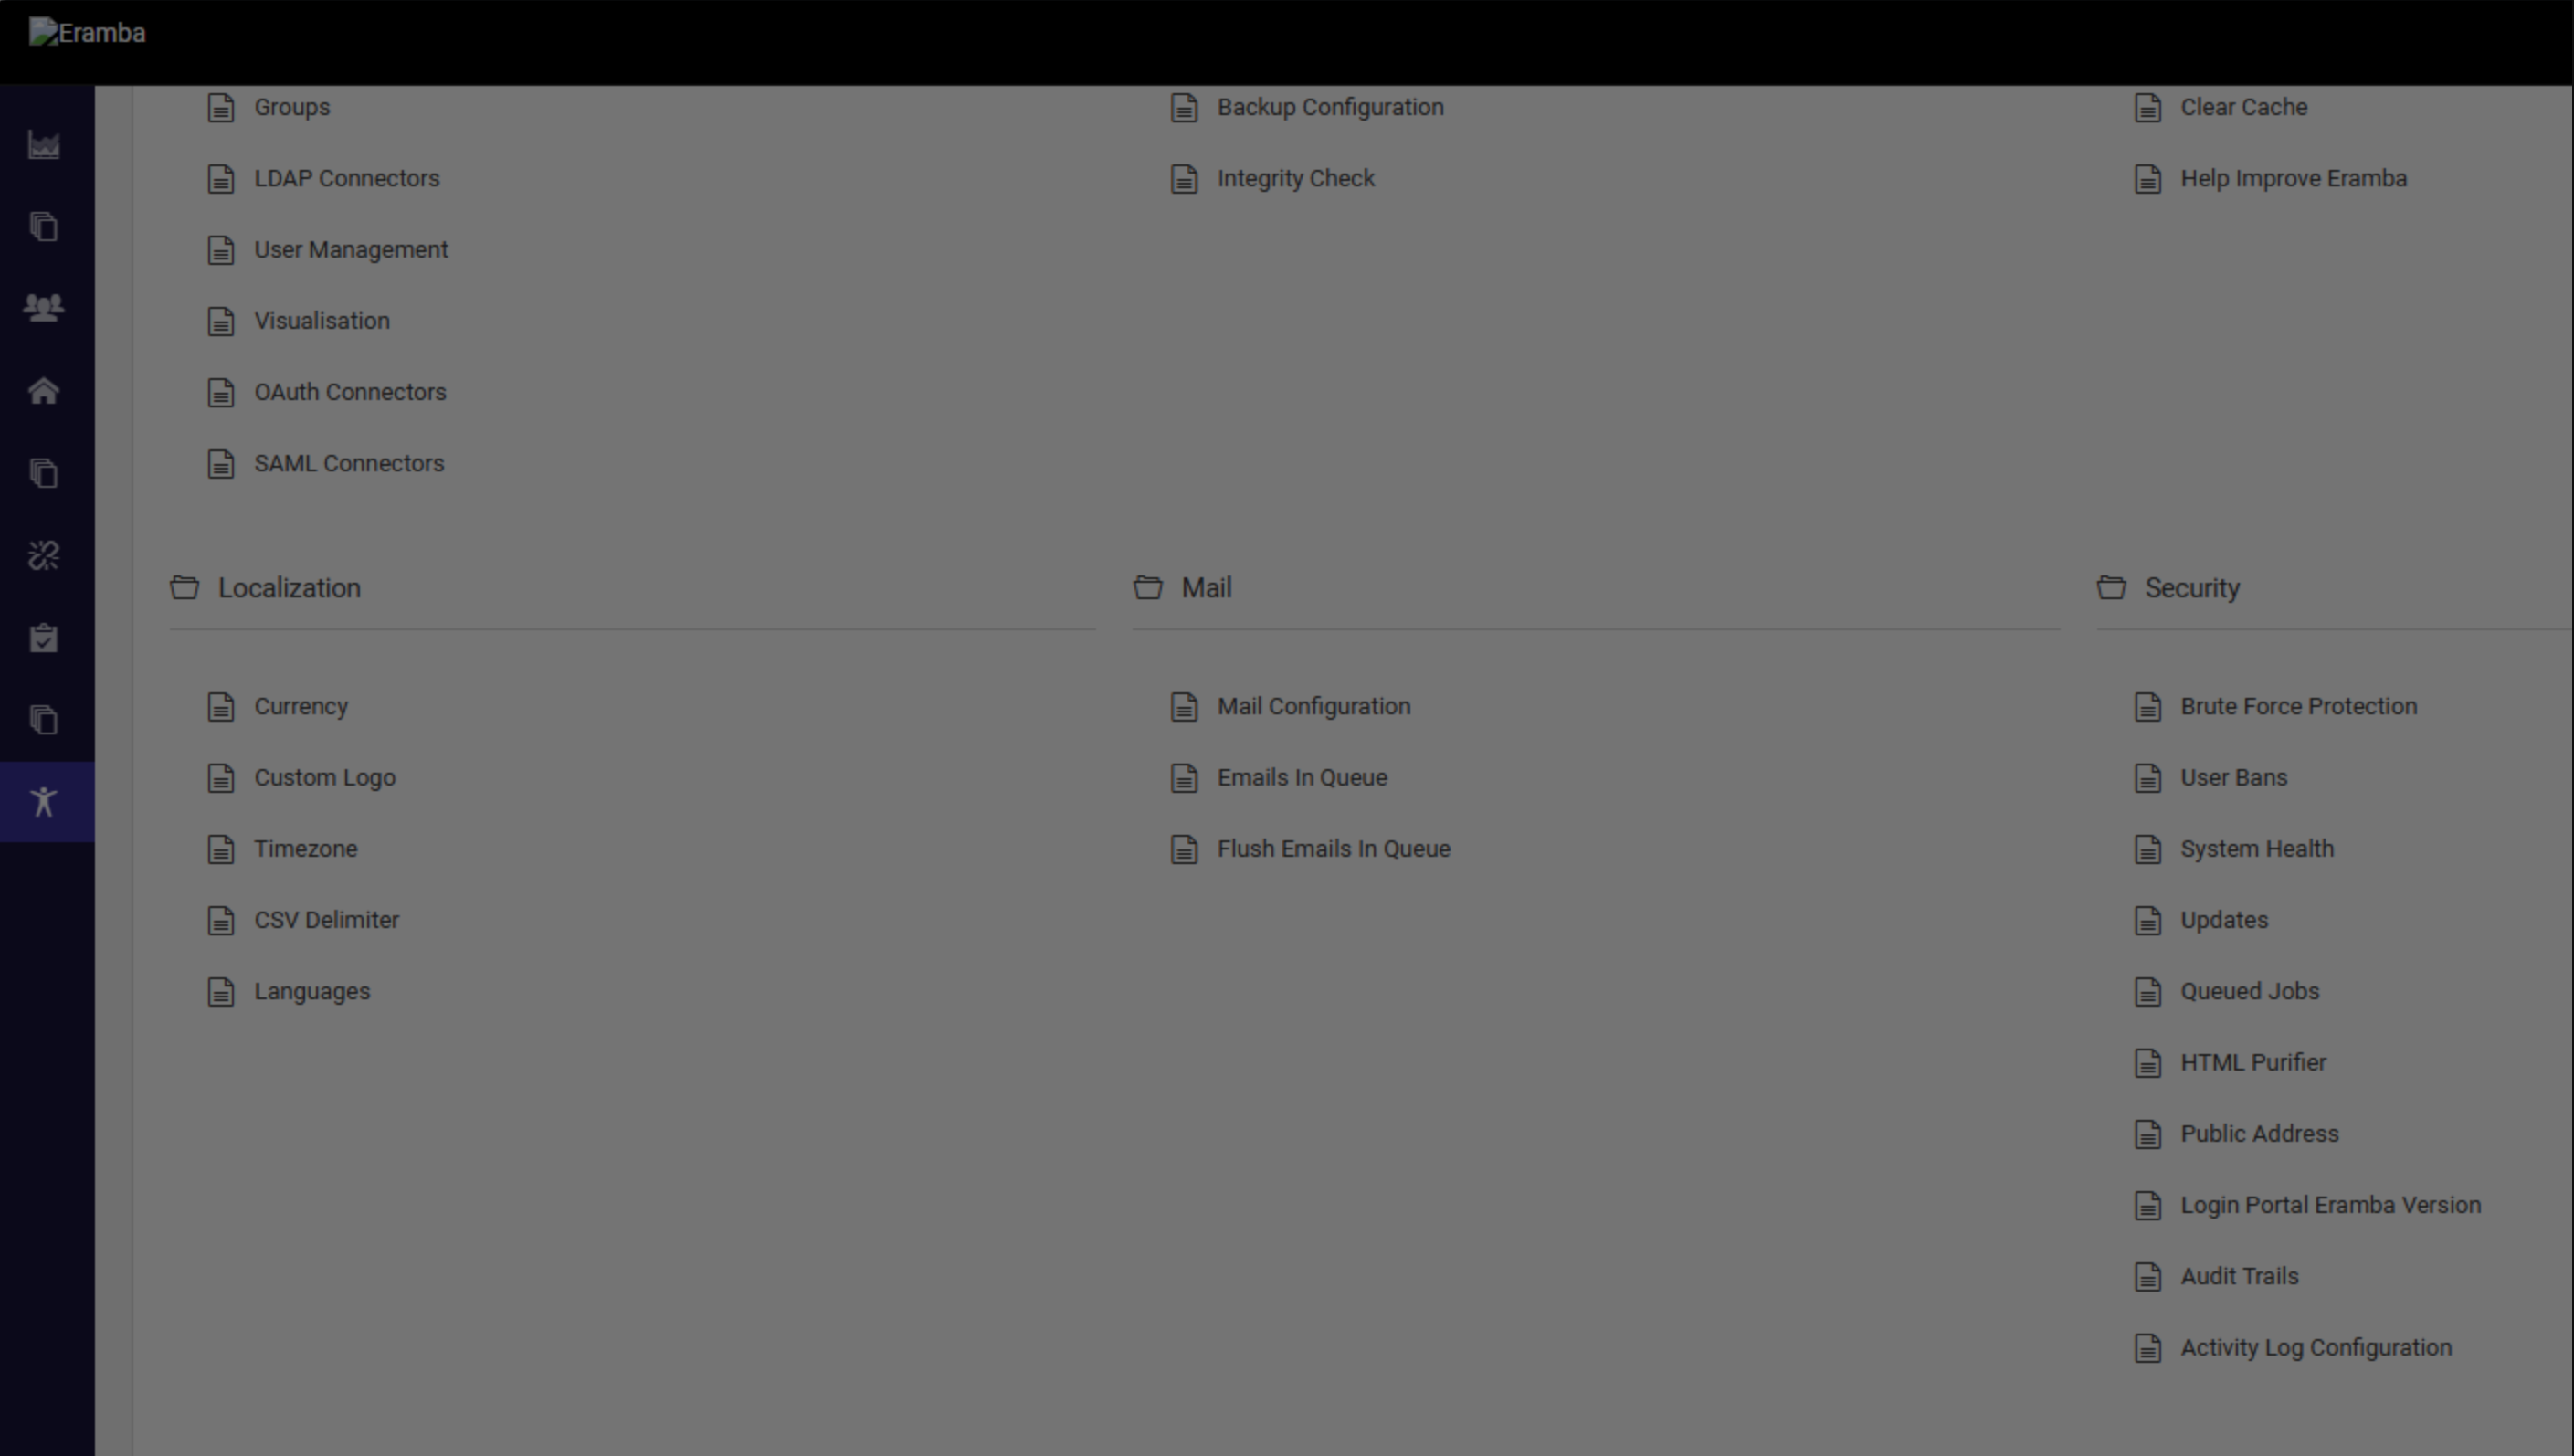
If clicking a button or adding an item results in a greyed out screen or causes a pop up that disappears, the PUBLIC_ADDRESS value in your .env file is incorrect. This value must be set to the domain or IP address you are actually using to access eramba. See Configure Public Address.
PDF Export Errors
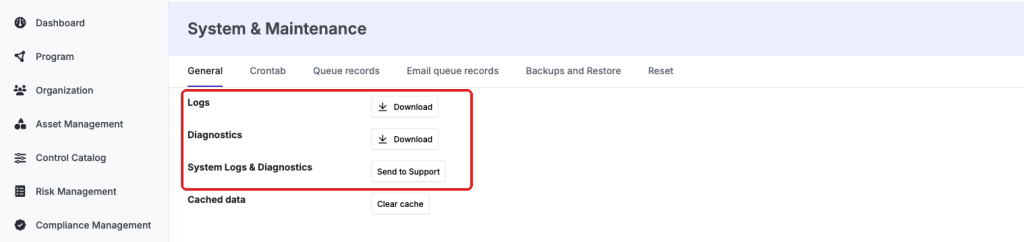
If PDF export reports An Internal Error Has Occurred, ensure that the eramba domain can be resolved by the server it is installed on. This can be verified using standard tools such as curl or ping. For further details on the specific error, inspect the logs under Settings > System & Maintenance > General.
CSV Template Delimiter
If all fields from a CSV template appear in a single spreadsheet column, the spreadsheet application is not interpreting the delimiter correctly. This is common with Excel on Windows when non-English regional settings are in use.
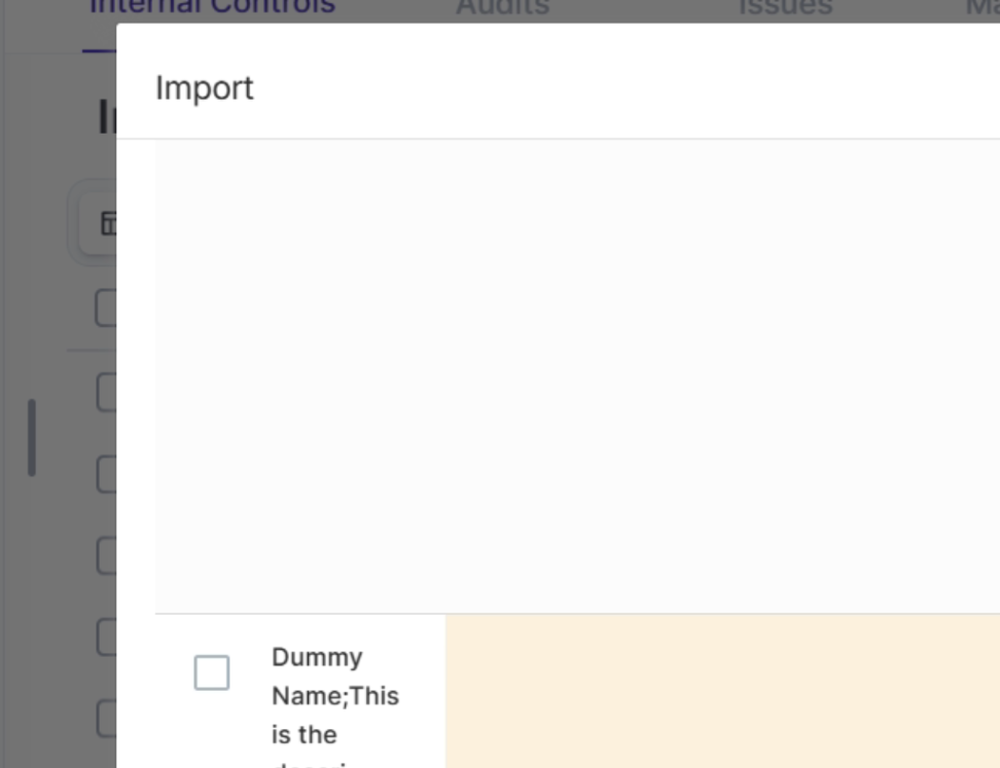
Possible fixes include opening the file in Google Sheets or LibreOffice, changing the List Separator in the Windows Control Panel, or changing the delimiter in eramba settings. Note that changing the delimiter in eramba will affect all eramba users.
For an in-depth explanation of the issue, check this forum post.
Version doesn't change after image switch
If you switched the Docker image to update to a new version but the version number still looks the same after logging into Eramba, this is usually down to one of two things. Either the docker_app volume was not deleted as mentioned in the image switch guide, or there is some stale cache on eramba / your browser that needs to be cleared.
If you have volumes on mounted directories, keep in mind that just deleting the volume on Docker is not enough, since it won't remove the data on the directory itself. You will also need to clear the directory that mounts your docker_app volume to get rid of the old code.
SMTP test email doesn't work
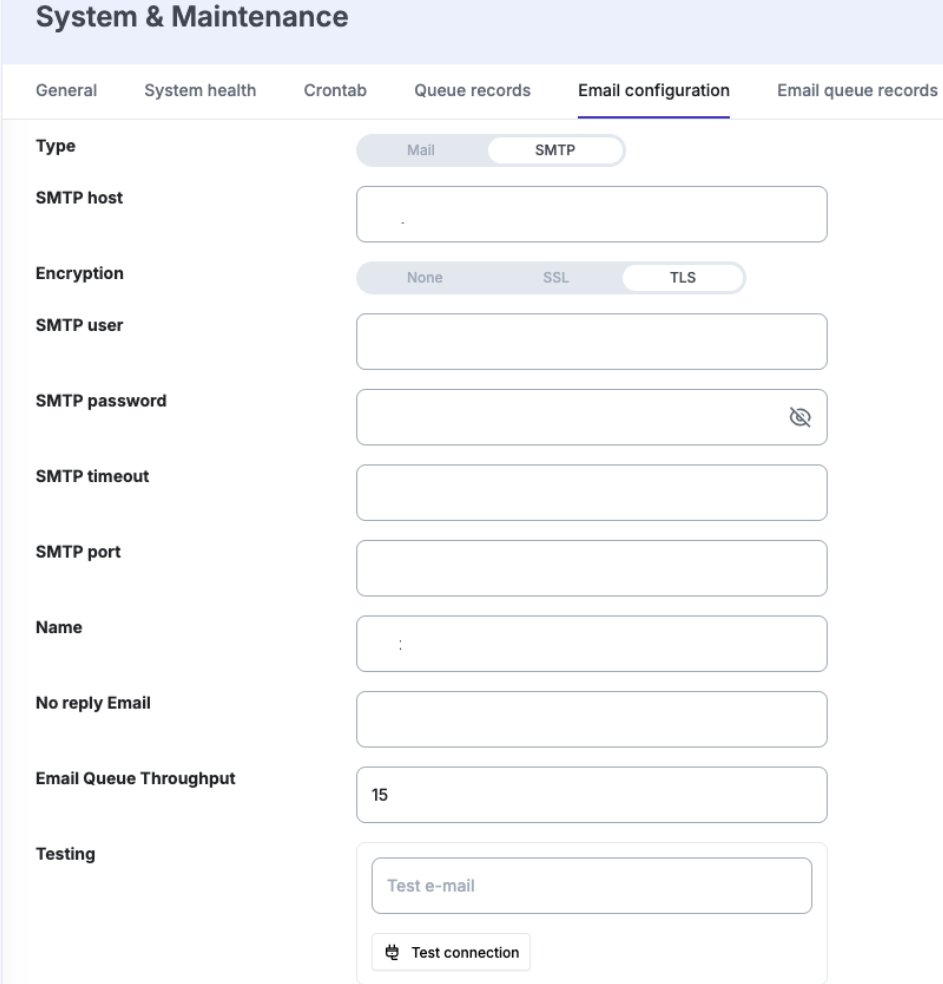
Ensure your server and eramba container can reach your SMTP server, and that you are using the correct encryption type (None, SSL or TLS) along with the appropriate port. Eramba works as a standard email client, so if you encounter a connection error, the issue is most likely a misconfiguration or an unreachable SMTP server. Eramba is compatible with common SMTP providers such as Amazon SES, Resend, Mailersend, and others.
To troubleshoot the SMTP connection, you can use swaks as a debugging tool.
Clear eramba cache
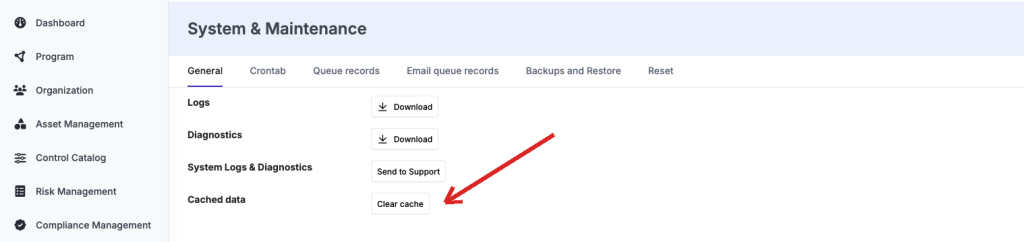
You can clear eramba's cached data by navigating to Settings > System & Maintenance > General > Cached Data.
Report a Bug/Issue
If you are an Enterprise customer and are experiencing an issue or bug with the eramba software (a button not working or an error appearing when clicking somewhere), and it is not covered in this troubleshooting guide, please reach out to support@eramba.org.
Please note that this support channel is intended for issues related to the eramba application itself. If the problem is related to your operating system or infrastructure, we may not be able to help, as that falls under your own infrastructure and system administration responsibilities.
Before reaching out, make sure you are running the latest version of the application and send us an email with a detailed explanation of what is happening, including any relevant steps to reproduce it. The more detail you provide, the easier it is for us to help you!
Logs & Diagnostics
Container Logs
To read the log for any container, run:
docker logs container-name
For example, to view the Apache application container output:
docker logs eramba
Application Log Types
The PHP application records the following:
- Changes to items such as risks and controls.
- Successful logins, failed logins, and brute-force attempts.
- Application, database, authentication, and other technical events.
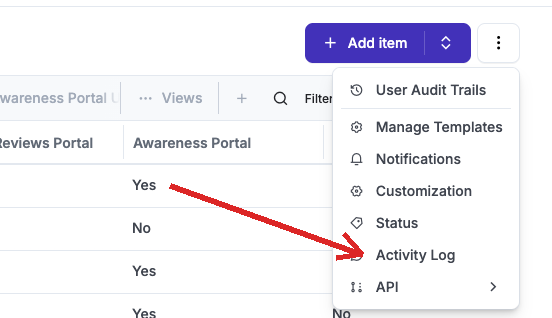
Activity Logs
Every change to an item is recorded in the database and can be accessed through the interface.
Login Logs
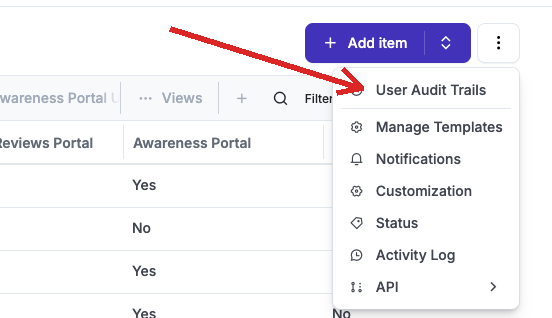
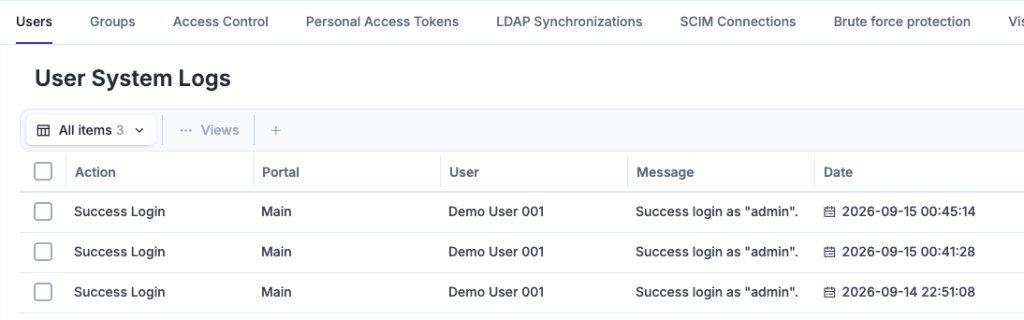
Open Settings > Organization & Access > Users > User Audit Trail. These records cover logins, and token creation. Only local authentication logins are recorded here. For LDAP, SAML, and other authentication methods, inspect authentication.log or the corresponding provider logs.
Core Logs and Diagnostics
Open Settings > System & Maintenance > General to access application log files. If the support team requires diagnostic information, they may ask you to use the Send to Support option.
A ZIP archive can also be downloaded from the interface, containing the following log files:
access.log: Nginx-style access records, with domain names masked as***.authentication.log: eramba access records, with usernames masked except for the first and last character.authorization.log: actions performed by users.backup_restore.log: backup and restore events.cli-debug.log: command-line activity.cli-error.log: command-line errors.cron_daily.log: daily cron activity.cron_hourly.log: hourly cron activity.debug.log: low-level CakePHP debugging output.diagnostics/config.log: internal application configuration diagnostics.diagnostics/migrations.log: internal migration diagnostics.diagnostics/mysql_general.log: general database diagnostics.diagnostics/mysql_tables.log: database table diagnostics.diagnostics/mysql_variables.log: database variable diagnostics.diagnostics/php_info.log: PHP environment information.diagnostics/system_health.log: eramba system health diagnostics.diagnostics/system_info.log: server and system information.error.log: CakePHP errors.reports.log: report processing and generation events.system_health_status.log: information used to determine whether the system has any health issues.
The same files are also available directly inside the eramba container:
docker exec -it eramba bash
cd /var/www/eramba/app/upgrade/logs
Still have questions?
Write to support@eramba.org or ask the community on the forum.