Introduction to Access Management
Users, Groups, Visualisations, Etc.
Introduction
There are two types of users:
- Those that run GRC and have an interest in populating eramba with information (Risks, Controls, etc). We typically call them "Administrators".
- Those that provide feedback - Risk Reviews, Control Evidence, etc. We typically call them "Users".
While all users need to access eramba, what they can "Do" and what they can "See" will differ. First, let's make a clear difference between what we mean by "Do" and "See".

In the screenshot above the options highlighted in red boxes are things you can "Do" in eramba. Modules are shown in the bar on the left. A menu bar displays options across the top of the page. Options for every item are shown in the section below (in this example, Risks). Anything you can "Click" falls under the "Do" definition.
Highlighted in green boxes is what data users can "See", i.e. the data. In this example it is Risks.
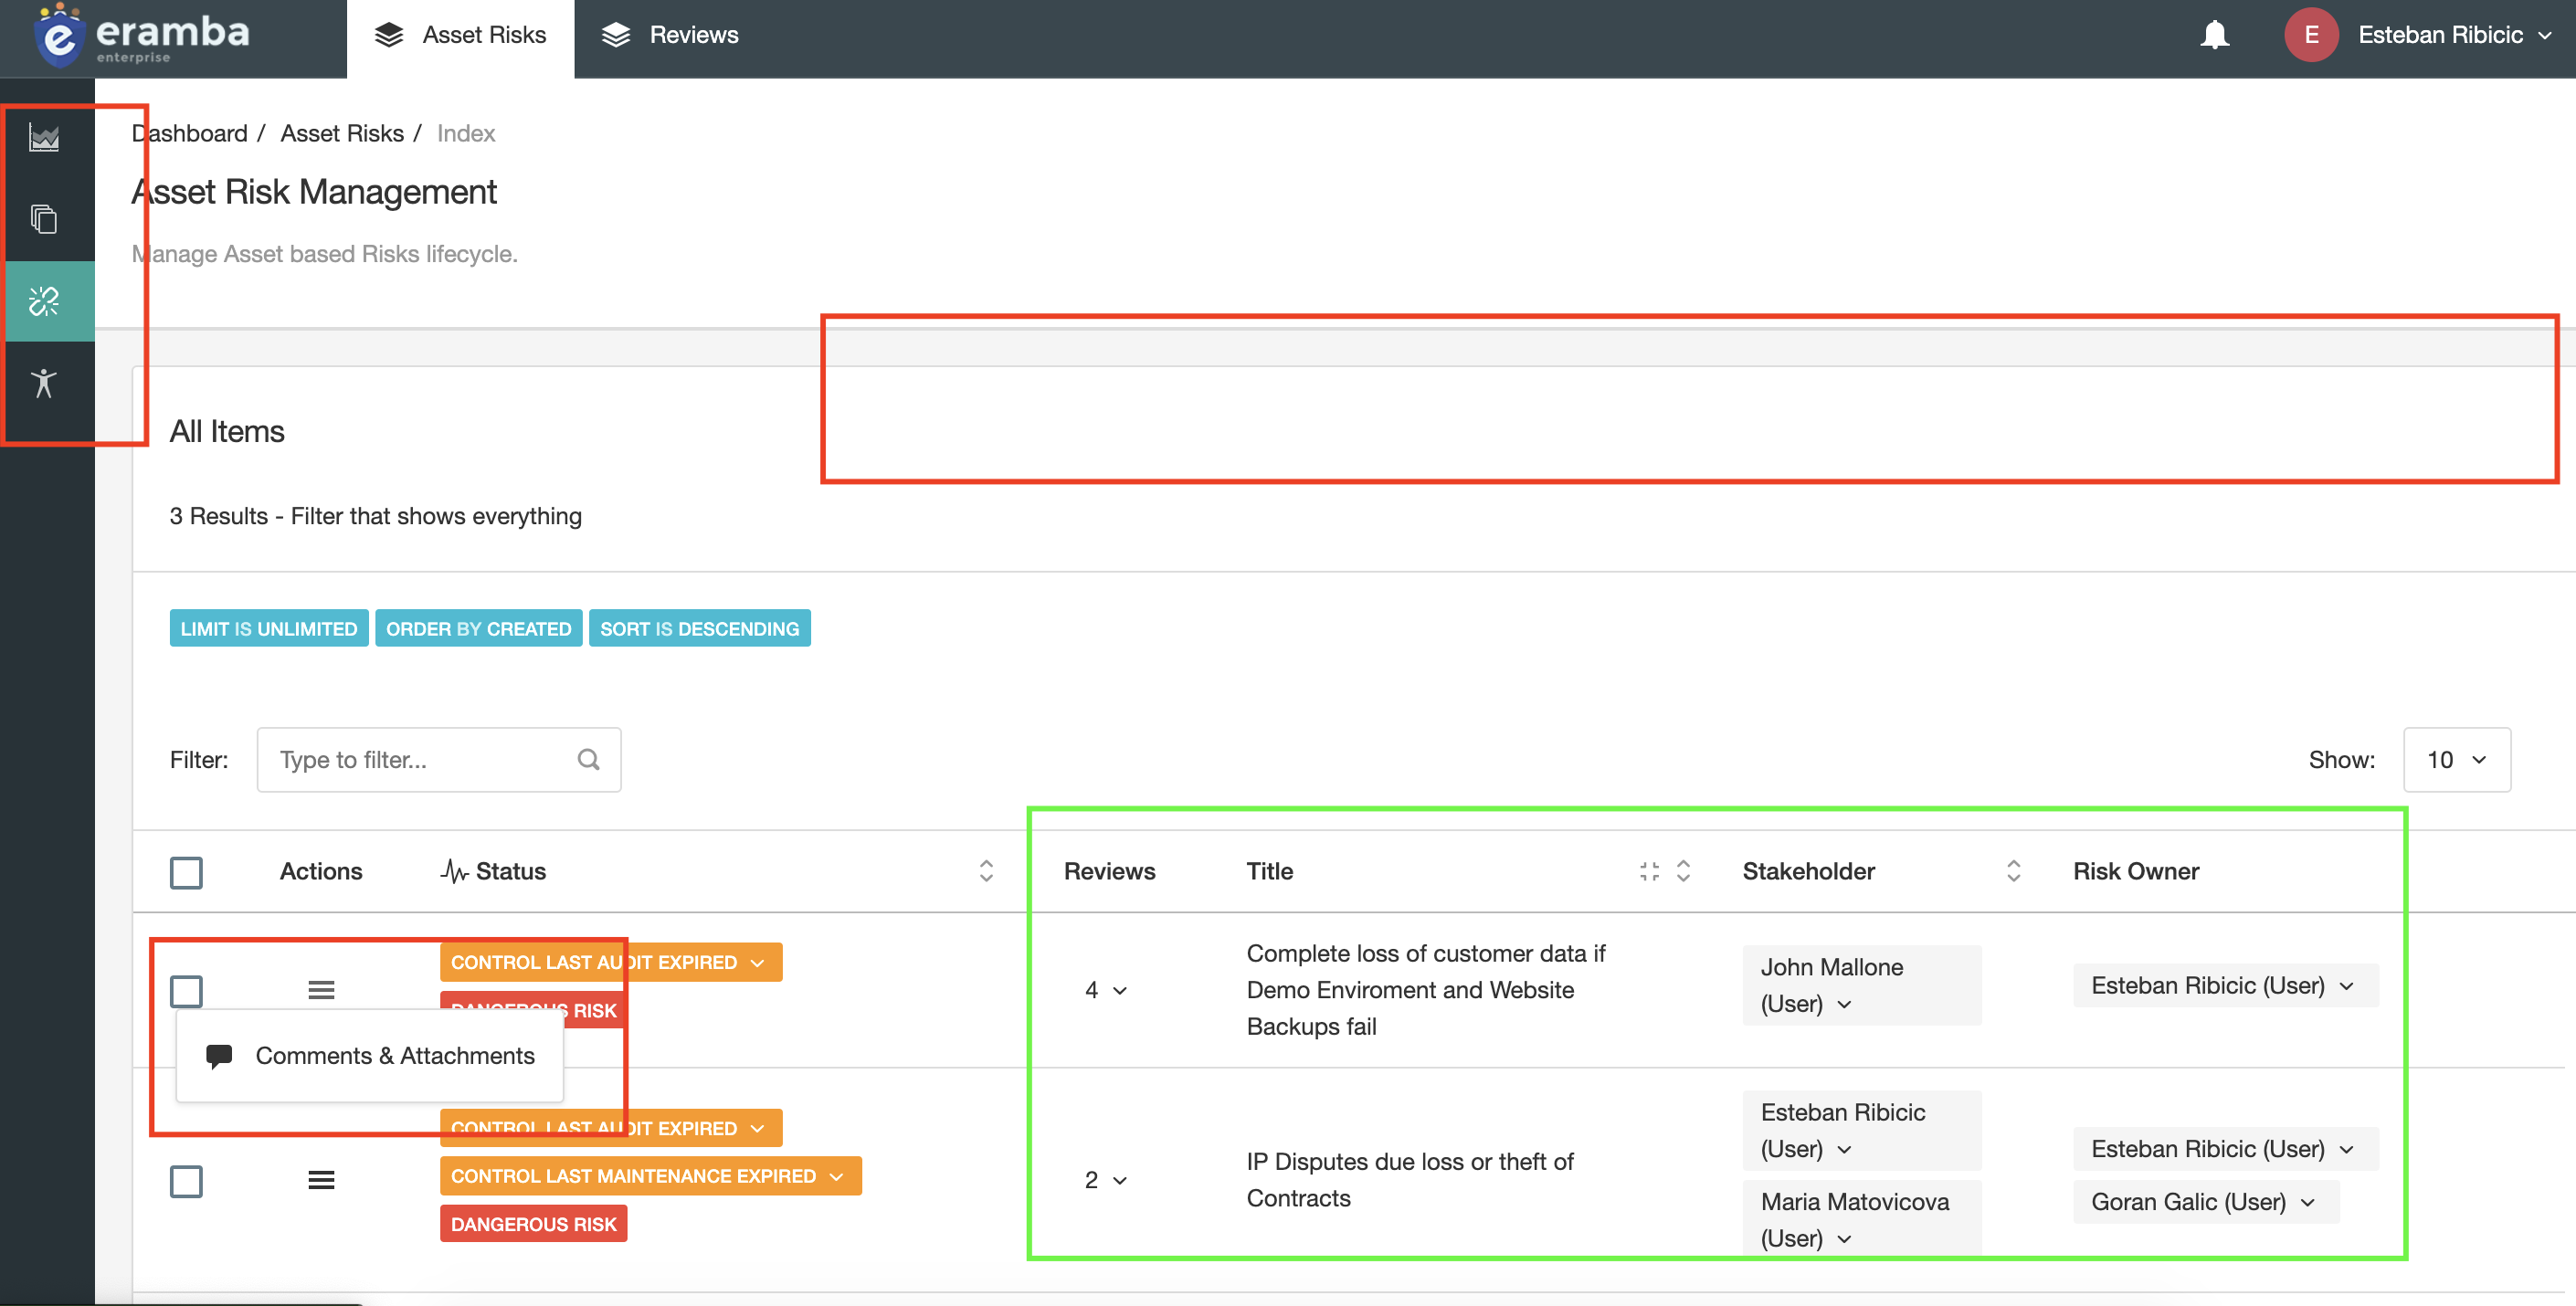
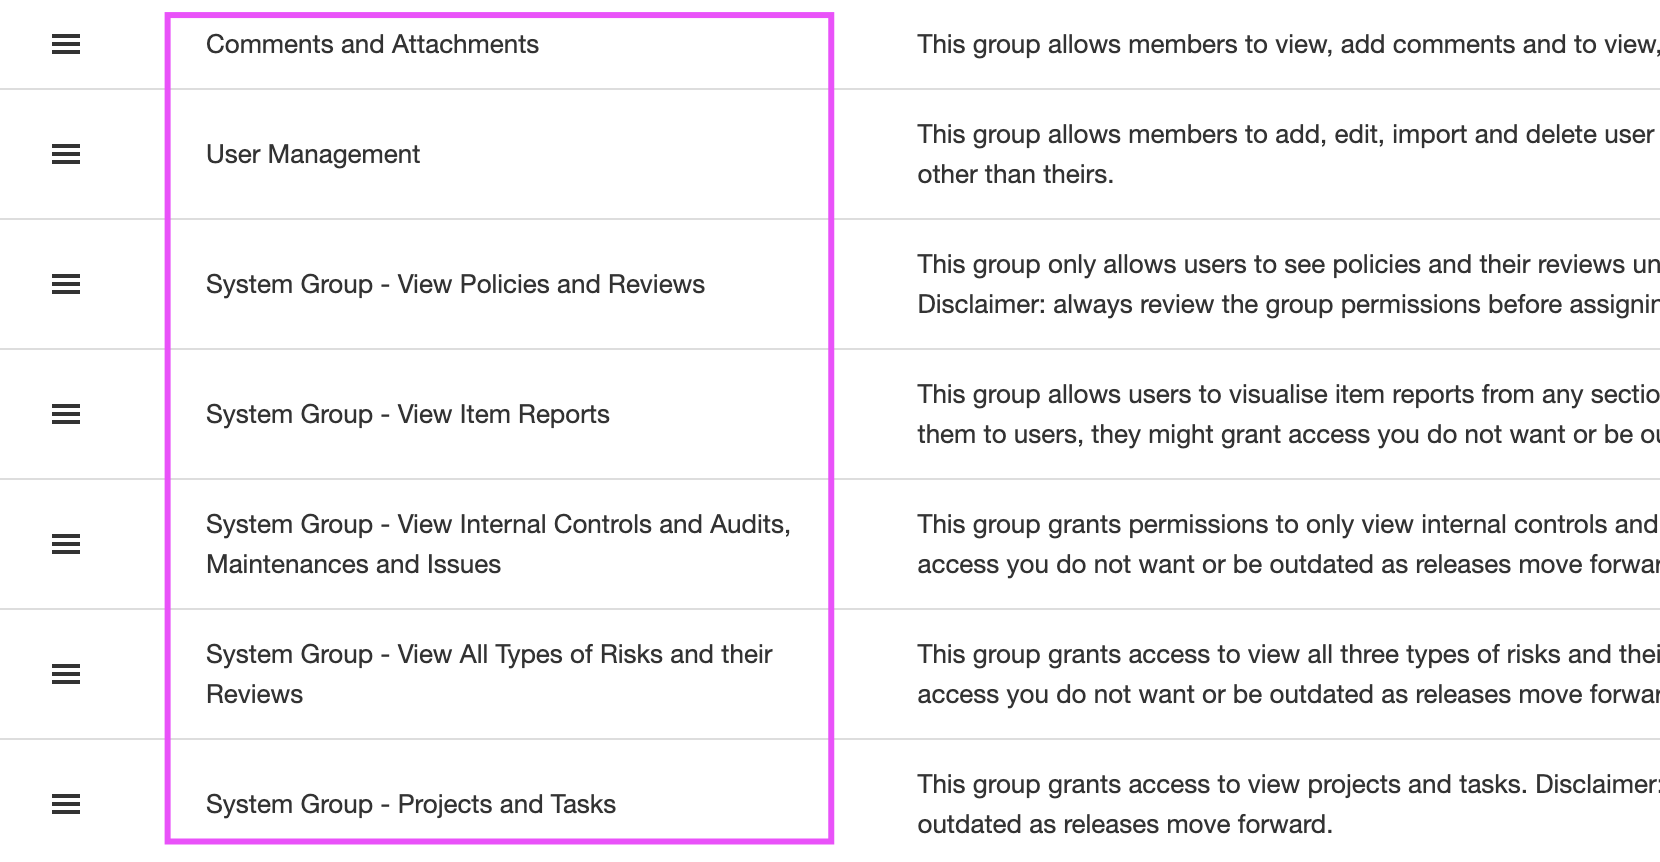
The screenshot above shows what another user can "Do" and "See". As you can see this user has access to fewer modules (left hand bar), does not get any options in the menu bar on the top and for each item is only allowed to access Comments and Attachments. The user can only see the two risks that are associated with the account they are logged in as.
It is important to understand the difference between these two things because you will be need to configure the system in a way that suits what each of your users needs to "Do" and "See".
Users
You will need to create user accounts in eramba regardless of the authentication method you choose. You can create user accounts in three ways:
- One by one
- Using CSV imports
- LDAP Synchronization.
All user management actions are performed under "System" > "Settings" > "User Management".
Groups
Groups define what users can "Do" and where they "Work", for that reason every user you create will have at least two groups (for example, "Review Internal Controls" and "IT Team") but many times they will have more than that.
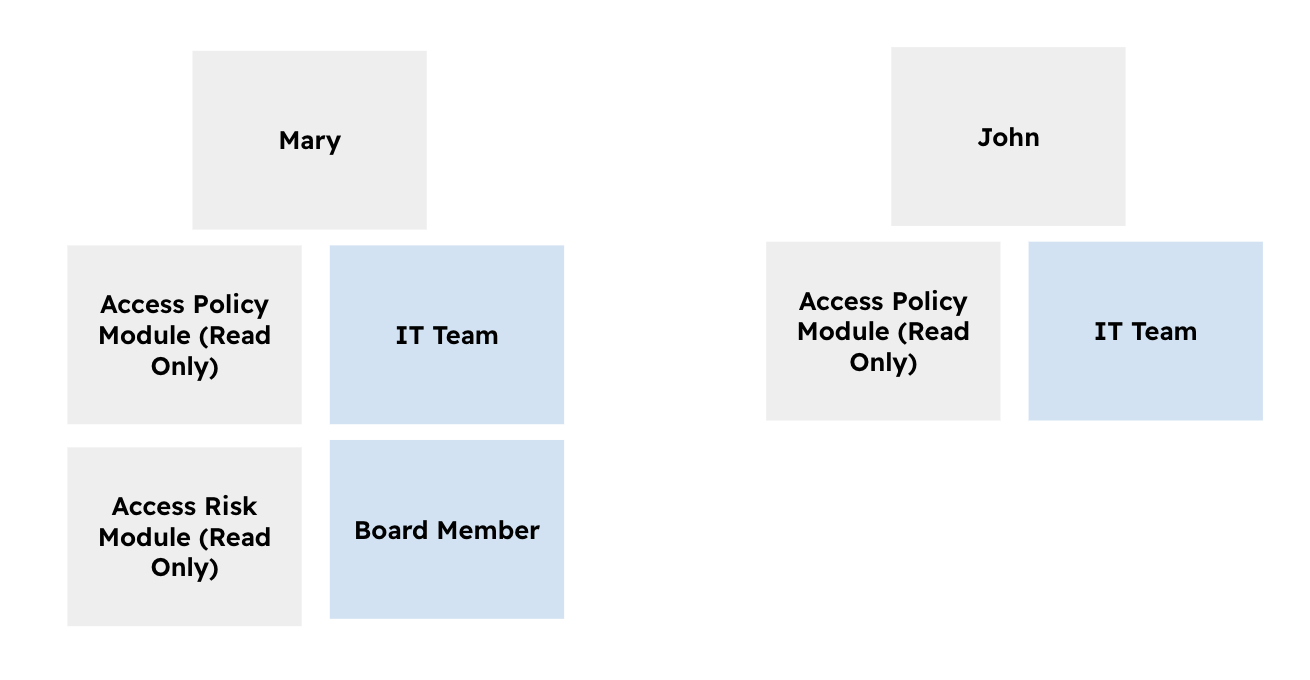
The diagram above illustrates a few typical scenarios:
- Mary has 4 groups assigned to her, two describe where she works (IT Team and Board Member) and two other groups describe what she can "Do" in eramba.
- John has 2 groups assigned to him, one describing he works at the "IT Team" and one that describes what he can "Do" in eramba.
Where do they work?
Often people ask how to break down an organization chart into groups that describe what people do, our suggestion is to keep things simple.
- Think about which departments will "own" items in eramba (Risks, Policies, Controls, etc.)
- Typically this will be IT, Finance, GRC, Etc. Those are the groups you will need in eramba.
Sometimes is a bit trickier, for example, a company that operates in multiple countries as shown in the diagram below:
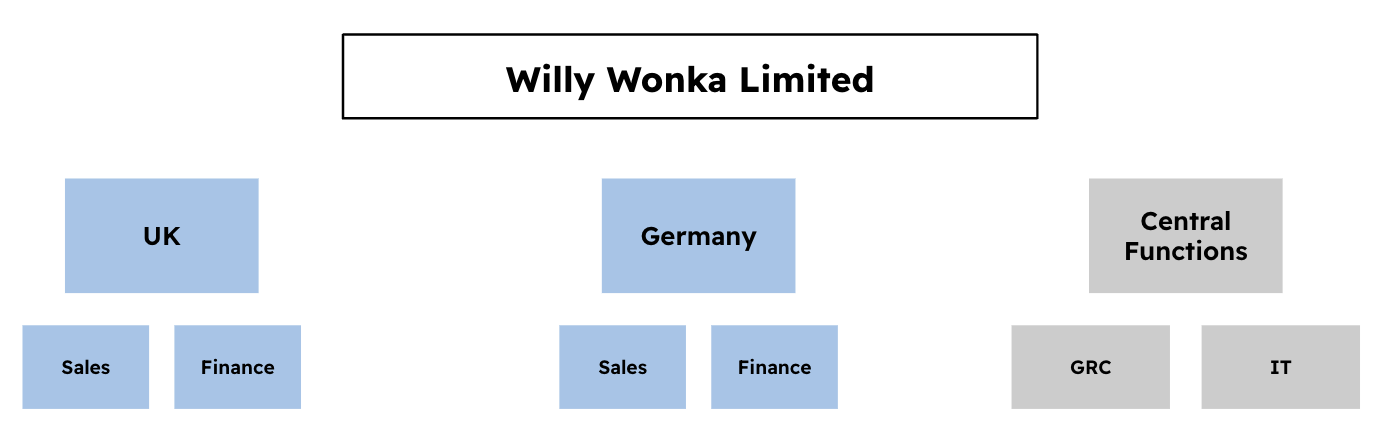
- Every country has a Finance department, you could create groups in eramba called UK_Finance, Germany_Finance, etc. Naming conventions are not unusual.
- A set of teams operates across all countries, they could be called GRC, IT, etc.
You will assign these groups to Risks, Controls, Policies, etc (depending on your use case) so when you think of a department, you might as well on their roles. This is only needed if the department is heavily subdivided.
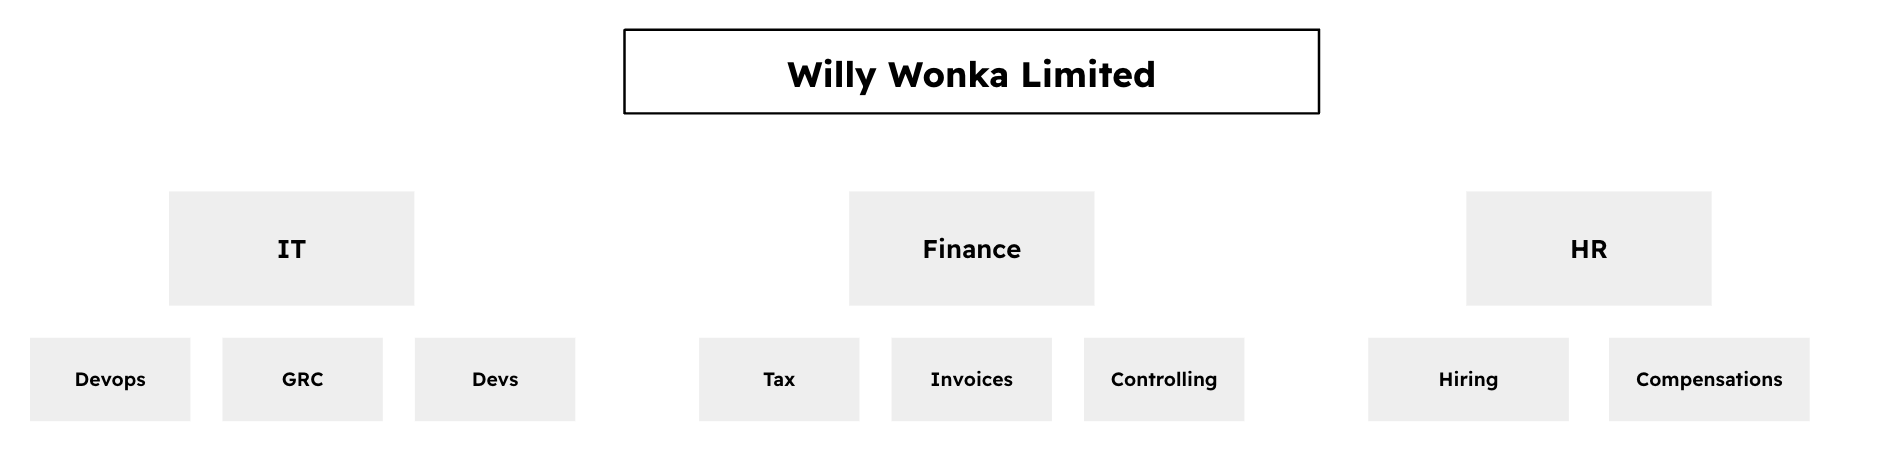
The diagram above suggests groups in eramba could be set up as Finance_Tax, Finance_Invoices, etc.
What Access do they need?
These groups will be used to limit what user accounts can do in eramba, for example:
- Can they create Policies?
- Can they edit Exceptions?
- Can they run Reports?
Is very hard to tell what permissions people need until you know what eramba has to offer. eramba ships with a list of pre-defined groups that most companies need.
Note: groups have a "Flat" hierarchy, which means you can not put one group inside another.
Groups have "Access Lists" (ACLs) inside that tell us where members of that group can "access" eramba.
Note: by default when a new group is created there are no allowed access lists, this means the group if assigned to someone will have access nowhere.
Since there are many access lists (hundreds) is always advisable to understand first what the user needs and only allow those permissions, denying the rest by default.
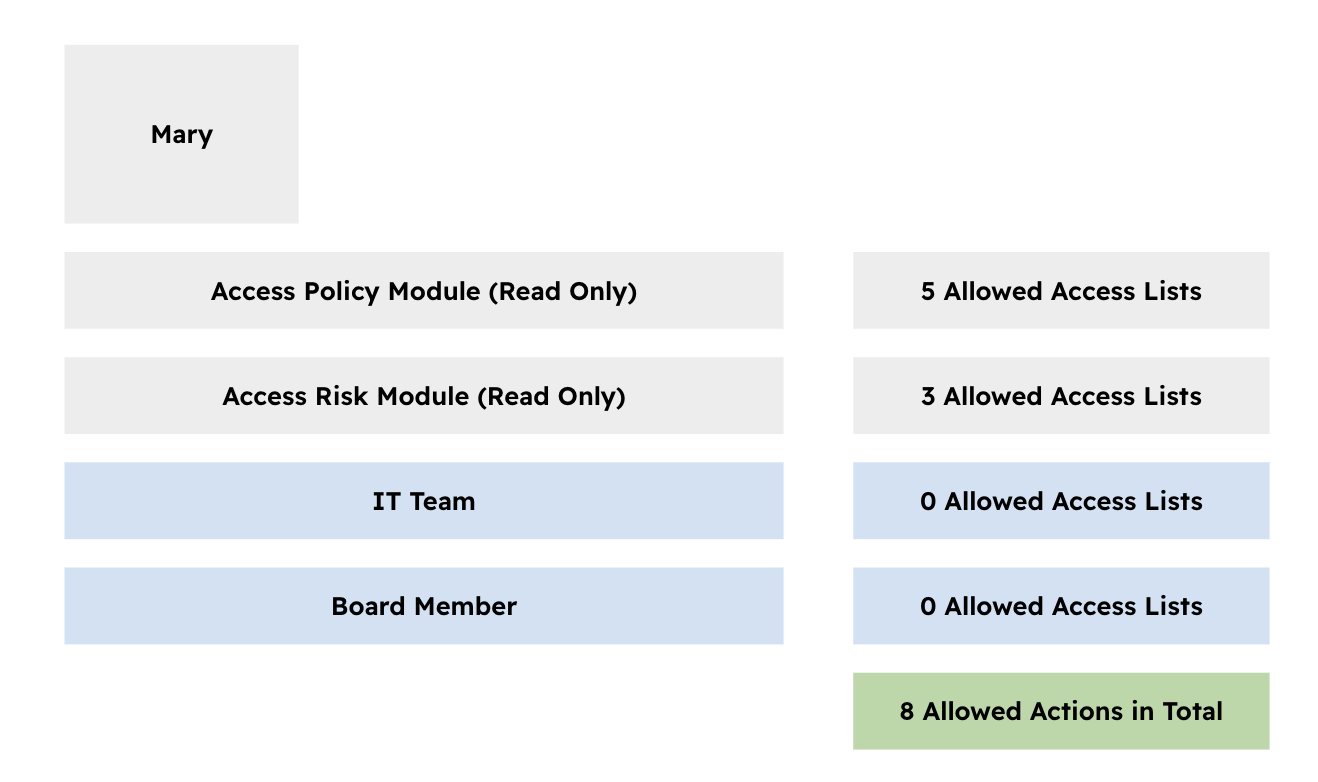
In the example described above, Mary will have a total of 8 allowed permissions, which is the addition of all allowed permissions inside each group she is a member of. Note that those groups that describe where she works are left default without any allowed ACL.
Module Roles
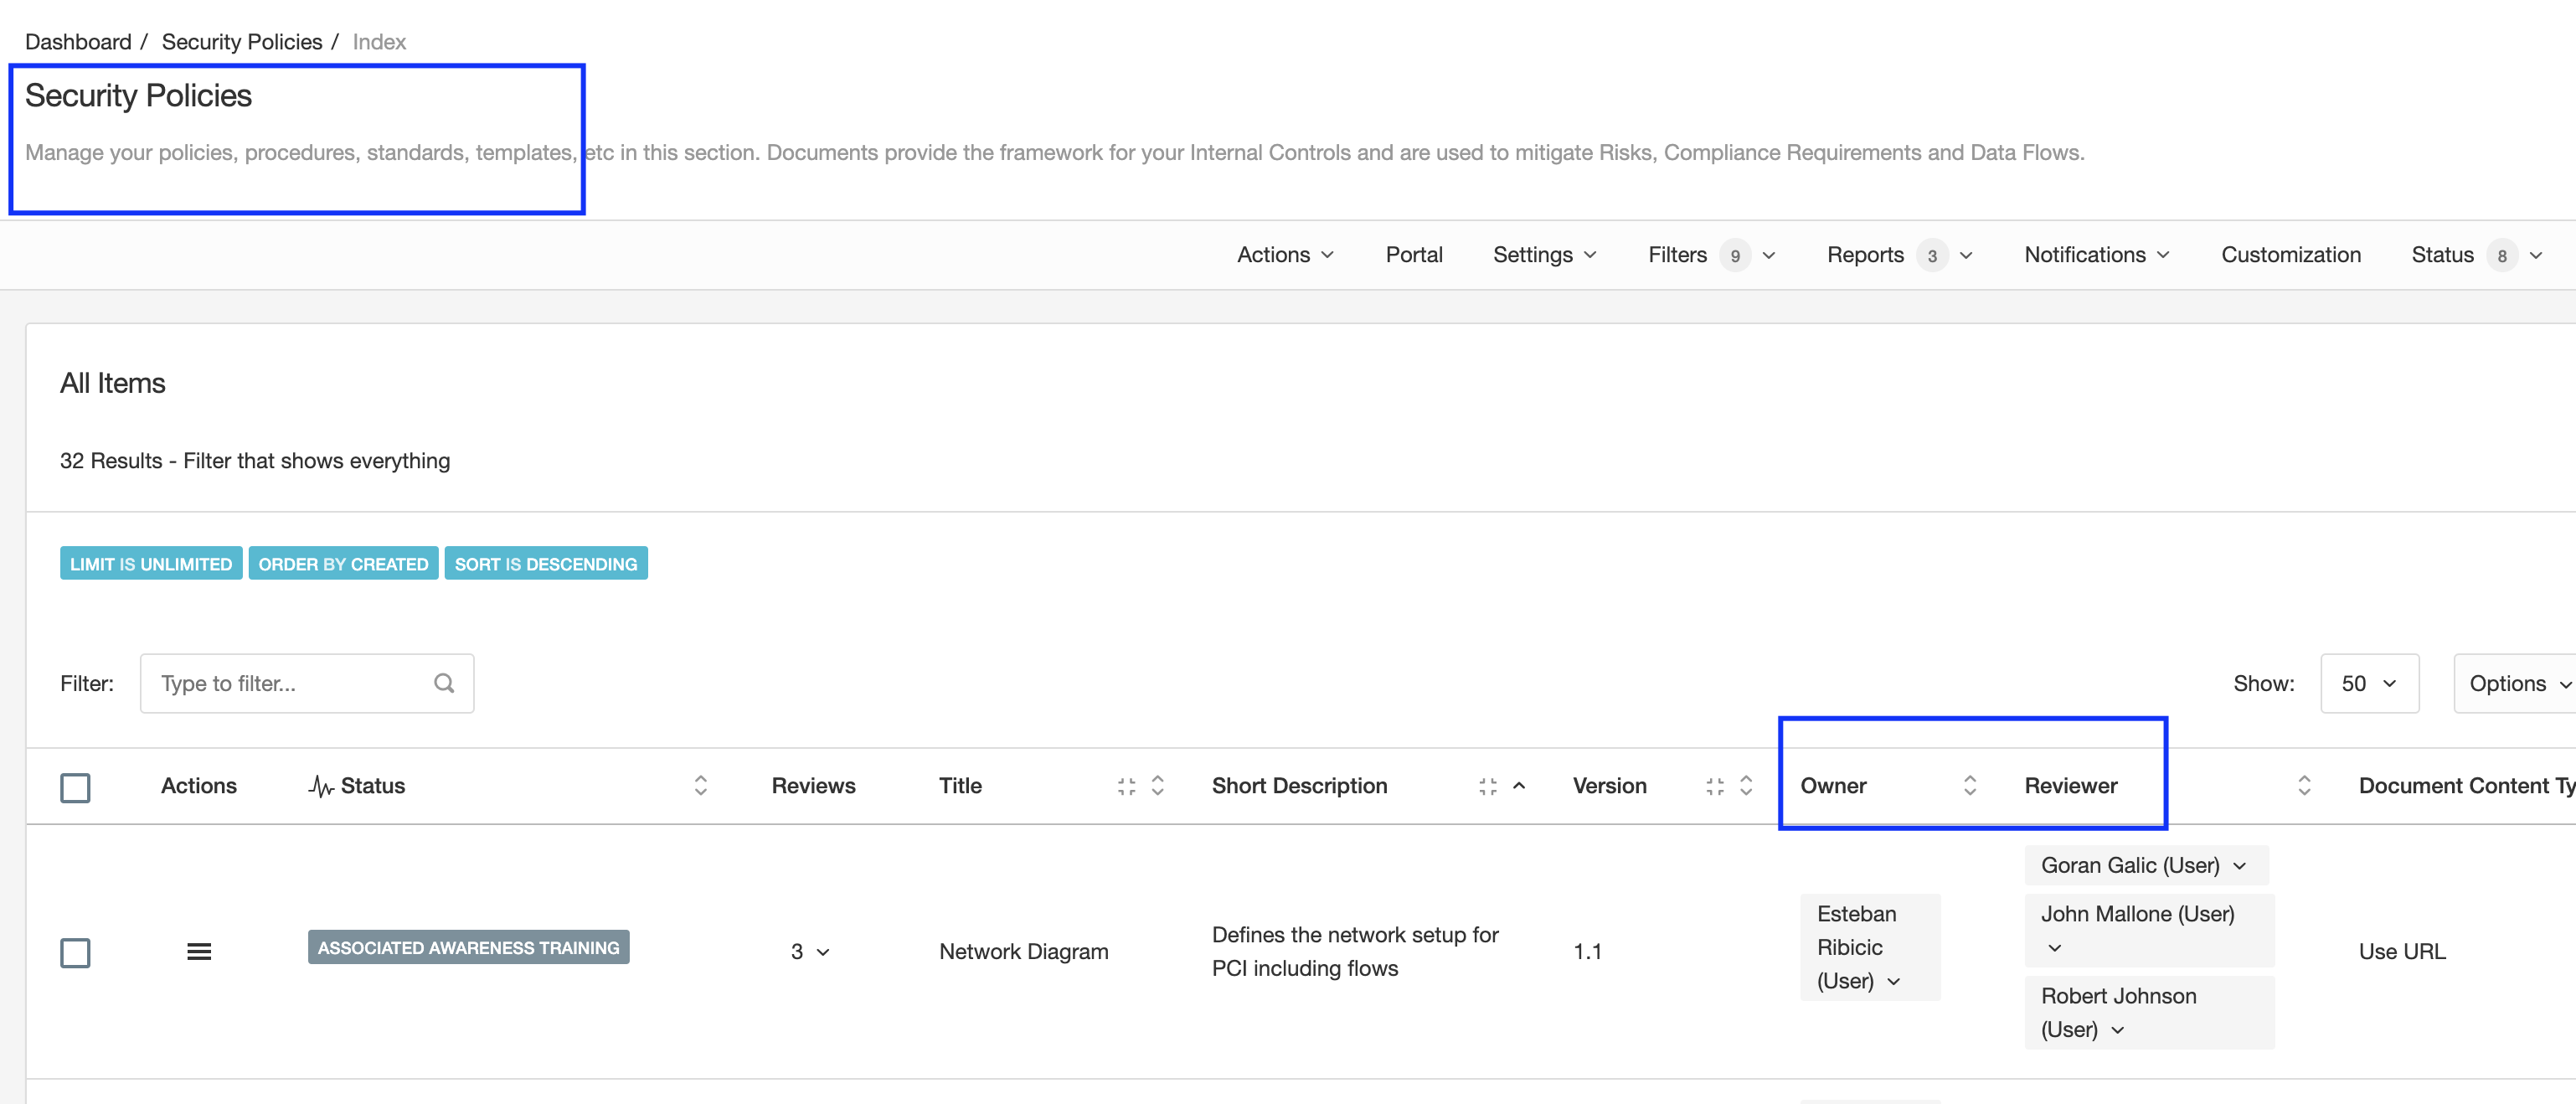
Every module (risks, controls, policies, etc.) has one or more "Roles" that tell us who is related to the items created. For example, the "Security Policies" module has two roles "Owner" and "Reviewer" (you can rename them to whatever name you want using Customizations).
Accountability is very important in eramba for the following reasons:
- It tells you who is related to every item on every module
- eramba decides what items to show to the logged user, remember eramba shows to the logged-in user the "Data" that relates to that person by default.
- eramba sends notifications by email, you want those to go to the right people or groups of people.
As you learn how different modules are used you will understand what these roles do and who you need to assign. The important recommendation here is that, as opposed to the example shown above, you should use groups and not user accounts.
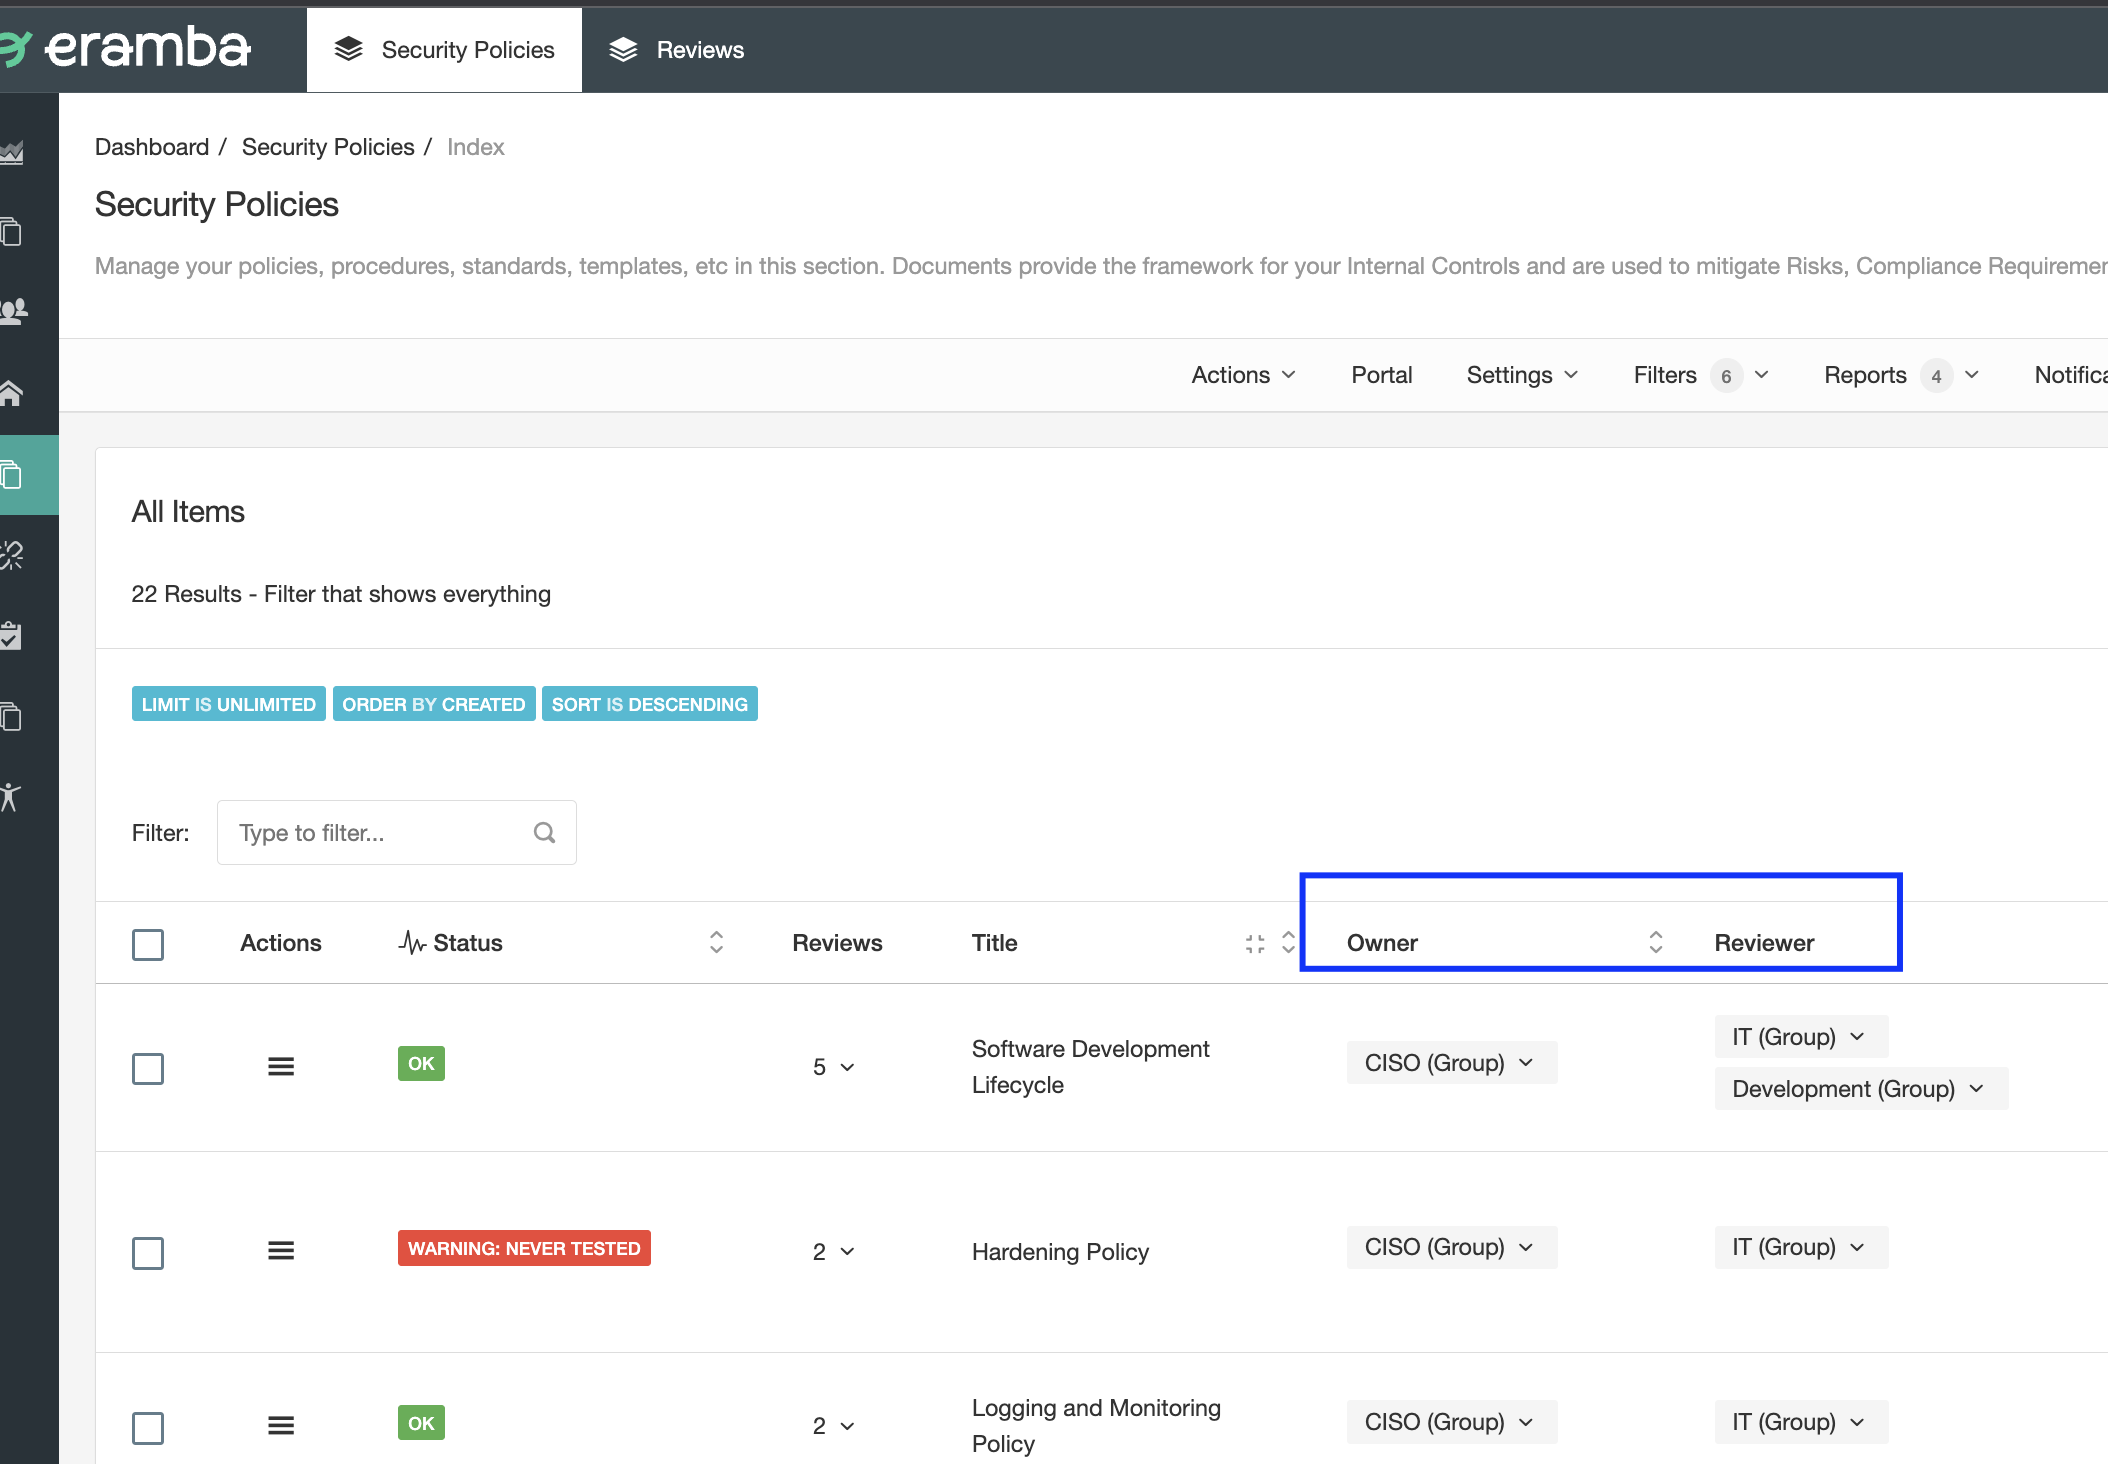
The diagram above shows how Groups are the recommended implementation method for assigning Roles. Inside these groups, you will have one or two accounts that will receive notifications, Etc.
Visualizations
As explained above, every item in eramba should have a "User" or (ideally) a "Group" assigned, oftentimes more than one. eramba will use that information to decide what items need to be shown to the logged-in user.
By default, eramba shows to the logged-in user the items that relate to that user. Following the screenshots shown above, if any account member of the "Development" group logs in to eramba they will only see the first row, not the other two. If any member of the "CISO" group logs into eramba, they will see all three rows, same for the "IT" Group.
Only the "Admin" account and members of the "Admin" group will see all items by default no matter who owns them. If you need a user or group to see all items no matter if they own them or not (typical scenario is Auditors) then you need to configure an exception at "System" > "Settings" > "Visualisation".
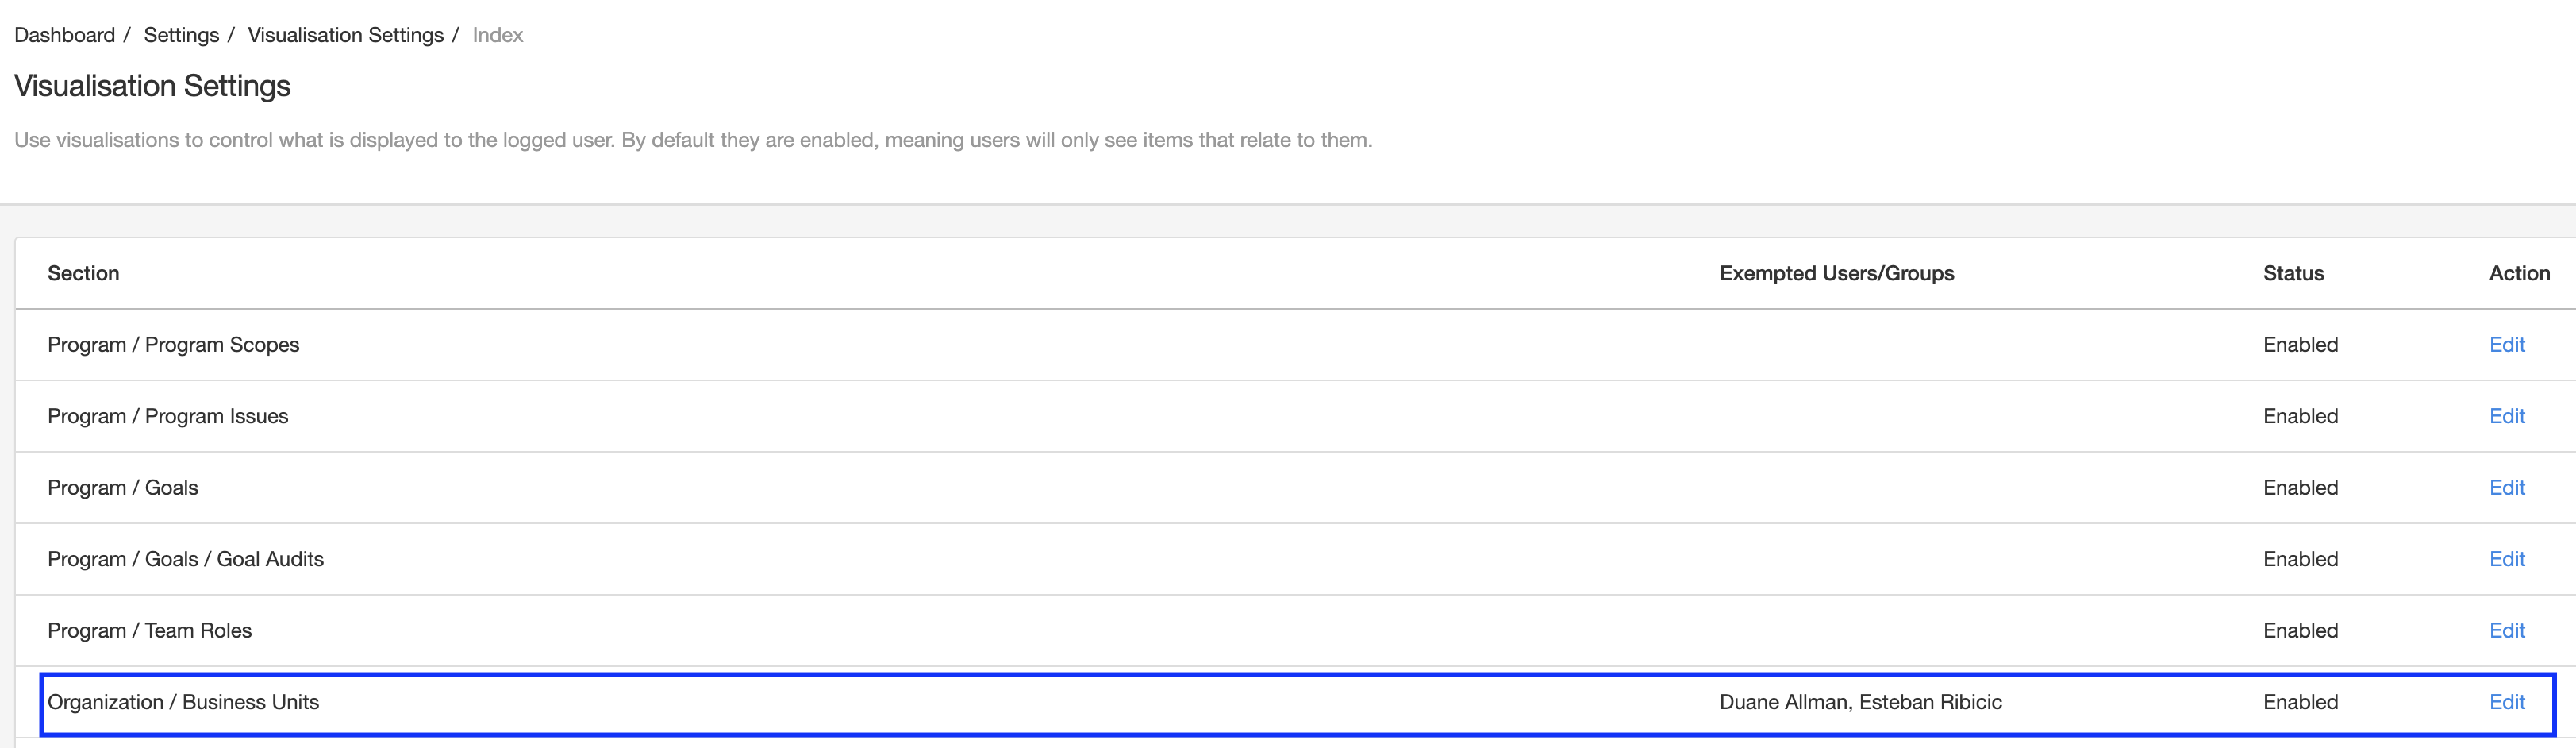
The diagram above shows how Esteban and Duane will be able to see all "Business Units" no matter if they are related to them or not.
User Accounts
There is a tendency in some organizations to create accounts for every employee in eramba. The reality is that this is rarely needed and the more you understand eramba the more obvious that will become.
The number of user accounts needed is typically:
- One for every member of the GRC department: they will create Policies, Risks, Controls, Etc
- Two accounts per "Department": they will be asked for "Feedback" when Policies, Risks, Etc deadlines are due
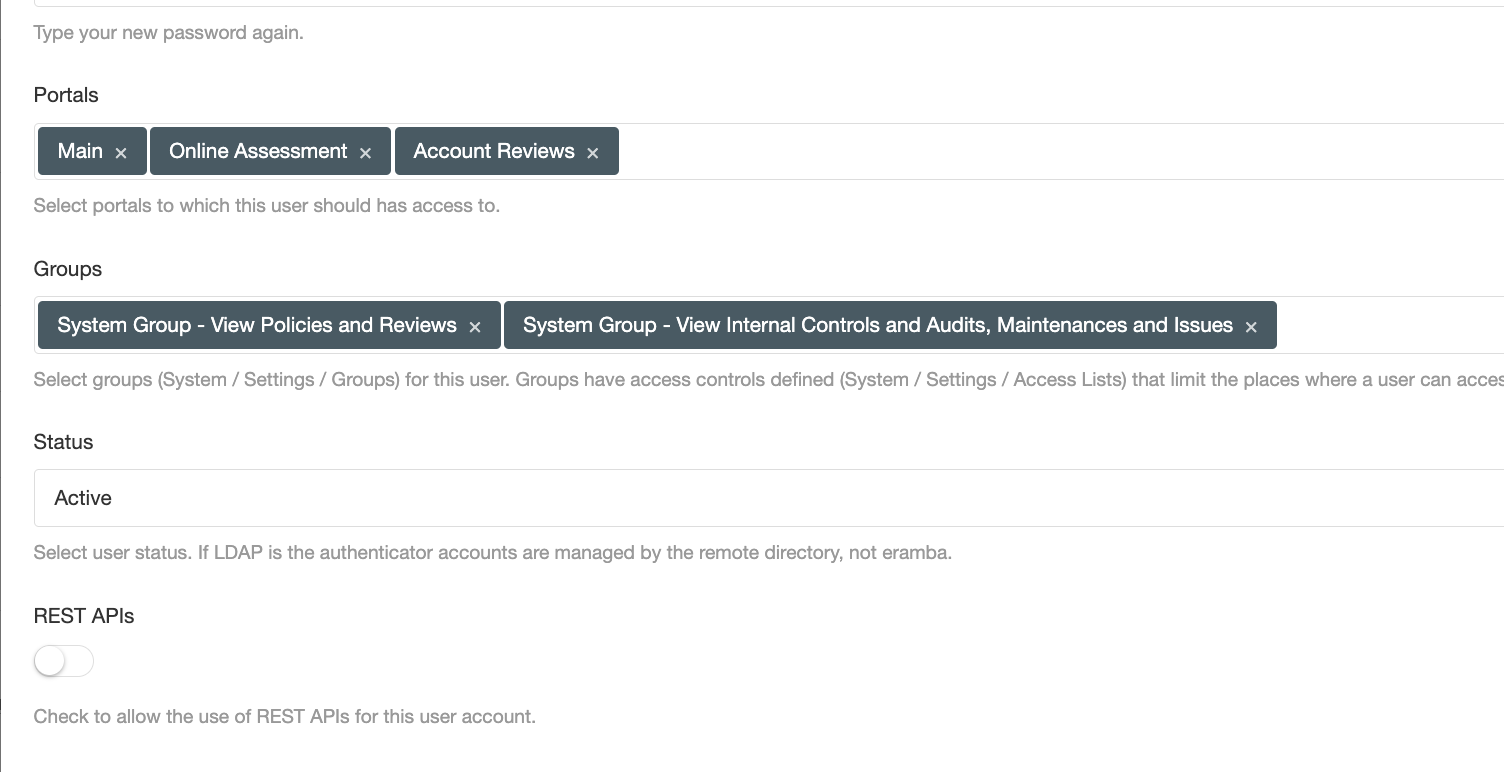
Portals
There are some functionalities in eramba that have a portal of their own. For example, the "Policy Portal" is accessed through a special URL and therefore is separated from the "Main" portal. The Awareness Program, Account Review, and Online Assessment modules all have their own portal with their own login screen. Once users are authenticated these portals show features specific to their functions.
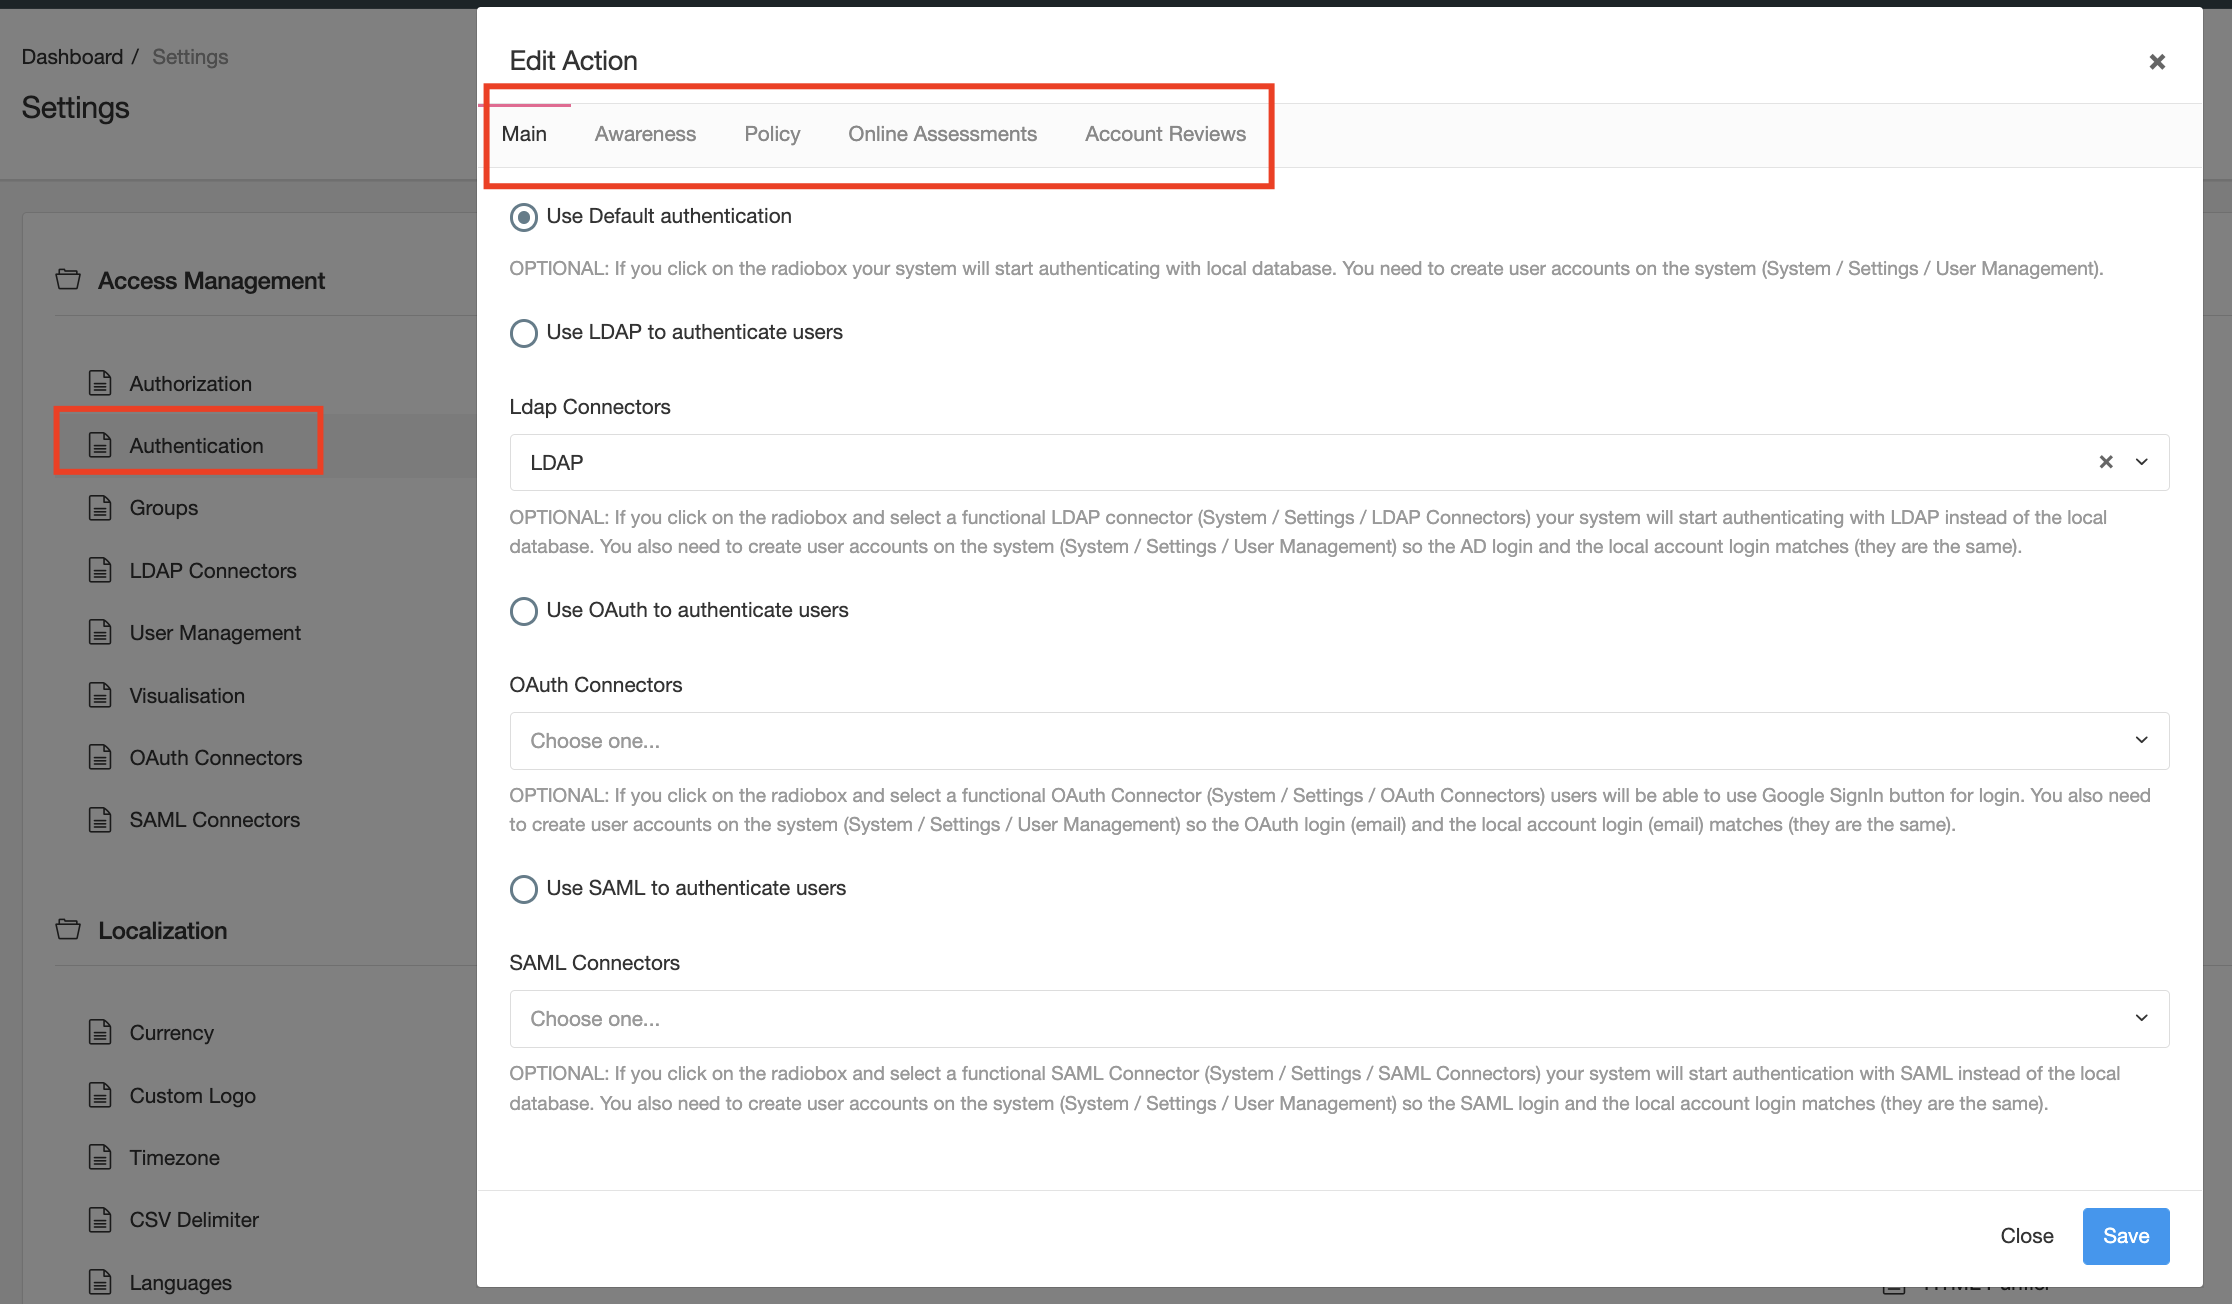
You can control which users access these portals because each has its own authentication methodology defined under "System" > "Settings" > "Authentication".
For all portals except the Policy and Awareness portal, when you create a user you must also define what portals users can access. This provides a second layer of isolation in between portals. By default all portals with the exception of the "Main" portal are disabled.
Authentication
Three authentication methods are supported by eramba:
- Local (eramba holds the user password in its database)
- LDAP (eramba passes credentials to an LDAP directory service of your choice, for example, Active Directory)
- SAML (eramba passes credentials to a SAML service provider of your choice)
- Google Oauth
Whatever authentication option you define for the "Main" portal will be inherited by the Account Reviews and Online Assessment portals. The Policy and Awareness Portals only support LDAP.
SAML and LDAP require special "Connectors" that you must configure in advance for them to be used in eramba (see next episodes for details).
Brute Force
By default all locally authenticated accounts are protected by a "Brute Force" protection. This means that if a user provides wrong credentials while attempting to log into eramba the system will block further login attempts. Blocked accounts can be unlocked accessing System / Settings / User Bans
MFA
There is no built-in MFA (multiple factor authentication) in eramba, the reason is most users are companies that rely on their authentication providers (SAML, LDAP, Google OAuth) to handle authentication. Authentication providers handle the entire session and that includes MFA. There is no point in setting up MFA on each application when working when single-sign-on technologies.
Playlist
- Episode 1Introduction to Access Management5 mins left
- Episode 2Managing Groups & Access Lists7 mins left
- Episode 3Managing User Accounts4 mins left
- Episode 4Configuring Authentication1 min left
- Episode 5Configuring LDAP Connectors11 mins left
- Episode 6Configuring Google OAuth Connectors1 min left
- Episode 7Configuring SAML Connectors2 mins left