Managing User Accounts
Learn how User Accounts are Managed
Introduction
All users need an account in eramba even if they authenticate using an external service. The exception is users on the Awareness Management module, they do not need a local account.
To create accounts you have three options:
- One by One (our recommend method for 1-20 accounts). If you are using LDAP for authentication the process of creating accounts is pretty quick as most fields will be automatically completed by your AD.
- CSV Imports (our recommend method for more than 20 accounts)
- LDAP Syncronisation (our recommendation for hundreds or thousands of accounts).
When accounts are removed (one by one or in bulk), all items (Risks, Etc) owned by those accounts will be associated with the "Admin" user.
Creating Accounts
To create accounts click on "System" > "Settings" > "User Management", then "Actions" > "Add" and complete the form.
Each user account in eramba needs a unique email address. Without an email address eramba can not send notifications or, in the case of accounts using local authentication, send recovery password emails.
Local Account
Switch this toggle ON to set accounts to authenticate using the eramba built-in, local password management system.

Accounts that authenticate outside eramba (LDAP, SAML) require to have this toggle off. This setting will override external authentications configured in eramba if active.
Portals
eramba has a main "Portal" (the one you are using most of the time) which is required by everyone EXCEPT those that will use the Awareness, Account Review and Online Assessment use cases.
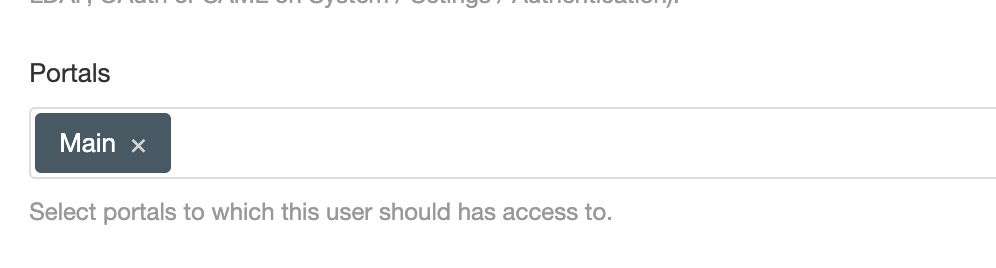
We strongly advice you to only use the "Main" portal on your user accounts unless you are focusing on the other use cases mentioned above.
Groups
Here is where you will select the groups you want to assign to a user.
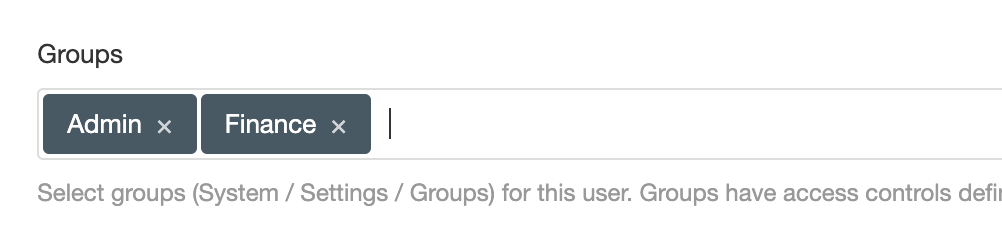 Every user in eramba needs at least (could be more)TWO groups:
- One group that tells us where this person works (department)
- One or more (very likely it will be many groups) that tell us where this user account can access eramba, where that person can "click". If access is not granted the user will receive an error.
Status
An "Inactive" account can not log in to eramba.
REST APIs
Unless the account you are creating is meant to use APIs, this toggle can be left off. Read more about APIs in our documentation.
Deleting Accounts
If you delete an account that has items (Risks, Controls, Etc) assigned to the system, those items will become owned by the "Admin" user account.
Bulk Account Creation
If you want to create accounts in bulk then you can use two methods:
- CSV Imports
- LDAP Synchronization (requires LDAP)
In general, is very unlikely you will need many accounts in eramba, most of the time the number of accounts required in eramba is a number of departments times 2 or 3. This is because you want to have items (Risks, etc) in eramba owned by groups (departments) and when a notification for those items arrives two or three people will be notified. Before creating multiple accounts make sure this concept is clear.
CSV Creation
For CSV imports go to "System" > "Settings" > "User Management" , then "Actions" > "Import" and download the CSV template. Fill in the user details in the correct columns in the CSV and upload it to eramba. You can use the training session on "CSV Import" to understand in detail how to work with imports.
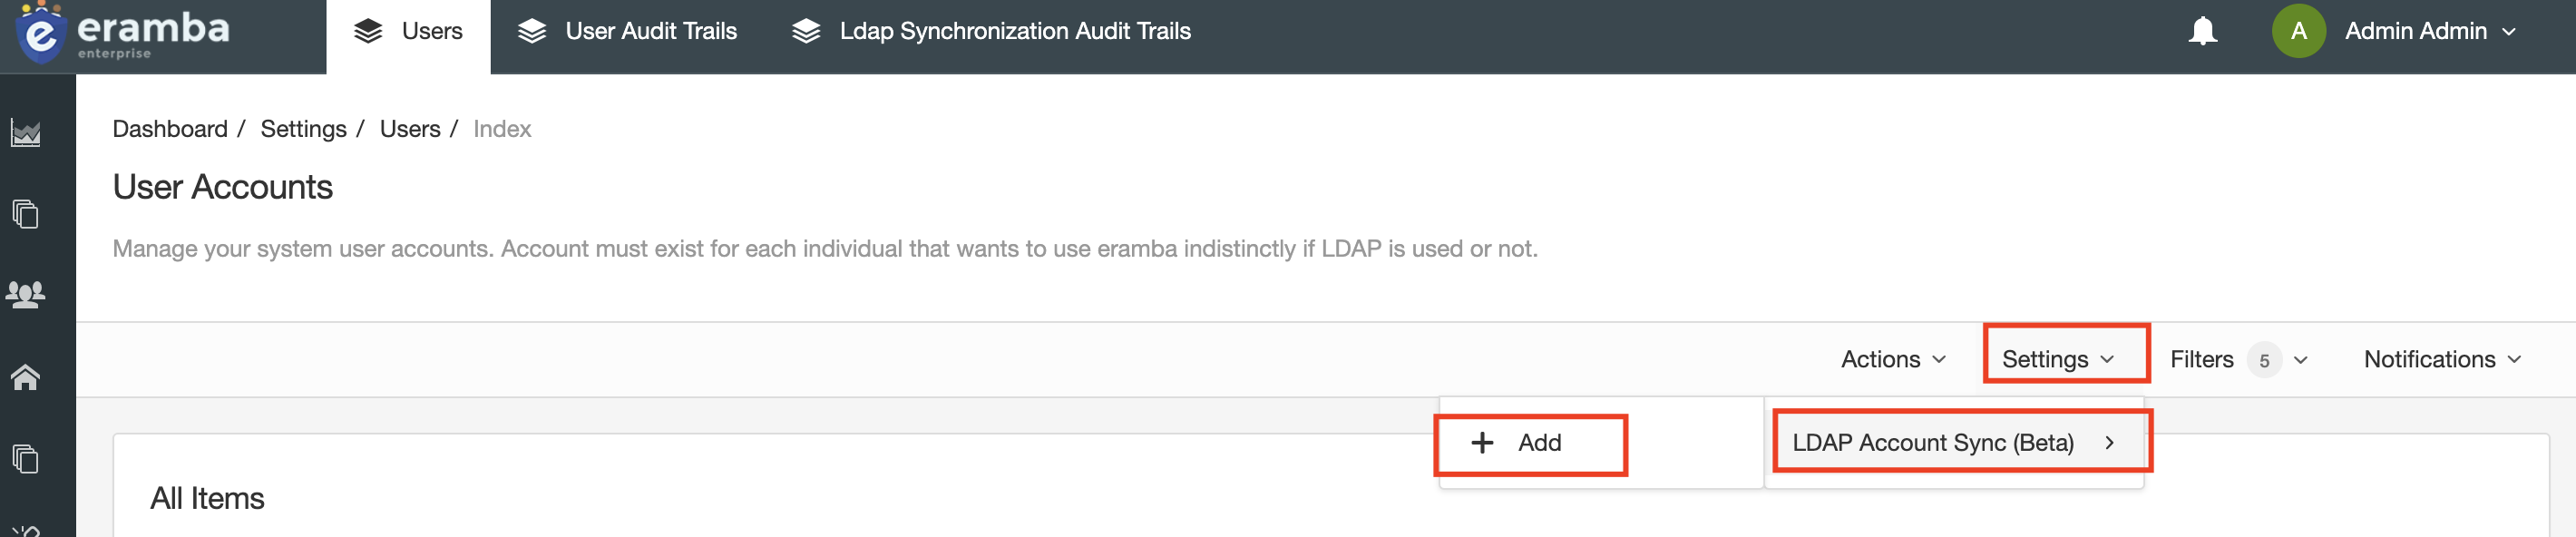
LDAP Sync
You can synchronise your LDAP directory user accounts into eramba automatically using LDAP Synchronization. A prerequisite for this functionality is having LDAP connectors correctly configured (see Access Management course). You will configure eramba with:
- the AD groups in your LDAP directory you wish to keep syncronised with eramba
- the groups and portals that the syncronised users will be assigned to
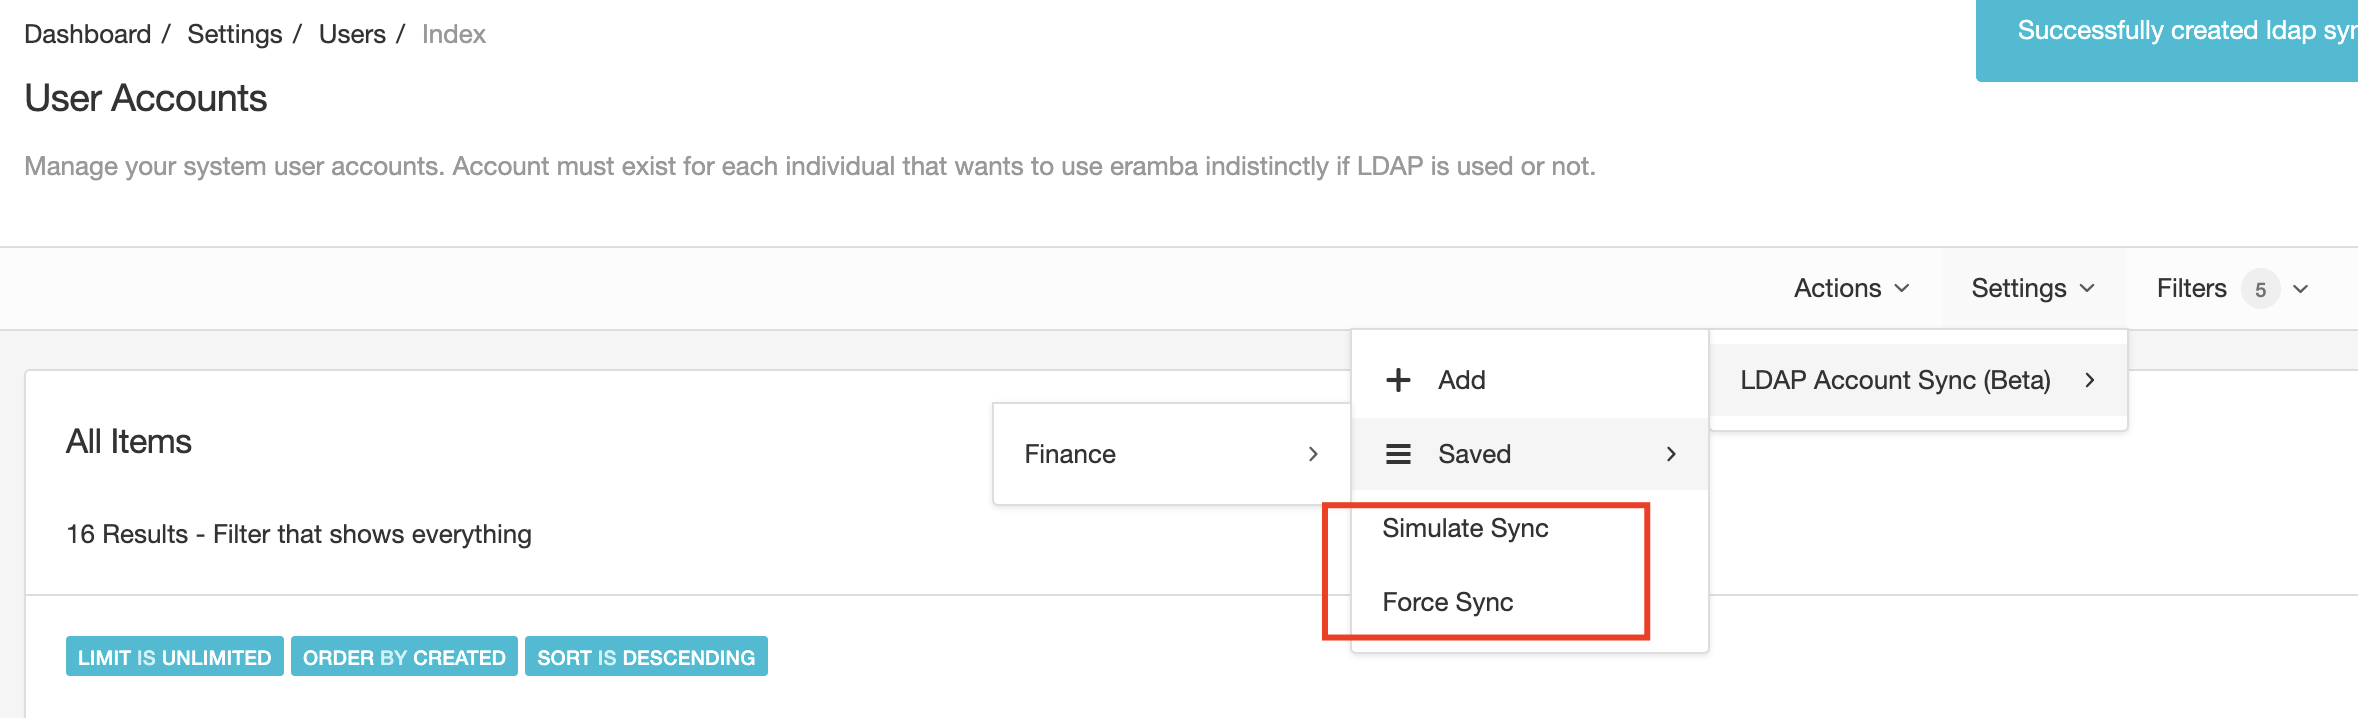
You can create multiple LDAP Syncronisations, one for each group in your LDAP directory. Under "System" > "Settings" > "User Mangement", go to "Settings" > "LDAP Syncronisation" and "Add" to start creating LDAP Sync's.
The form will let you choose your Authenticator and Group LDAP connectors, once selected you can choose one group from your LDAP to syncronise. You can also choose what to do when user accounts are removed from those groups on the LDAP directory (eramba syncronises users added and removed to LDAP groups)
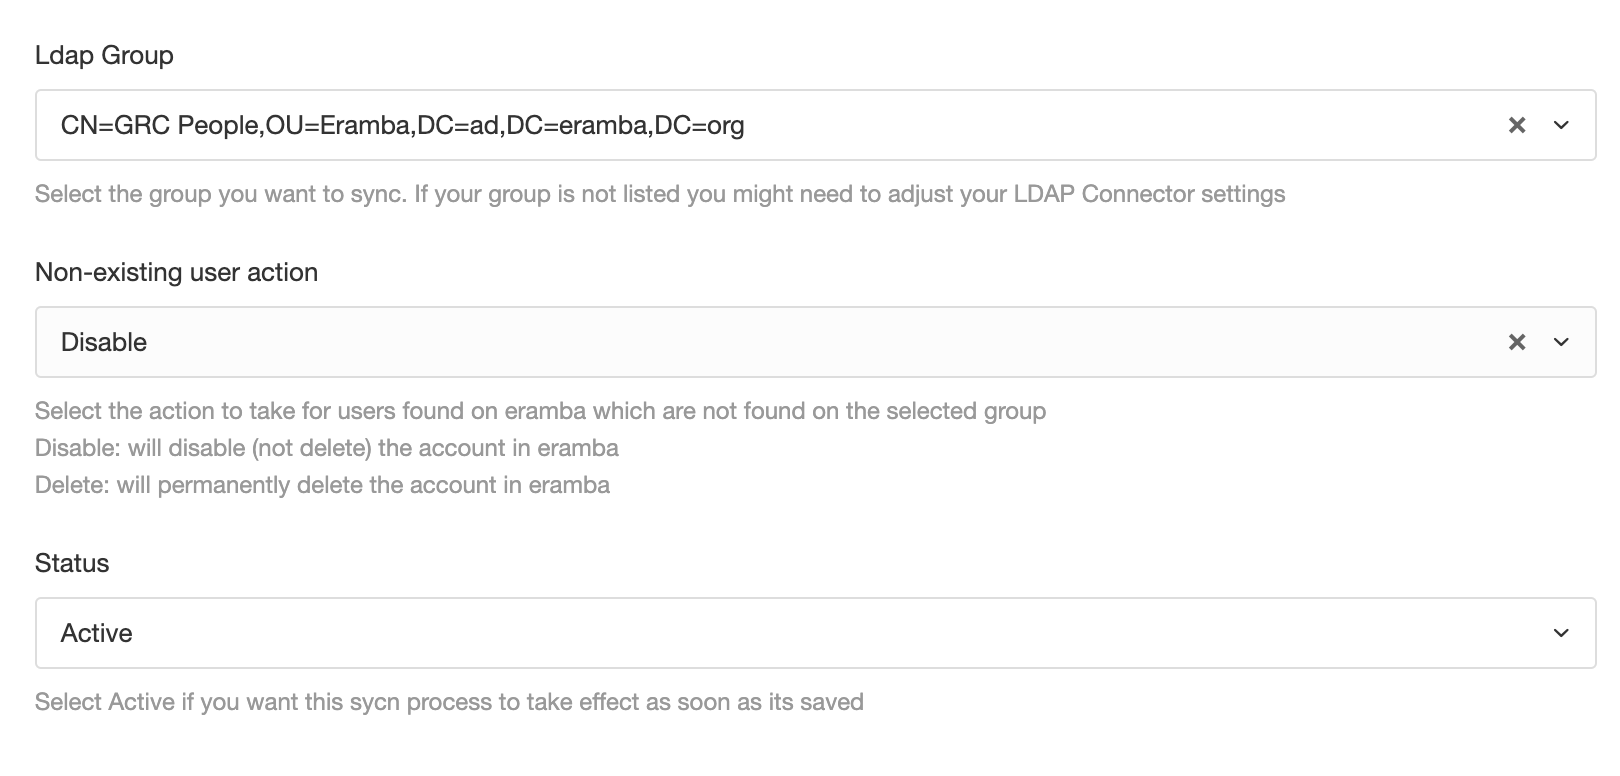
Your options are Disable, Delete and Do Nothing. Disabling will keep the account in eramba but set its status as "Inactive". "Delete" will remove the account all together.
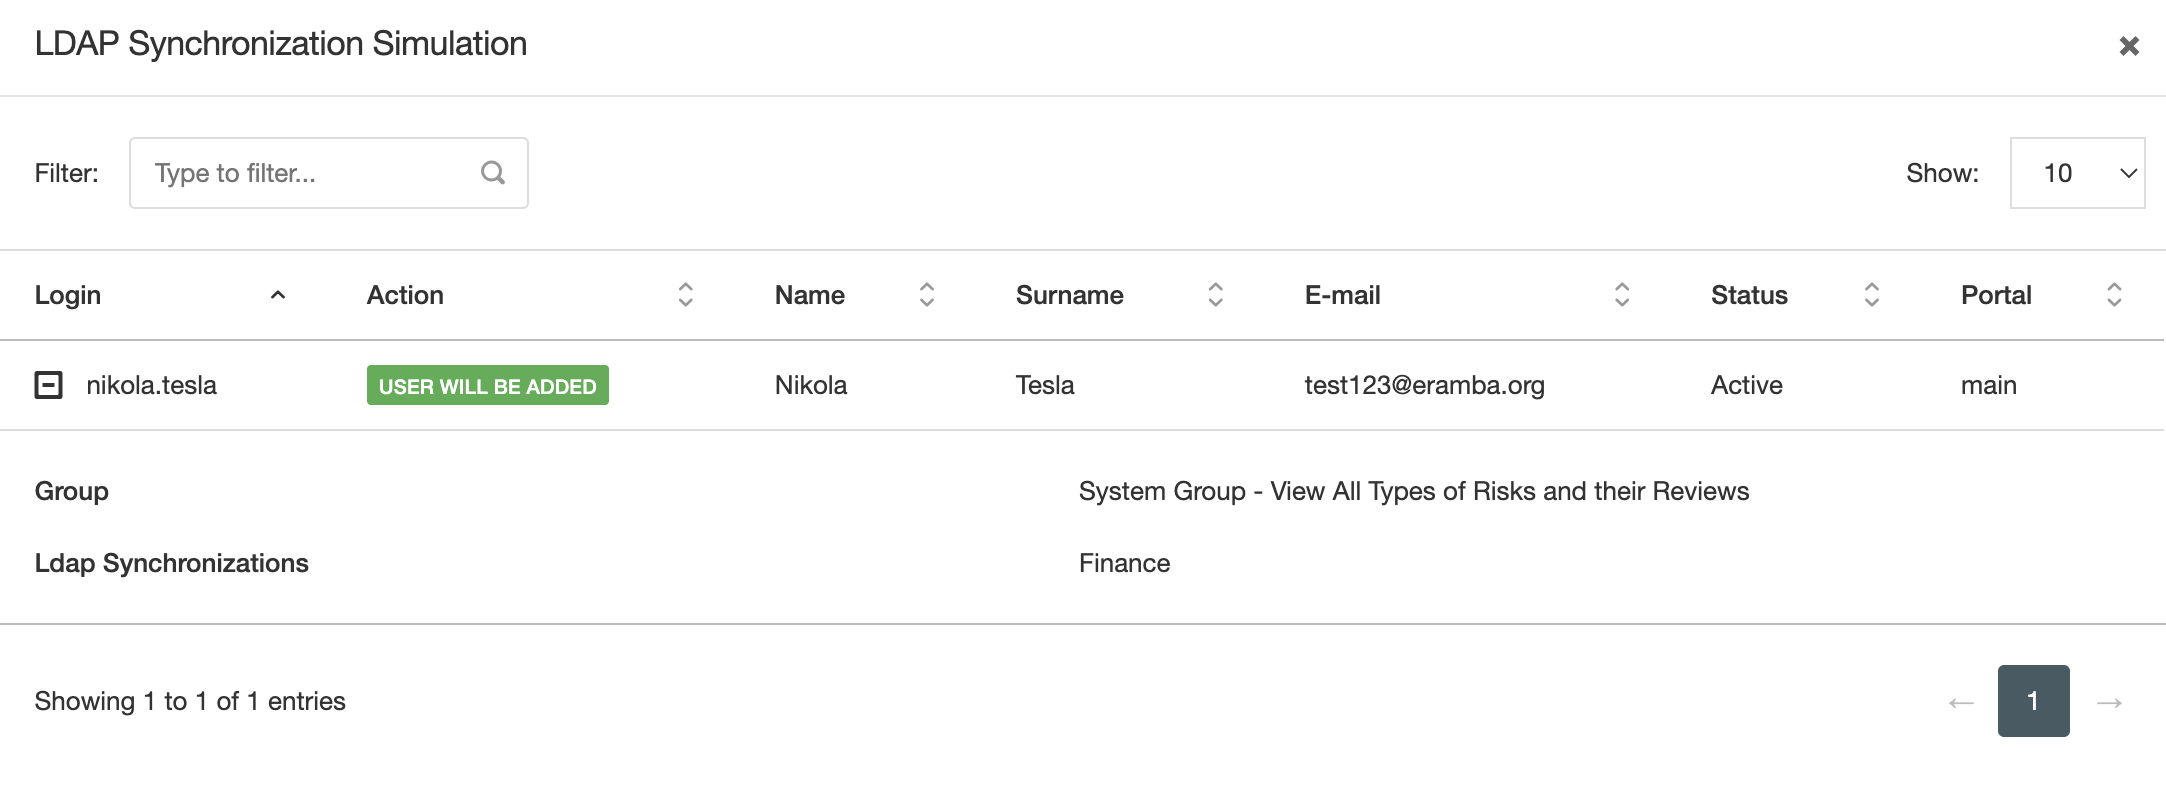
On the second tab select what eramba "Groups" and "Portals" these accounts will be assigned to by default. Once saved the LDAP Syncronisation will be run every hour. To minimise load on the servers accounts will start syncronising in batches. If you do not want to wait you have two options. "Force" will run the syncronisation process immediately. "Simulate" will allow you to see what actions the Sync would take if was actually run, but no accounts will created, deleted, etc.
The LDAP Sync process will show in detail what actions are taken:
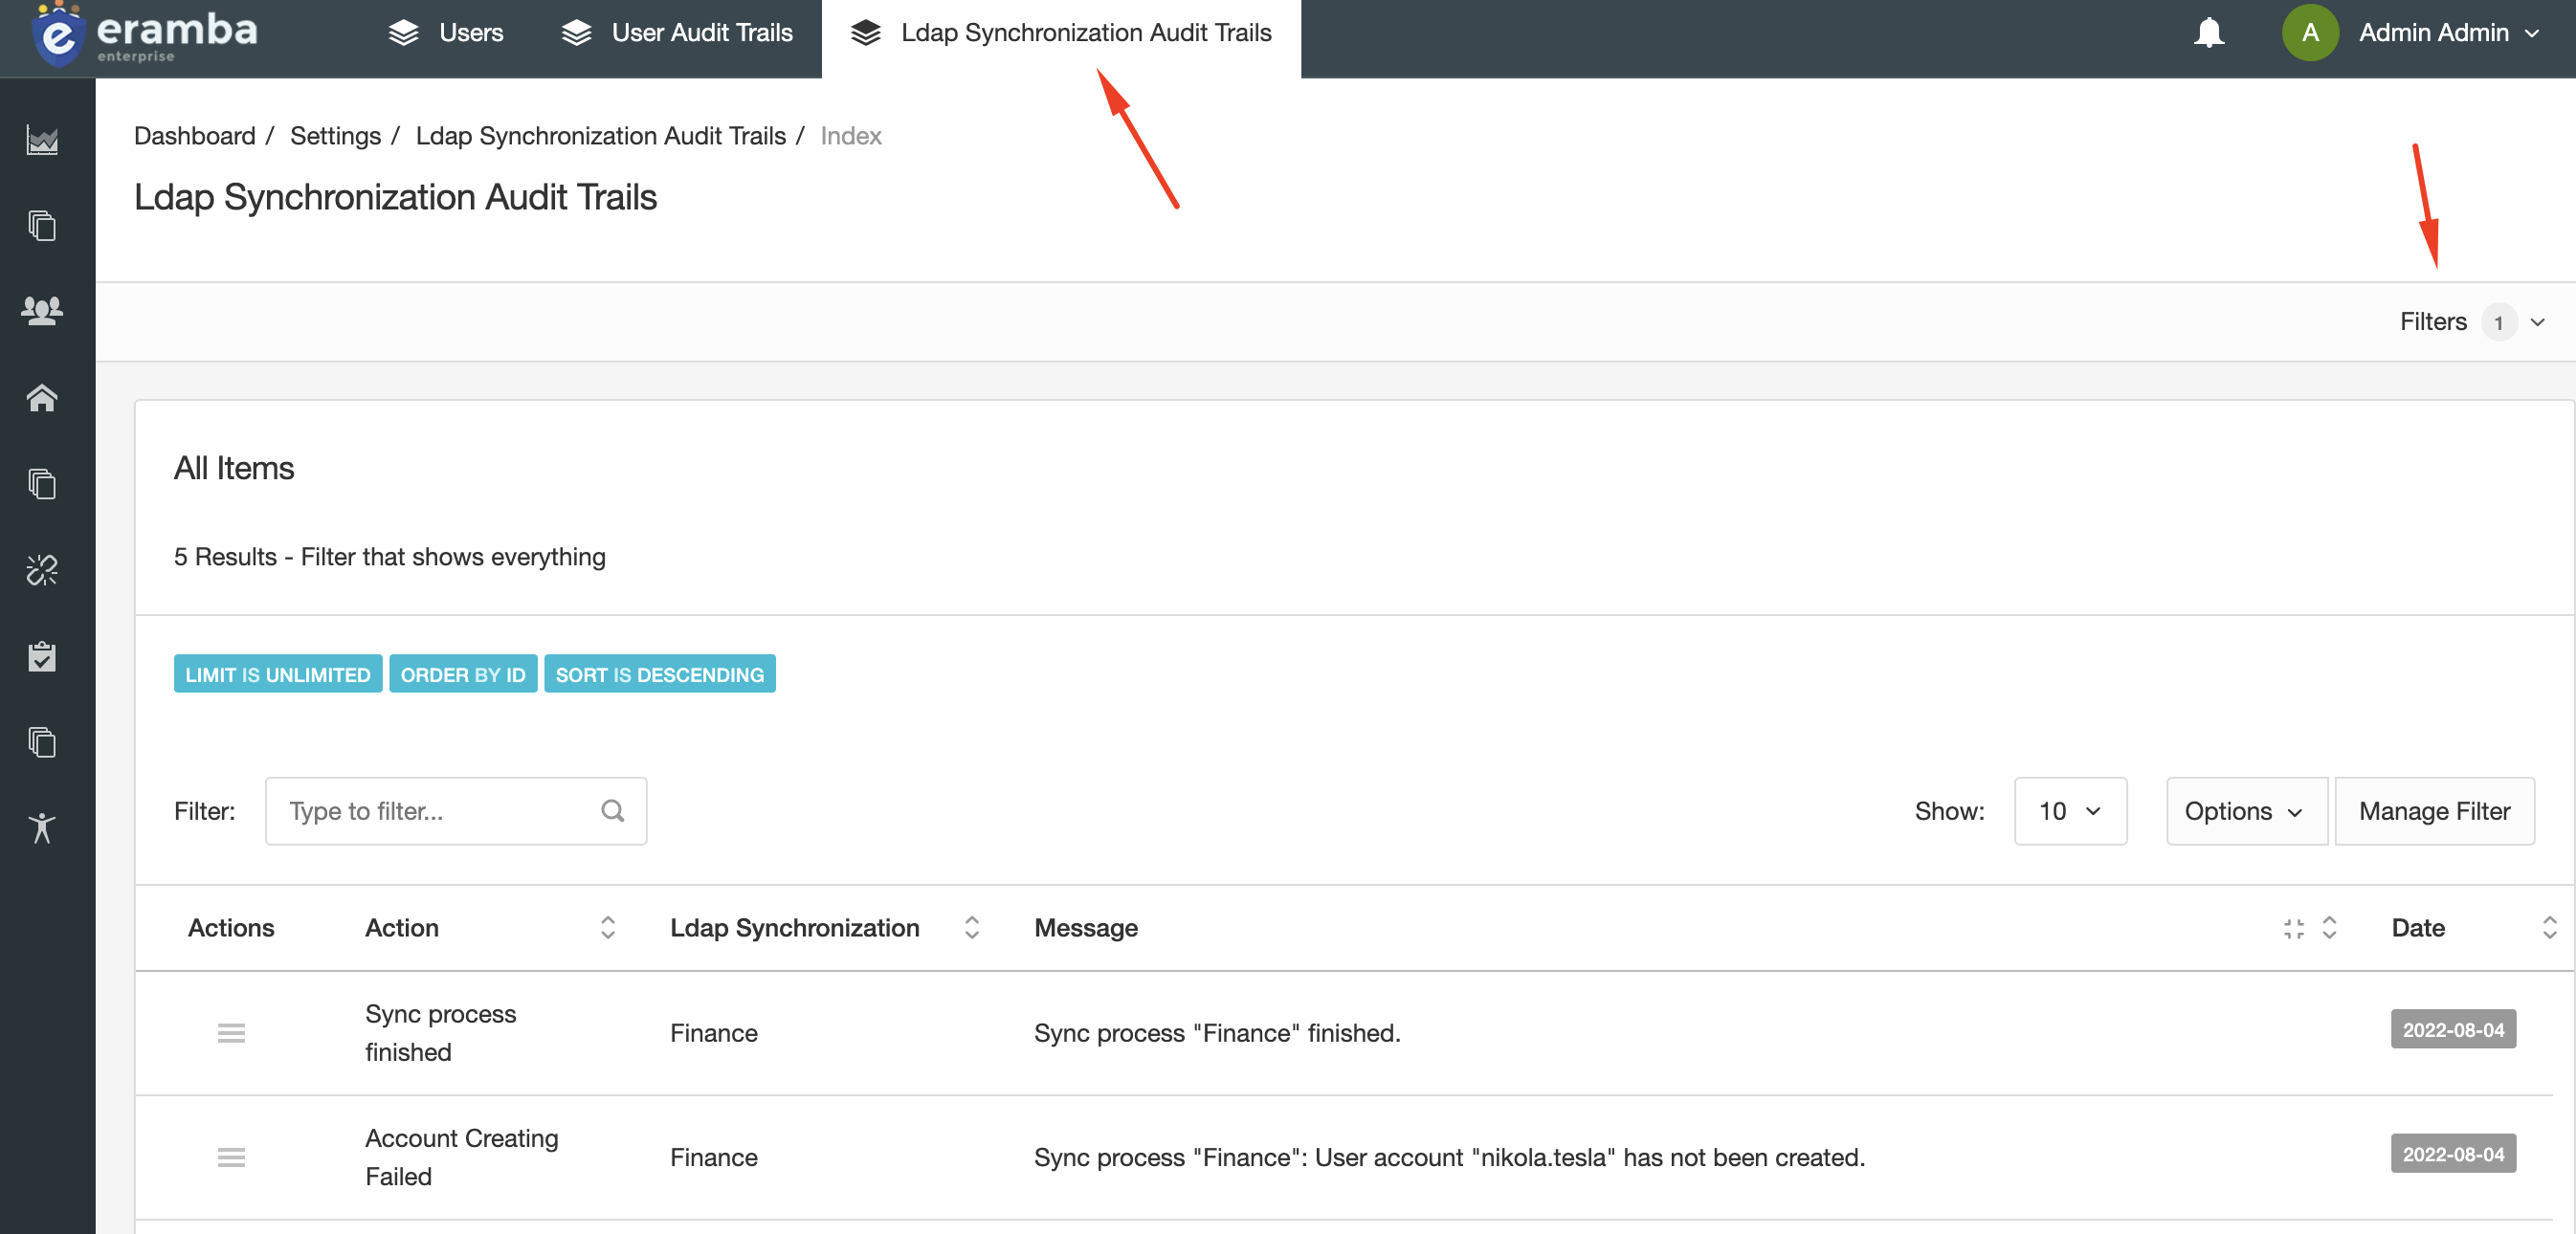
You can see a record of all actions taken by the LDAP Syncronisation process under the top tab "LDAP Syncronisation Audit Trails". You can use Filters to search through the logs.
Playlist
- Episode 1Introduction to Access Management5 mins left
- Episode 2Managing Groups & Access Lists7 mins left
- Episode 3Managing User Accounts4 mins left
- Episode 4Configuring Authentication1 min left
- Episode 5Configuring LDAP Connectors11 mins left
- Episode 6Configuring Google OAuth Connectors1 min left
- Episode 7Configuring SAML Connectors2 mins left