Introduction
Access Management defines how users sign in to eramba, what they can do, and which data they can see. These concepts apply across all modules.
This course is organised into Theory and How-to Guides. Read the Theory section to understand how access works. The implementation guides will tell you which accounts, groups, and permissions to configure and link to the relevant How-to Guides in this course.
Typical Scenarios
Access Management supports common scenarios such as:
- Allowing employees to see only the records relevant to their responsibilities.
- Giving GRC administrators full access across all modules.
- Giving auditors read-only access to all records, regardless of ownership.
- Controlling which modules users can access and which actions they can perform.
- Giving users access to specific portals, such as Policy or Online Assessments.
- Allowing users to sign in through an external identity provider using SAML, LDAP, or Google OAuth.
Supported Versions
Access Management is available in both Community and Enterprise editions, across on-premises and cloud deployments.
Theory
Account Types
Users typically fall into two categories: GRC team and Others. These categories describe their responsibilities, rather than different technical account types.
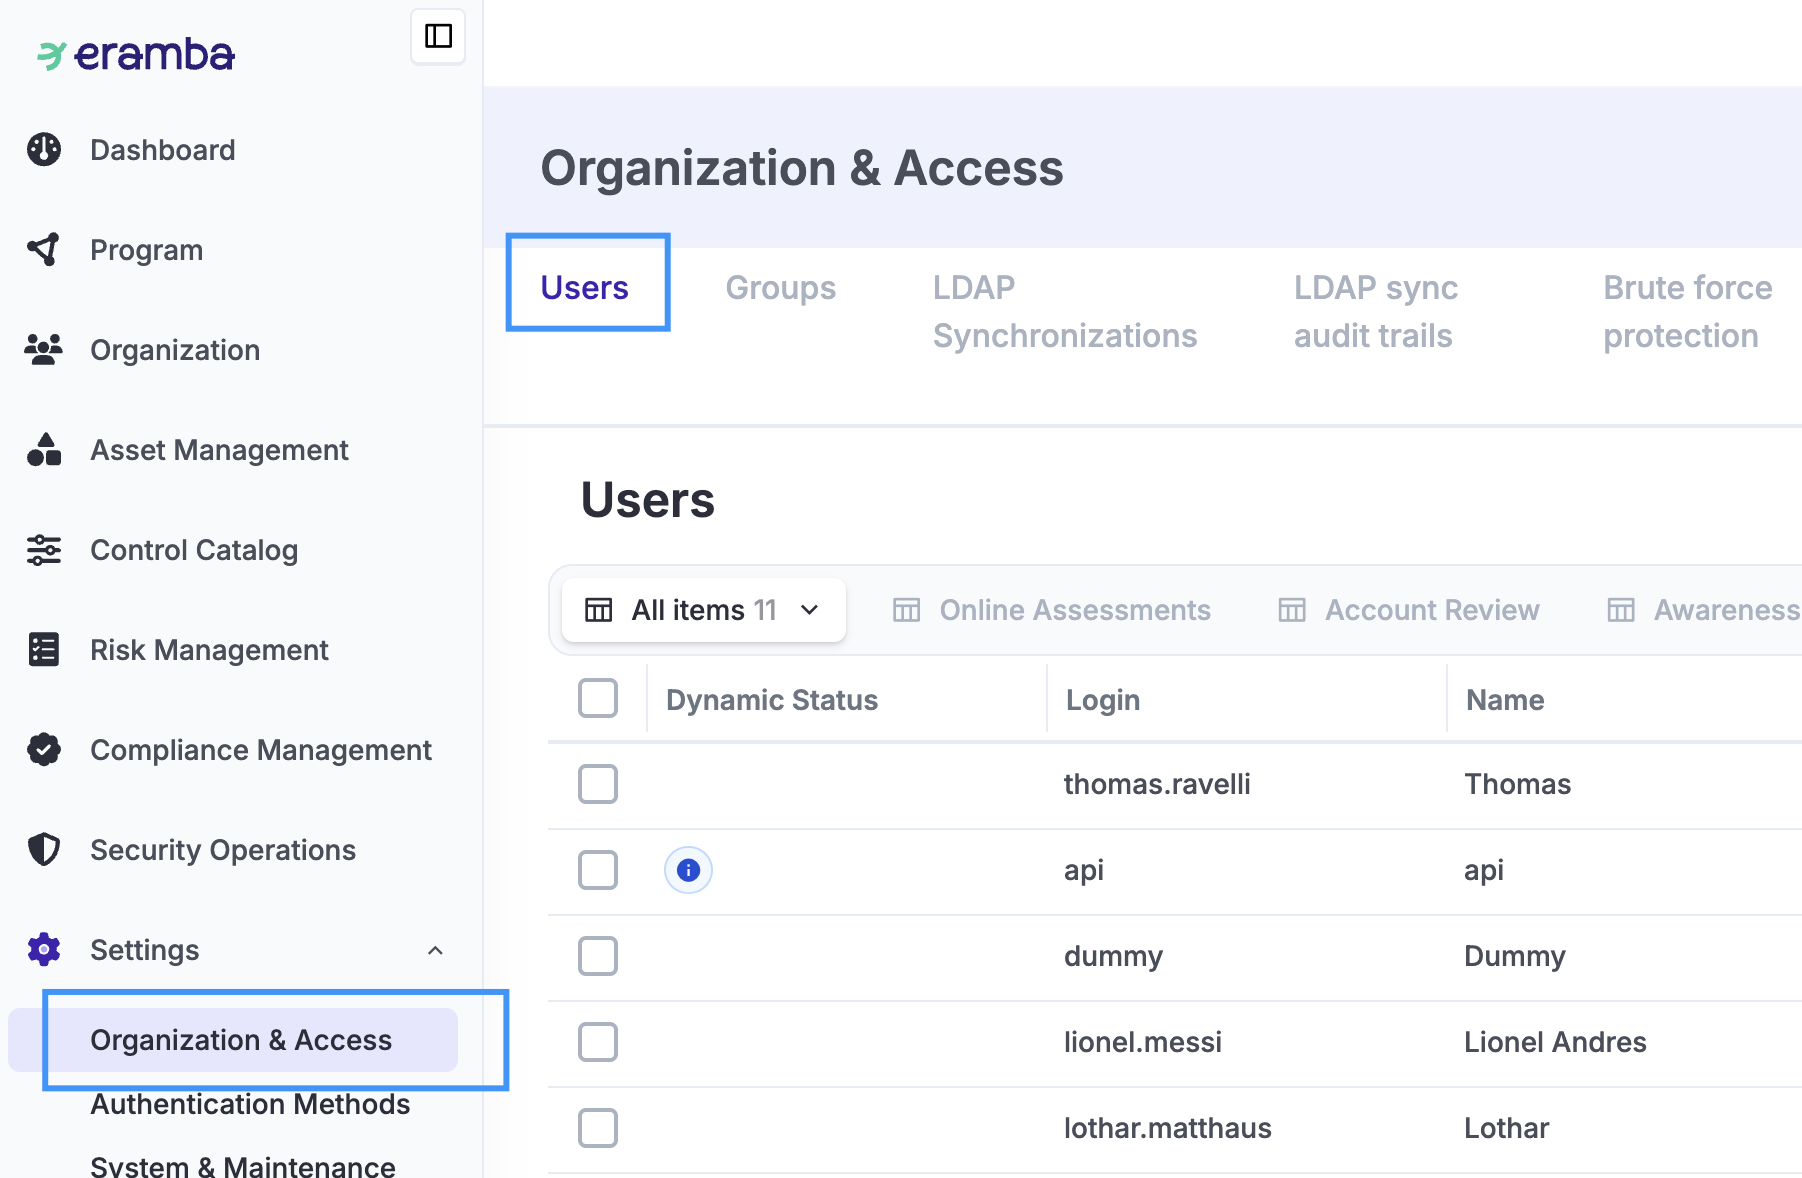
The GRC team, whatever its name in your organisation, manages the GRC programme and maintains information such as risks, controls, and policies.
Others include people from departments such as IT, Human Resources, and Sales, as well as external parties such as suppliers. They contribute information and provide feedback during activities such as control testing, policy reviews, and risk reviews.
These two categories of users exchange feedback throughout the GRC programme. For this reason, most modules include roles for both the GRC team and the people responsible for the item or activity.
See vs. Click
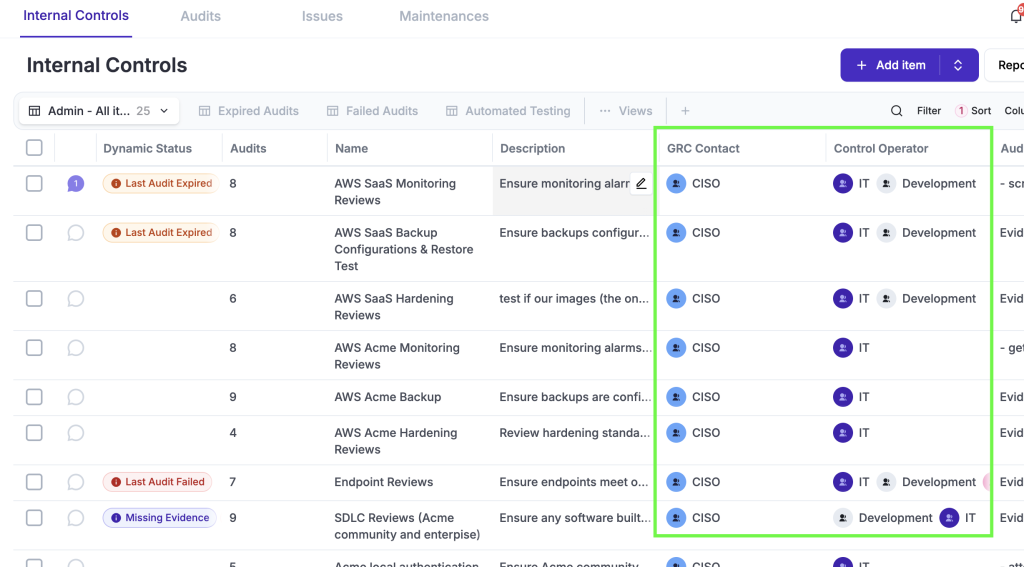
When configuring a user’s access to eramba, you control two aspects: what they can do and what they can see.
- What they can do, or where they can “click,” determines which modules and actions they can access—for example, whether they can open a module, add an item, or edit an existing item.
- What they can see determines which records are visible to them after they access a module. For example, permission to access the Risk module does not necessarily allow a user to see every risk. By default, users see only the items related to them, so assigning the correct groups to each item is essential.
Groups
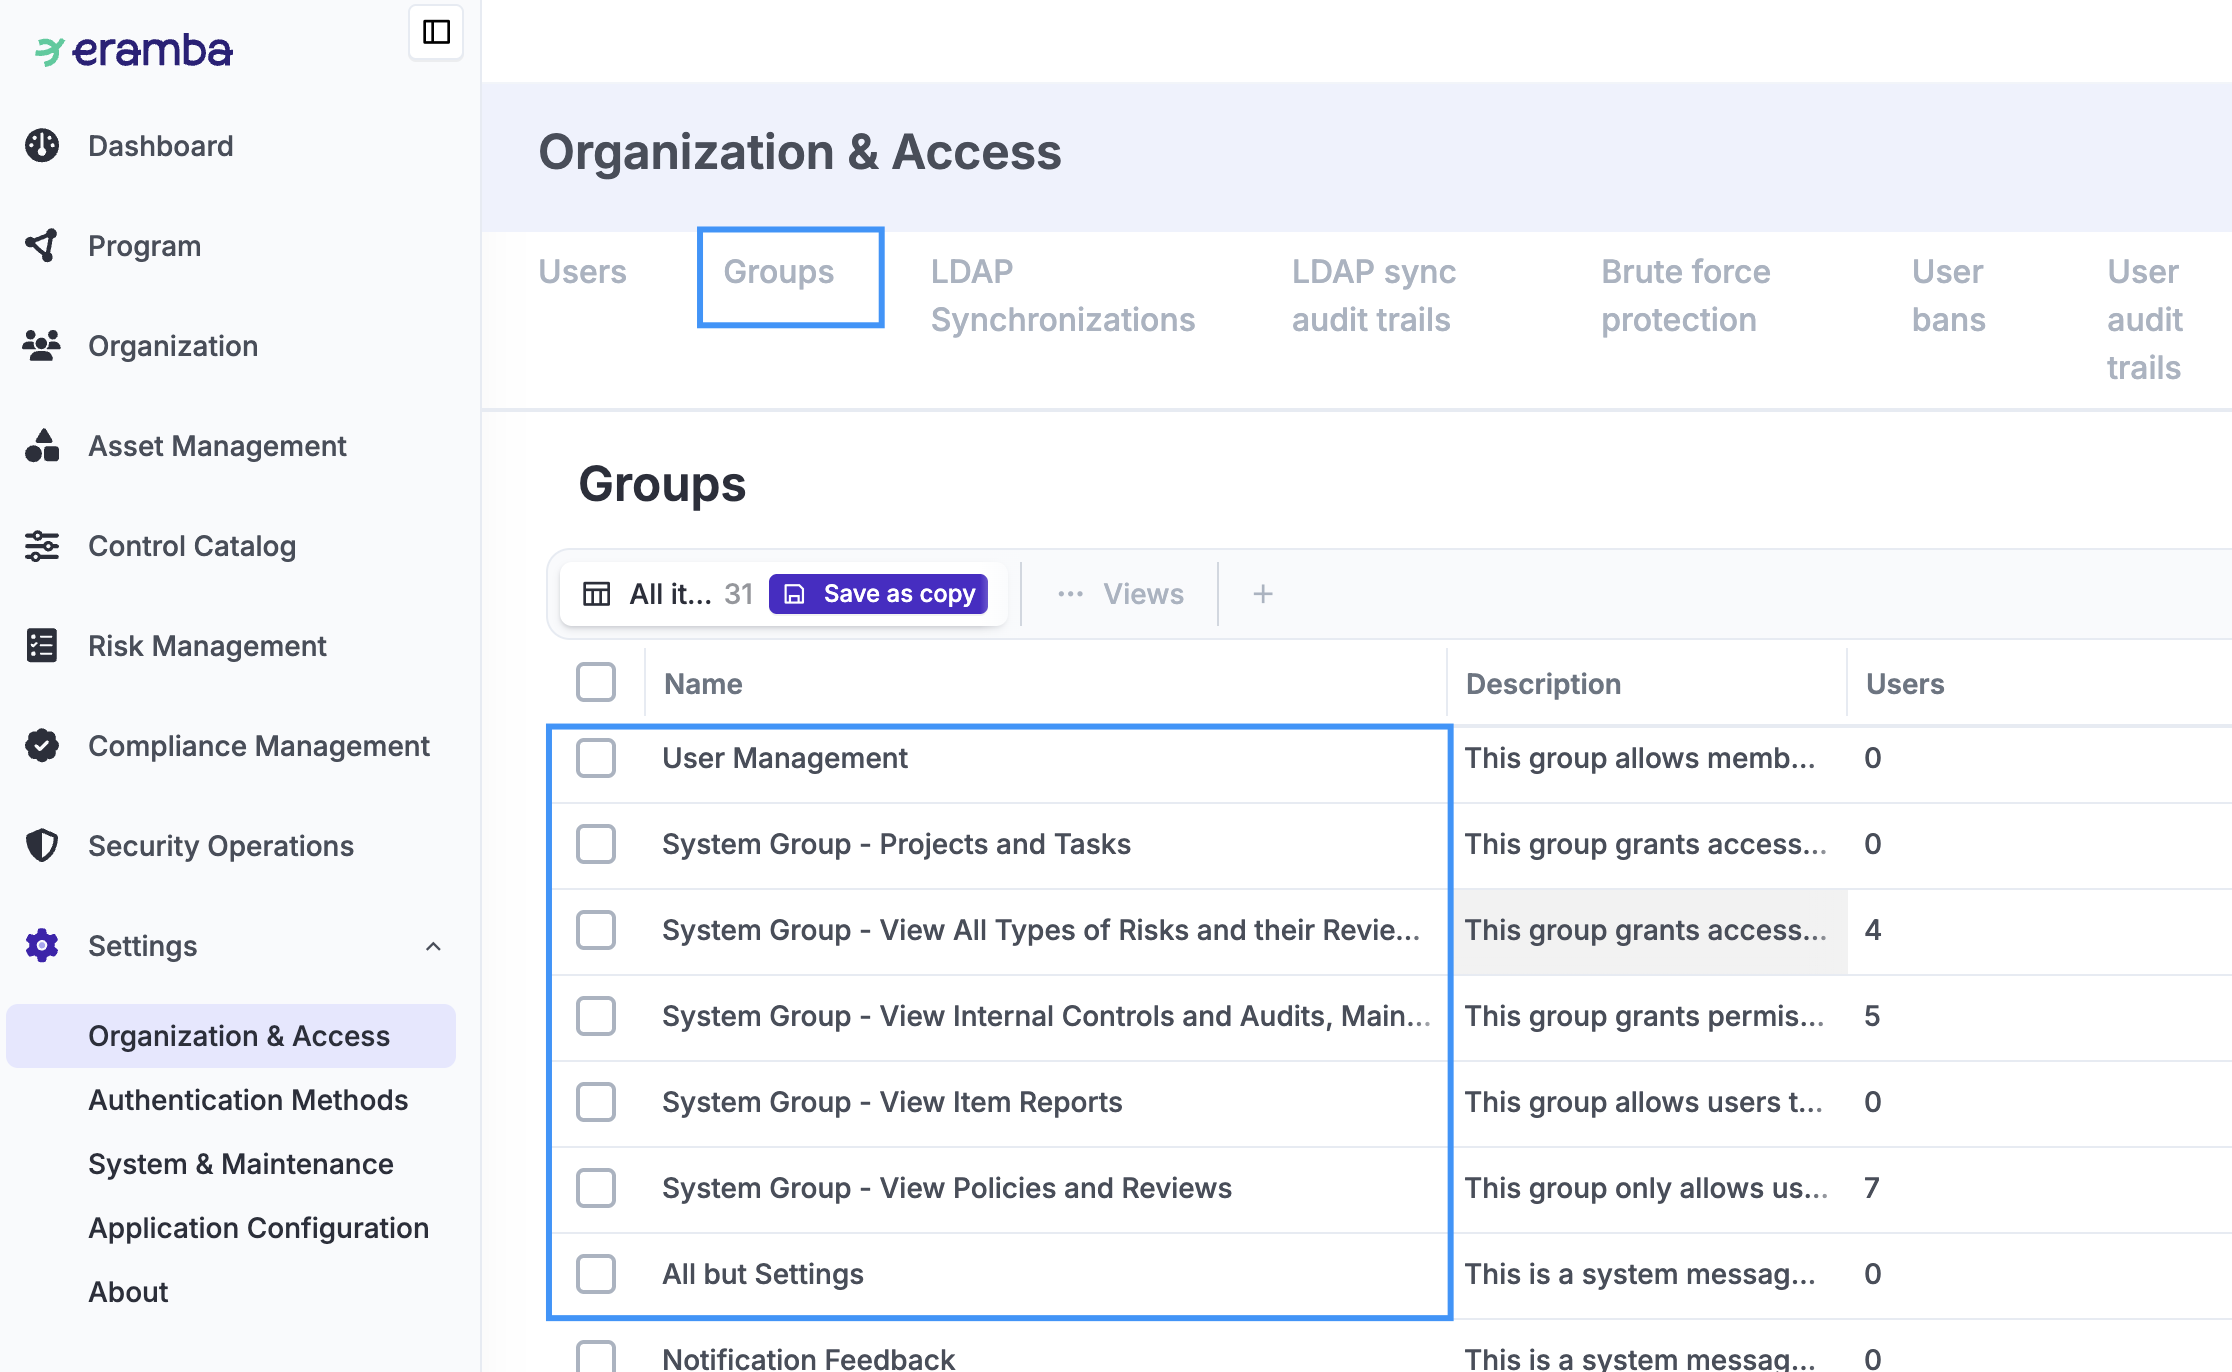
Groups control what users can see and where they can click in eramba. They are managed under Settings → Organization & Access → Groups.
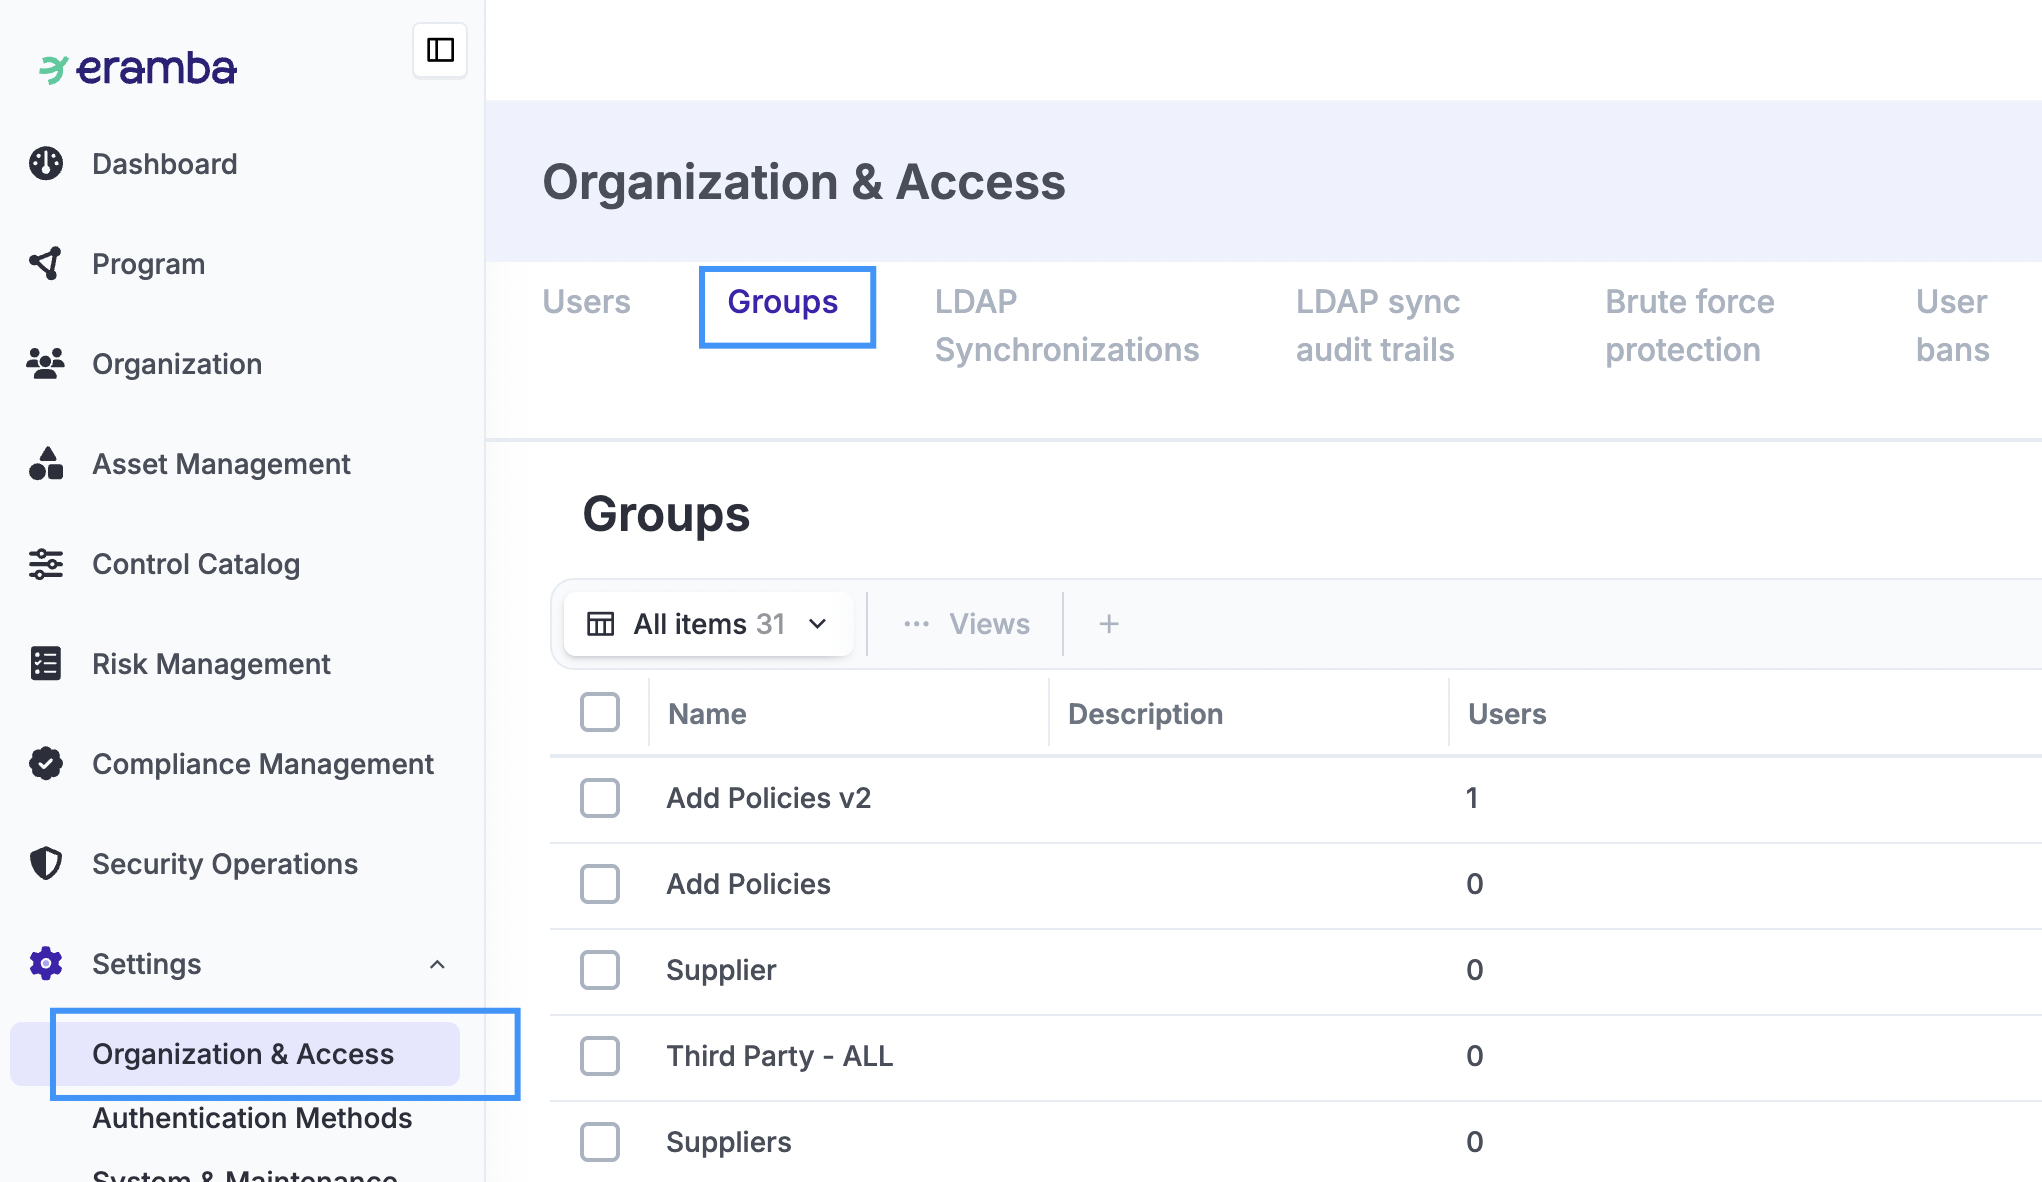
Every account needs at least two groups: a Department group, which identifies where the person works and therefore which items they can see, and a Permission group, which defines which modules and actions they can access. An account can belong to several groups of each kind.
Department Groups
Department groups represent teams such as GRC, IT, Human Resources, or Sales. They can also represent responsibilities that span departments, such as board membership or CISO or CTO.
When creating items such as controls, policies, or risks, assign them to the responsible department groups. Each group typically contains one or two representatives who maintain the information or provide feedback during activities such as control testing, policy reviews, and risk reviews.
Create department groups only for teams that will have items assigned to them. You do not need to reproduce your entire organisational chart.
As a planning estimate, you will typically need around two user accounts per department group. For example, five department groups would require approximately ten accounts. The actual number depends on how many people represent each department; someone who belongs to multiple groups needs only one account.
Assigning items to groups makes maintenance easier. When someone leaves or responsibilities change, update the group’s membership instead of reassigning every item.
Permission Groups
Permission groups define where users can click—for example, whether they can access policies, edit risks, or add comments.
eramba includes many predefined permission groups that act as templates for common access needs. You can assign several of these groups to an account to provide the required permissions. Your implementation guide specifies which groups to use.
On top of the pre-defined permissions groups that ship with eramba, you can create your own Permission Groups with permissions defined by you.
Group Names
Department and permission groups are the same type of group in eramba. The system does not distinguish them as separate group types; their names identify their intended purpose.
Use clear, consistent names. For example, IT Team identifies a department group, while Access Policy Module (Read Only) describes the access granted by a permission group.
Example: Mary and John
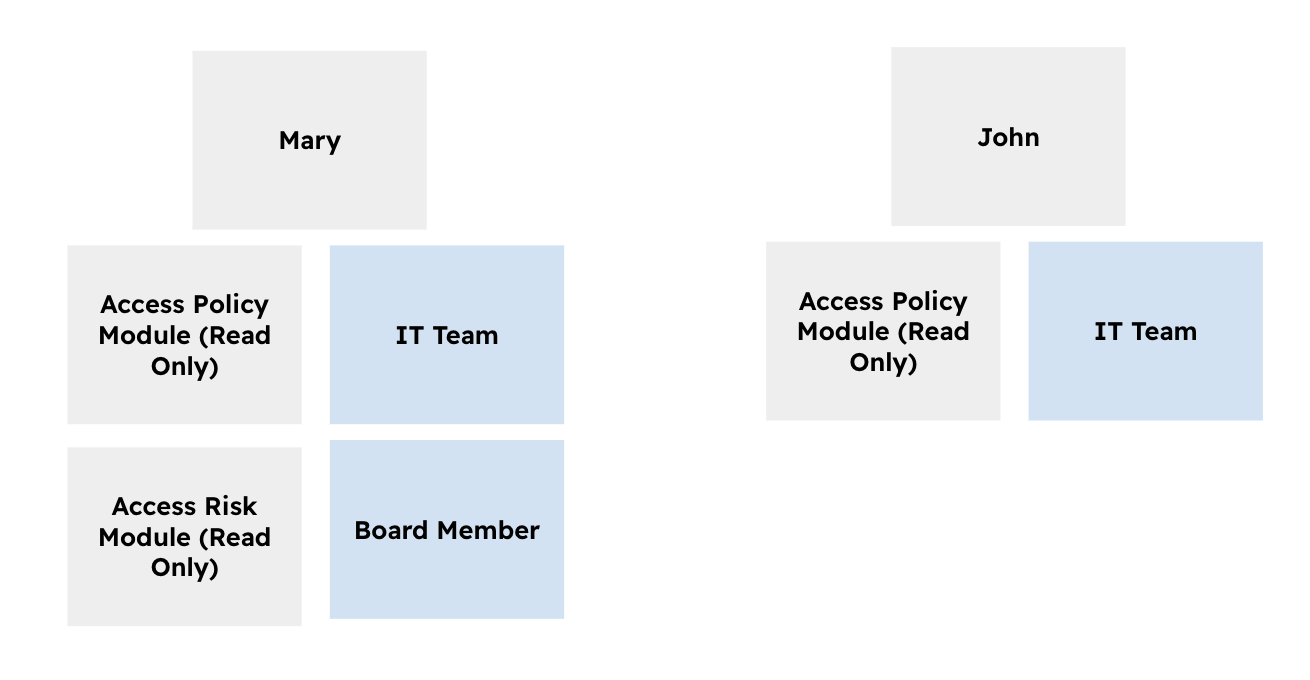
In the diagram, the blue boxes represent department groups, and the grey boxes beneath each user represent permission groups.
Mary belongs to four groups. Her department groups are IT Team and Board Member. Her permission groups grant read-only access to the Policy and Risk modules. Under the default visibility rules, she can view policies and risks assigned to either of her department groups, but these permissions do not allow her to edit them.
John belongs to two groups. His department group is IT Team, and his permission group grants read-only access to the Policy module. He can view policies assigned to IT. These groups do not grant him access to the Risk module or to policies assigned only to the Board Member group.
The example shows how both kinds of group work together: permission groups grant access to modules and actions, while department groups connect users to the items they can see.
Visualize Data
By default, users can see only items assigned to their department groups, provided they have permission to access the module.
When creating an item, assign groups to its role fields. Typically, GRC Contact identifies the GRC team, while another role, such as Policy Reviewer or Control Operator, identifies the department providing feedback.
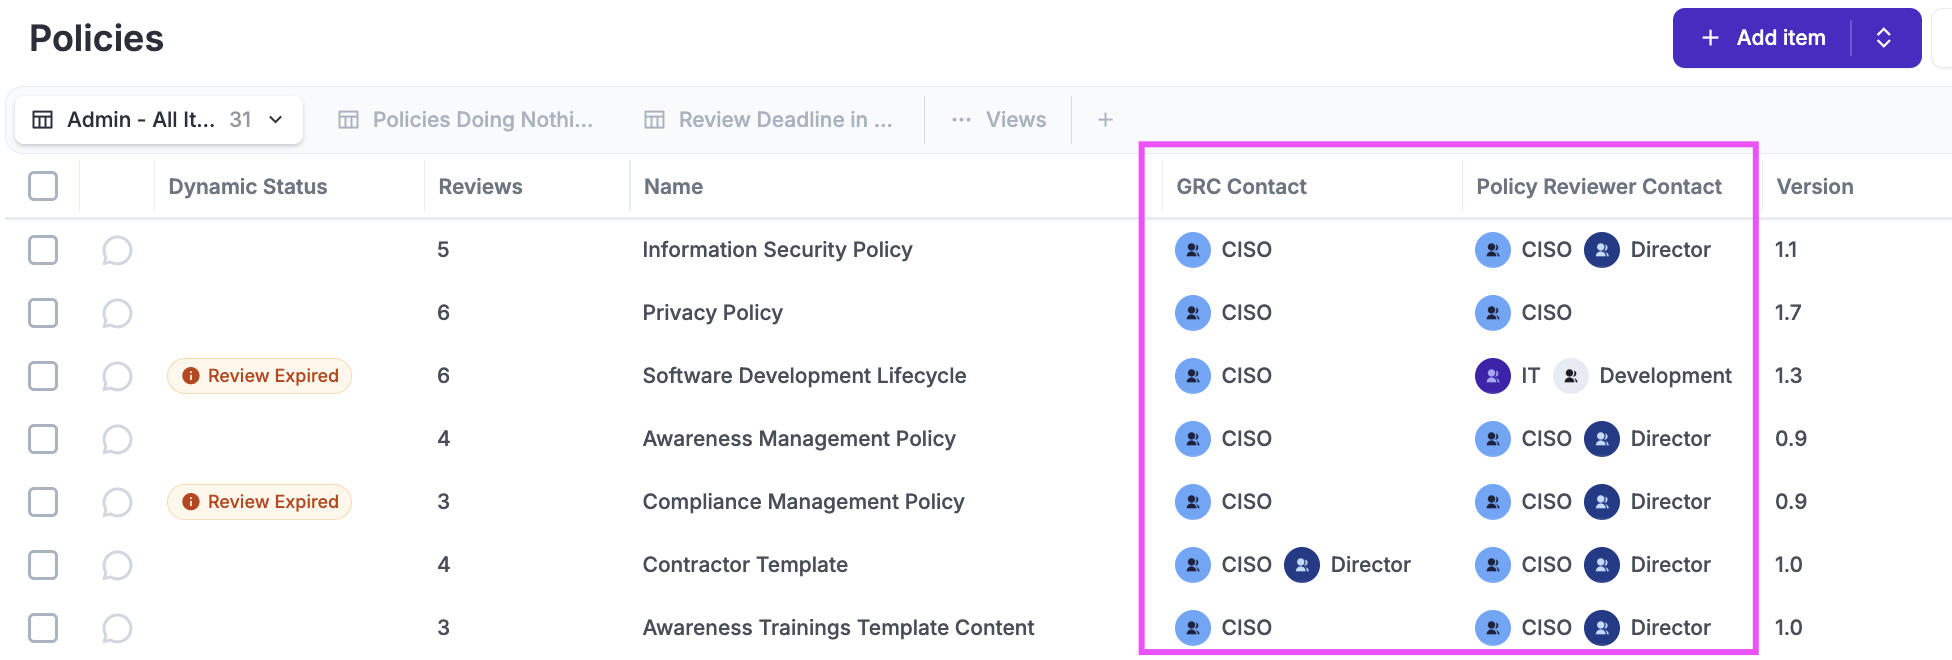
For example, a policy assigned to GRC and IT Team is visible to members of those groups. A user belonging only to Human Resources will not see it.
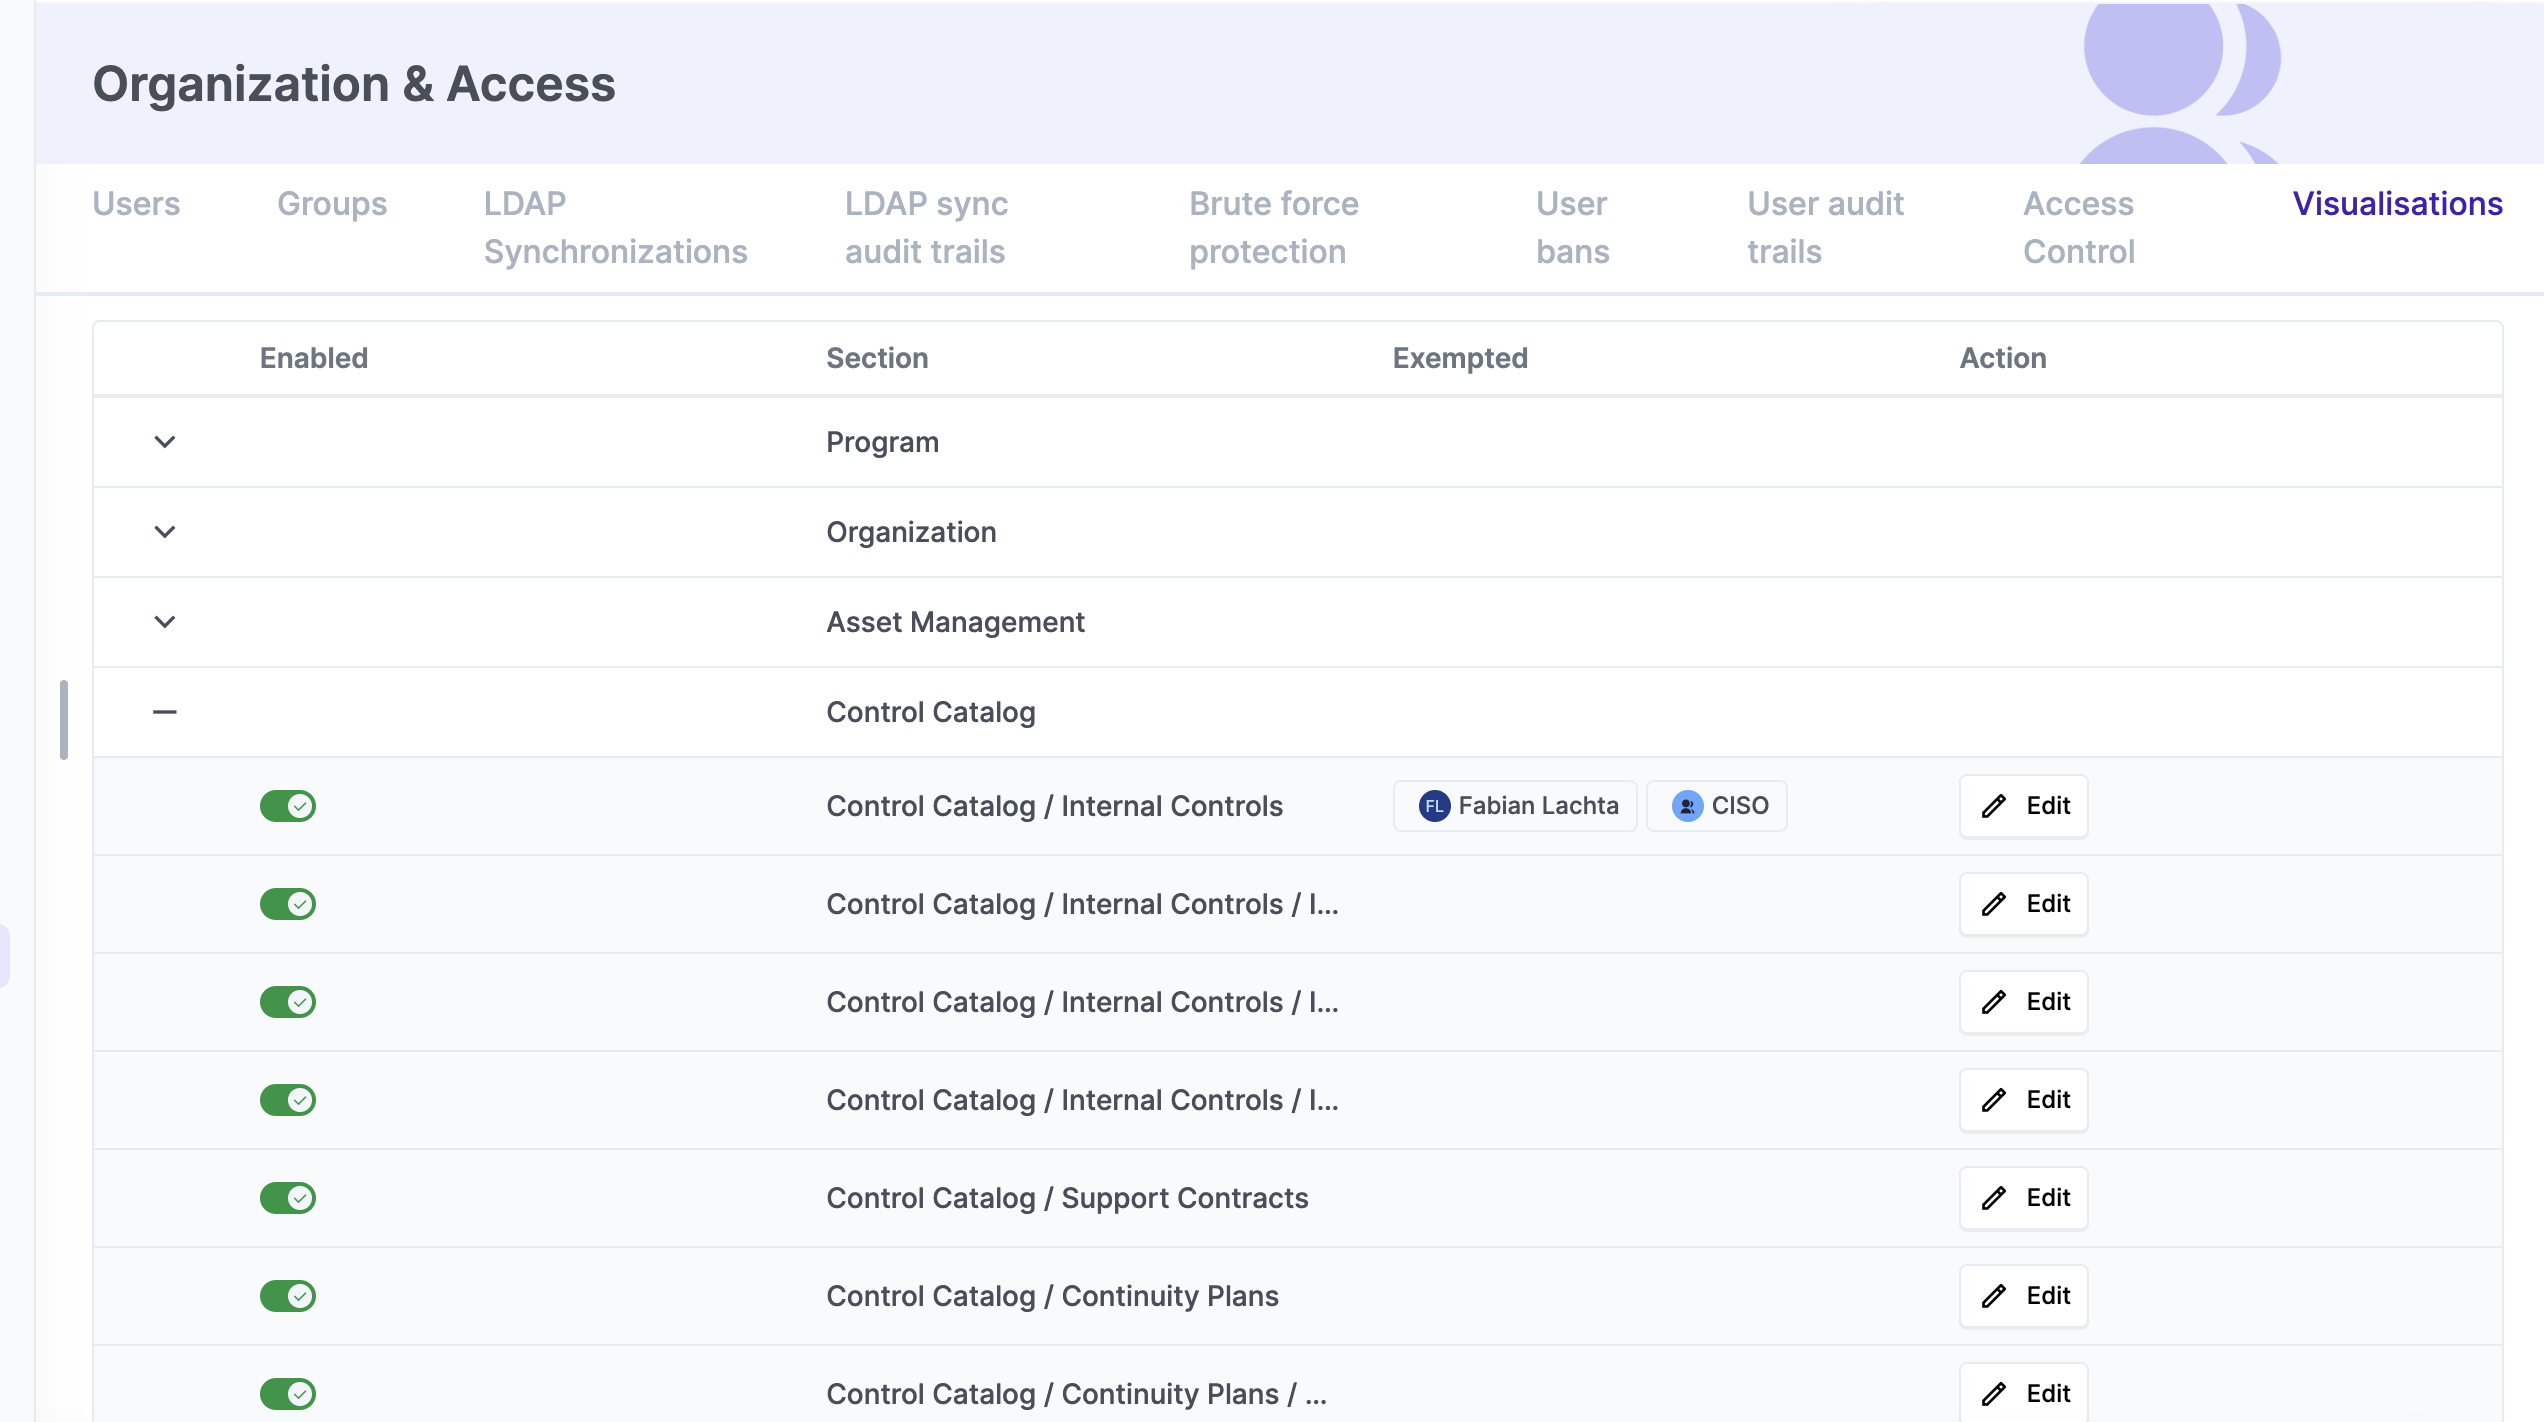
Members of the Admin group can see all items. To let other users or groups see all items in a specific module, configure an exemption under System → Organization & Access → Visualizations. This is useful for auditors: the exemption lets them see all records, while their permission groups determine what actions they can perform.
Control Feature Access
Permission groups define where users can click: which modules they can access and which actions they can perform, such as viewing, creating, editing, or deleting items.
eramba includes predefined permission groups for common needs. Use these wherever possible.
New groups have all permissions switched off by default. To review or configure them, go to System → Organization & Access → Access Controls, select the group, and enable the required modules and actions. Leave permissions switched off for department groups and use permission groups to grant access to features.
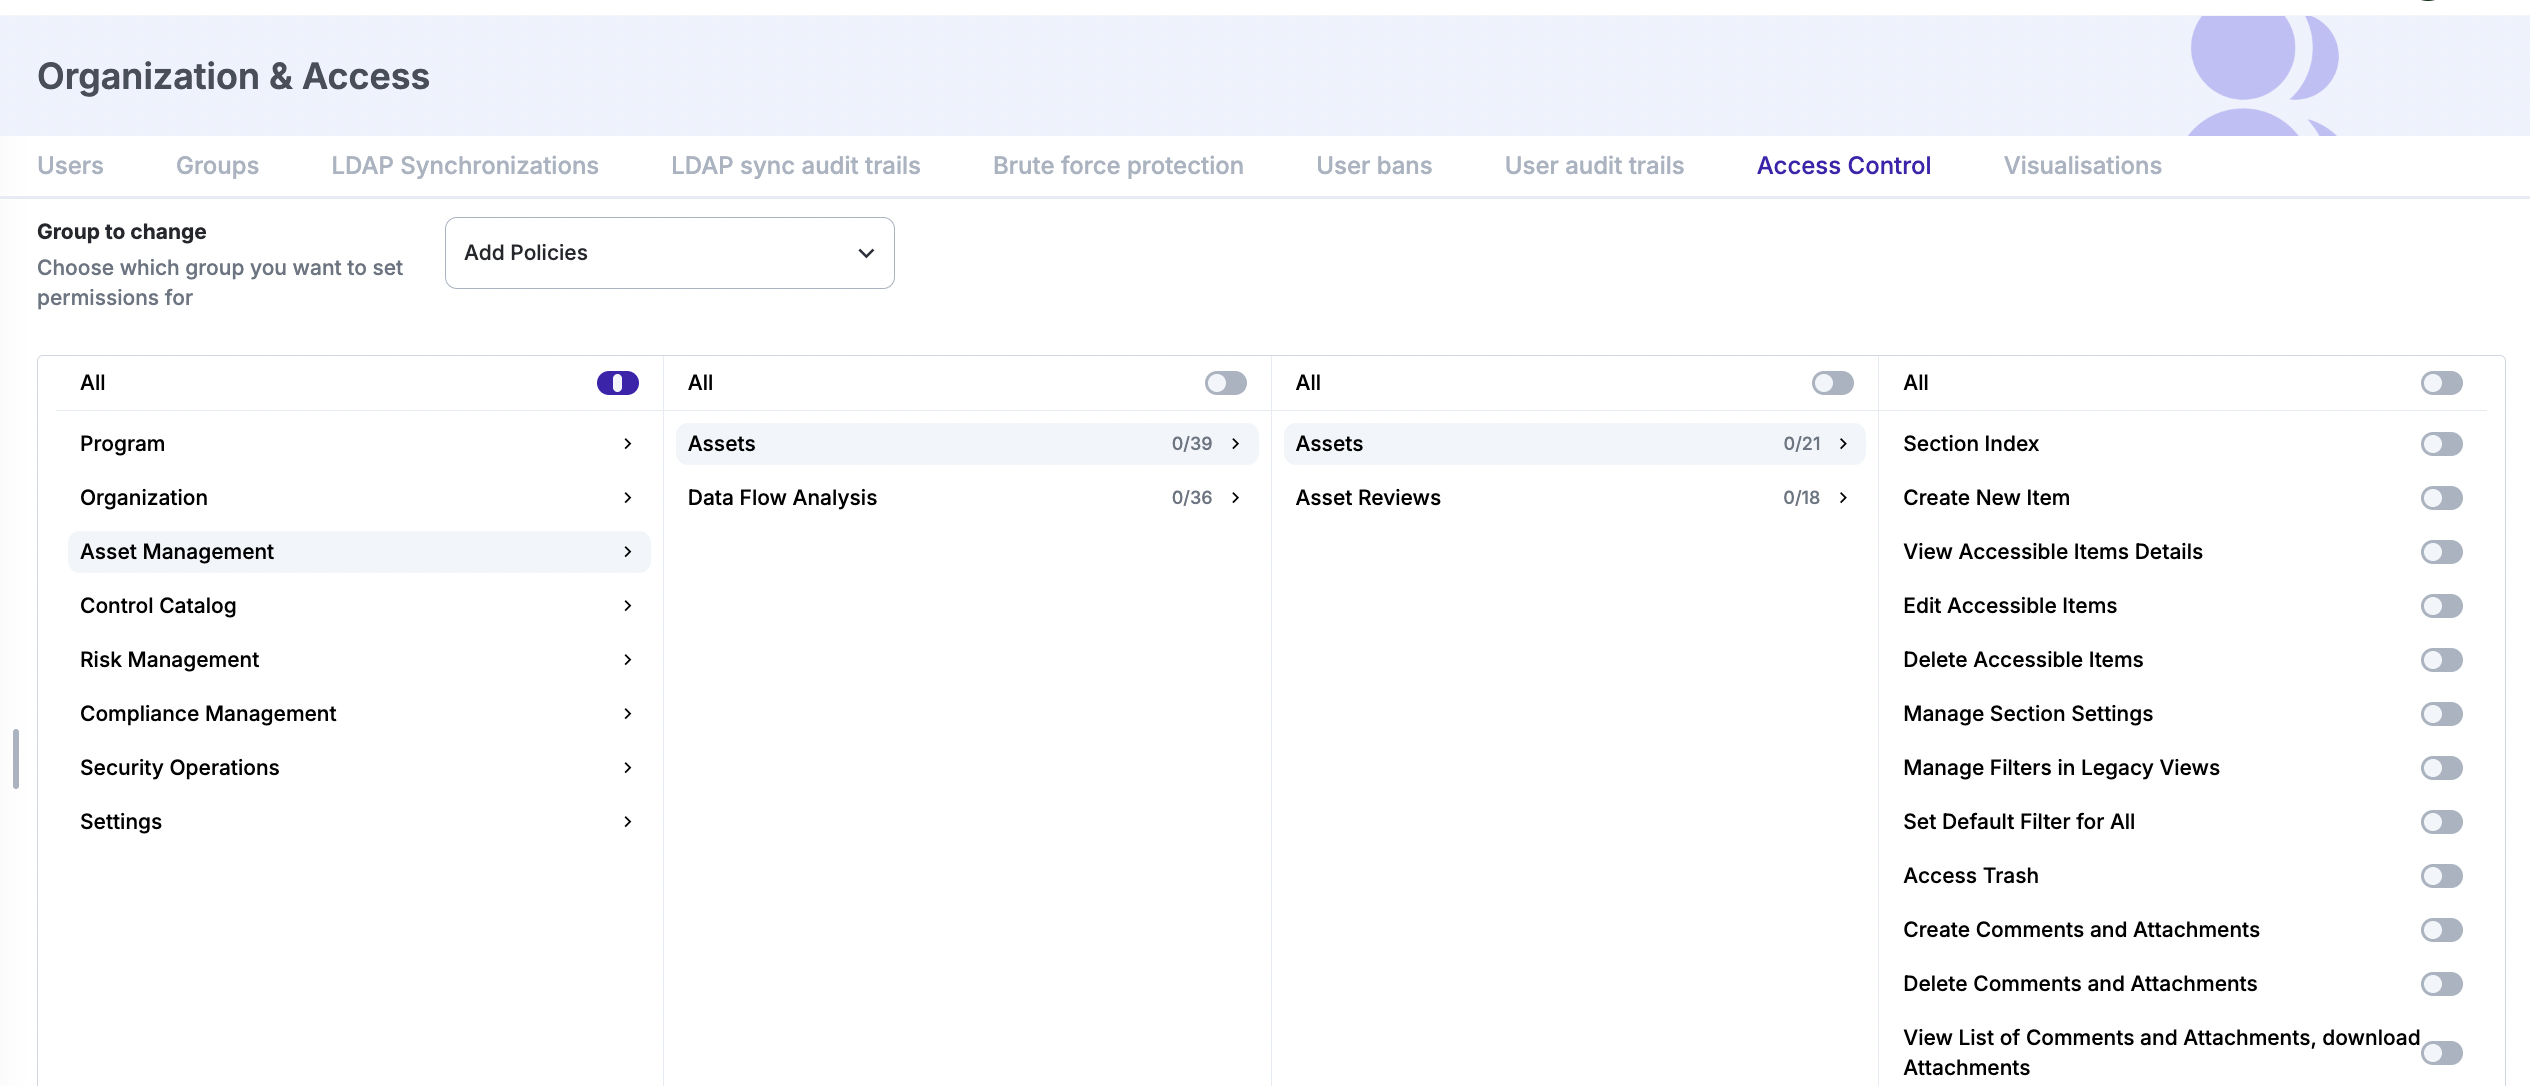
A user receives the combined permissions granted by all their groups. If one group allows an action and another does not, the user can still perform it. A permission switched off in one group does not cancel a permission granted by another.
For example, Mary’s permission groups allow her to view both policies and risks, while John’s allow him to view policies only. Their department groups determine which items they can see within those modules.
Portals
Portals are separate entry points to eramba for specific activities, such as reviewing policies, completing awareness programmes, or responding to online assessments. Each portal has its own login page. By default, only the Main portal is enabled.
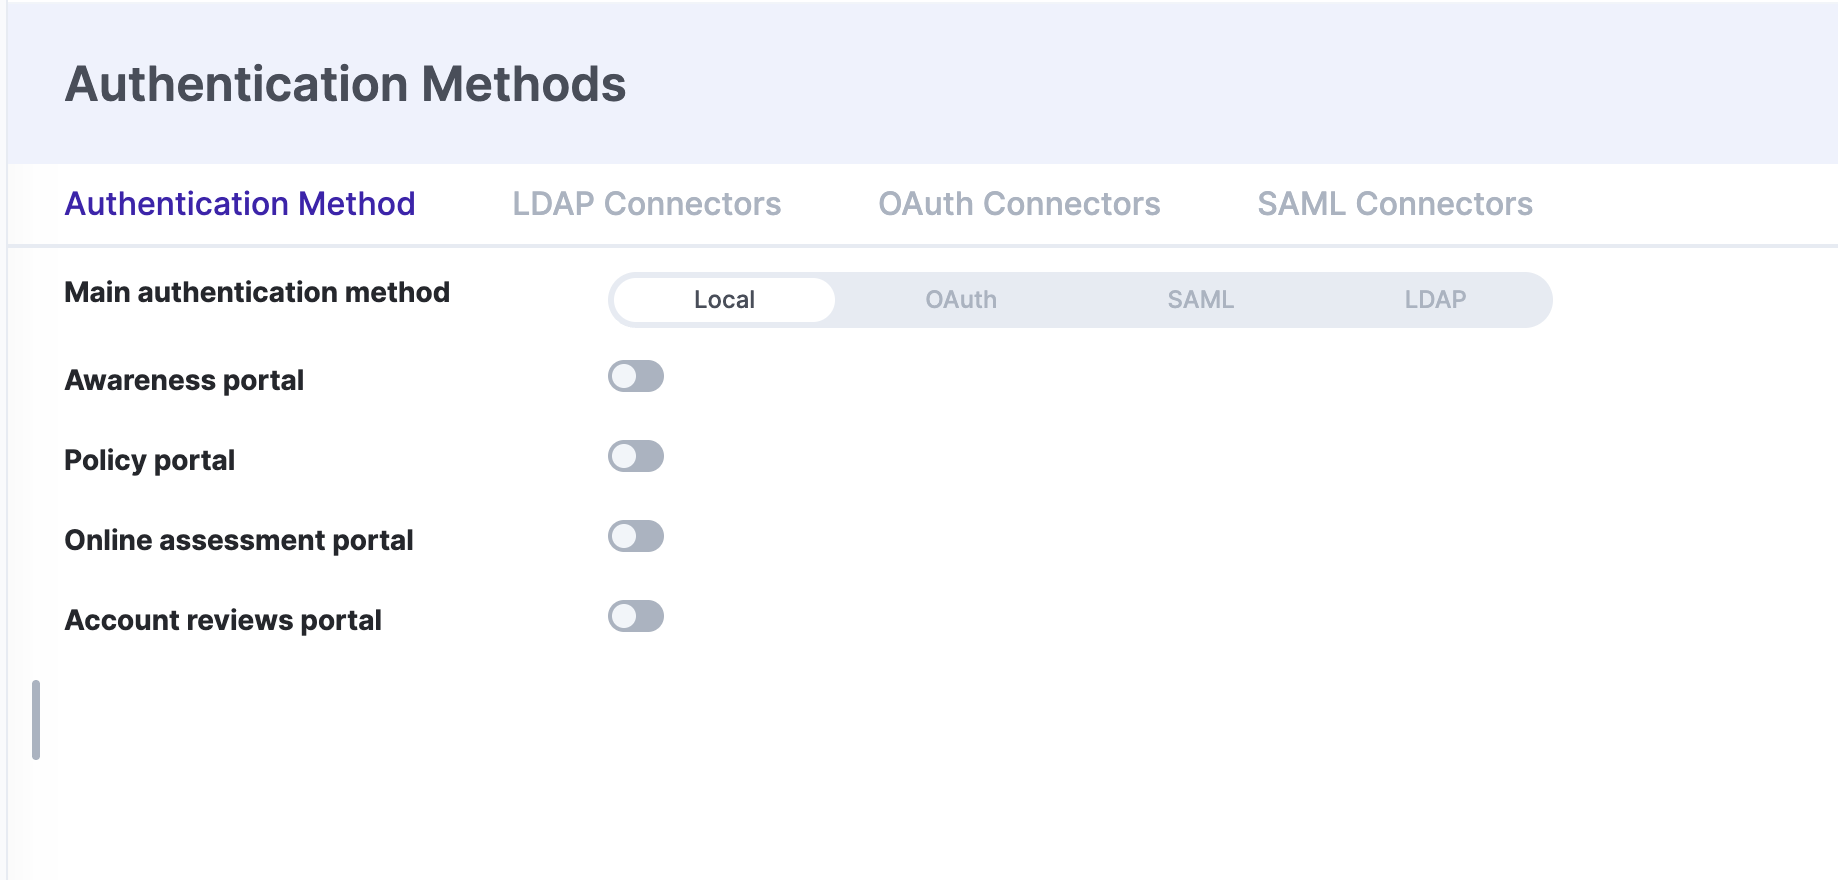
Enable the portals you need under Settings → Authentication Methods → Authentication Methods. Enabled portals inherit the authentication method configured for the Main portal.
When creating or editing a user account, select which portals that person can access. For example, a supplier responding to a questionnaire may need access only to the Online Assessments portal, while a GRC team member needs the Main portal to manage the assessment.
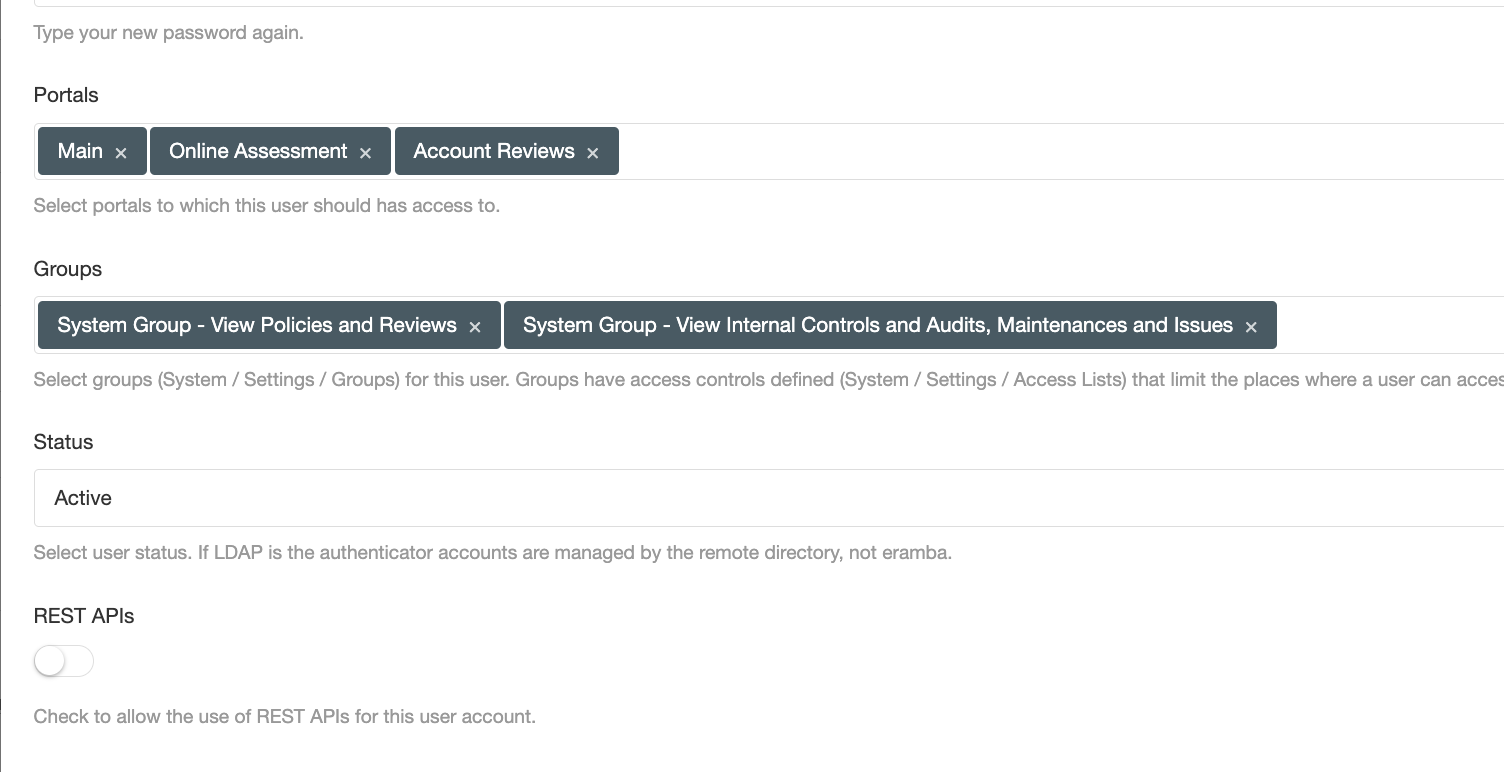
Portal access determines which portals a user can enter. It works alongside group permissions and data visibility to control their access. Your implementation guide specifies which portals to enable and assign.
Authentication
Authentication determines how users sign in to eramba. Accounts can authenticate locally, using a password managed in eramba, or remotely, through an external identity provider.
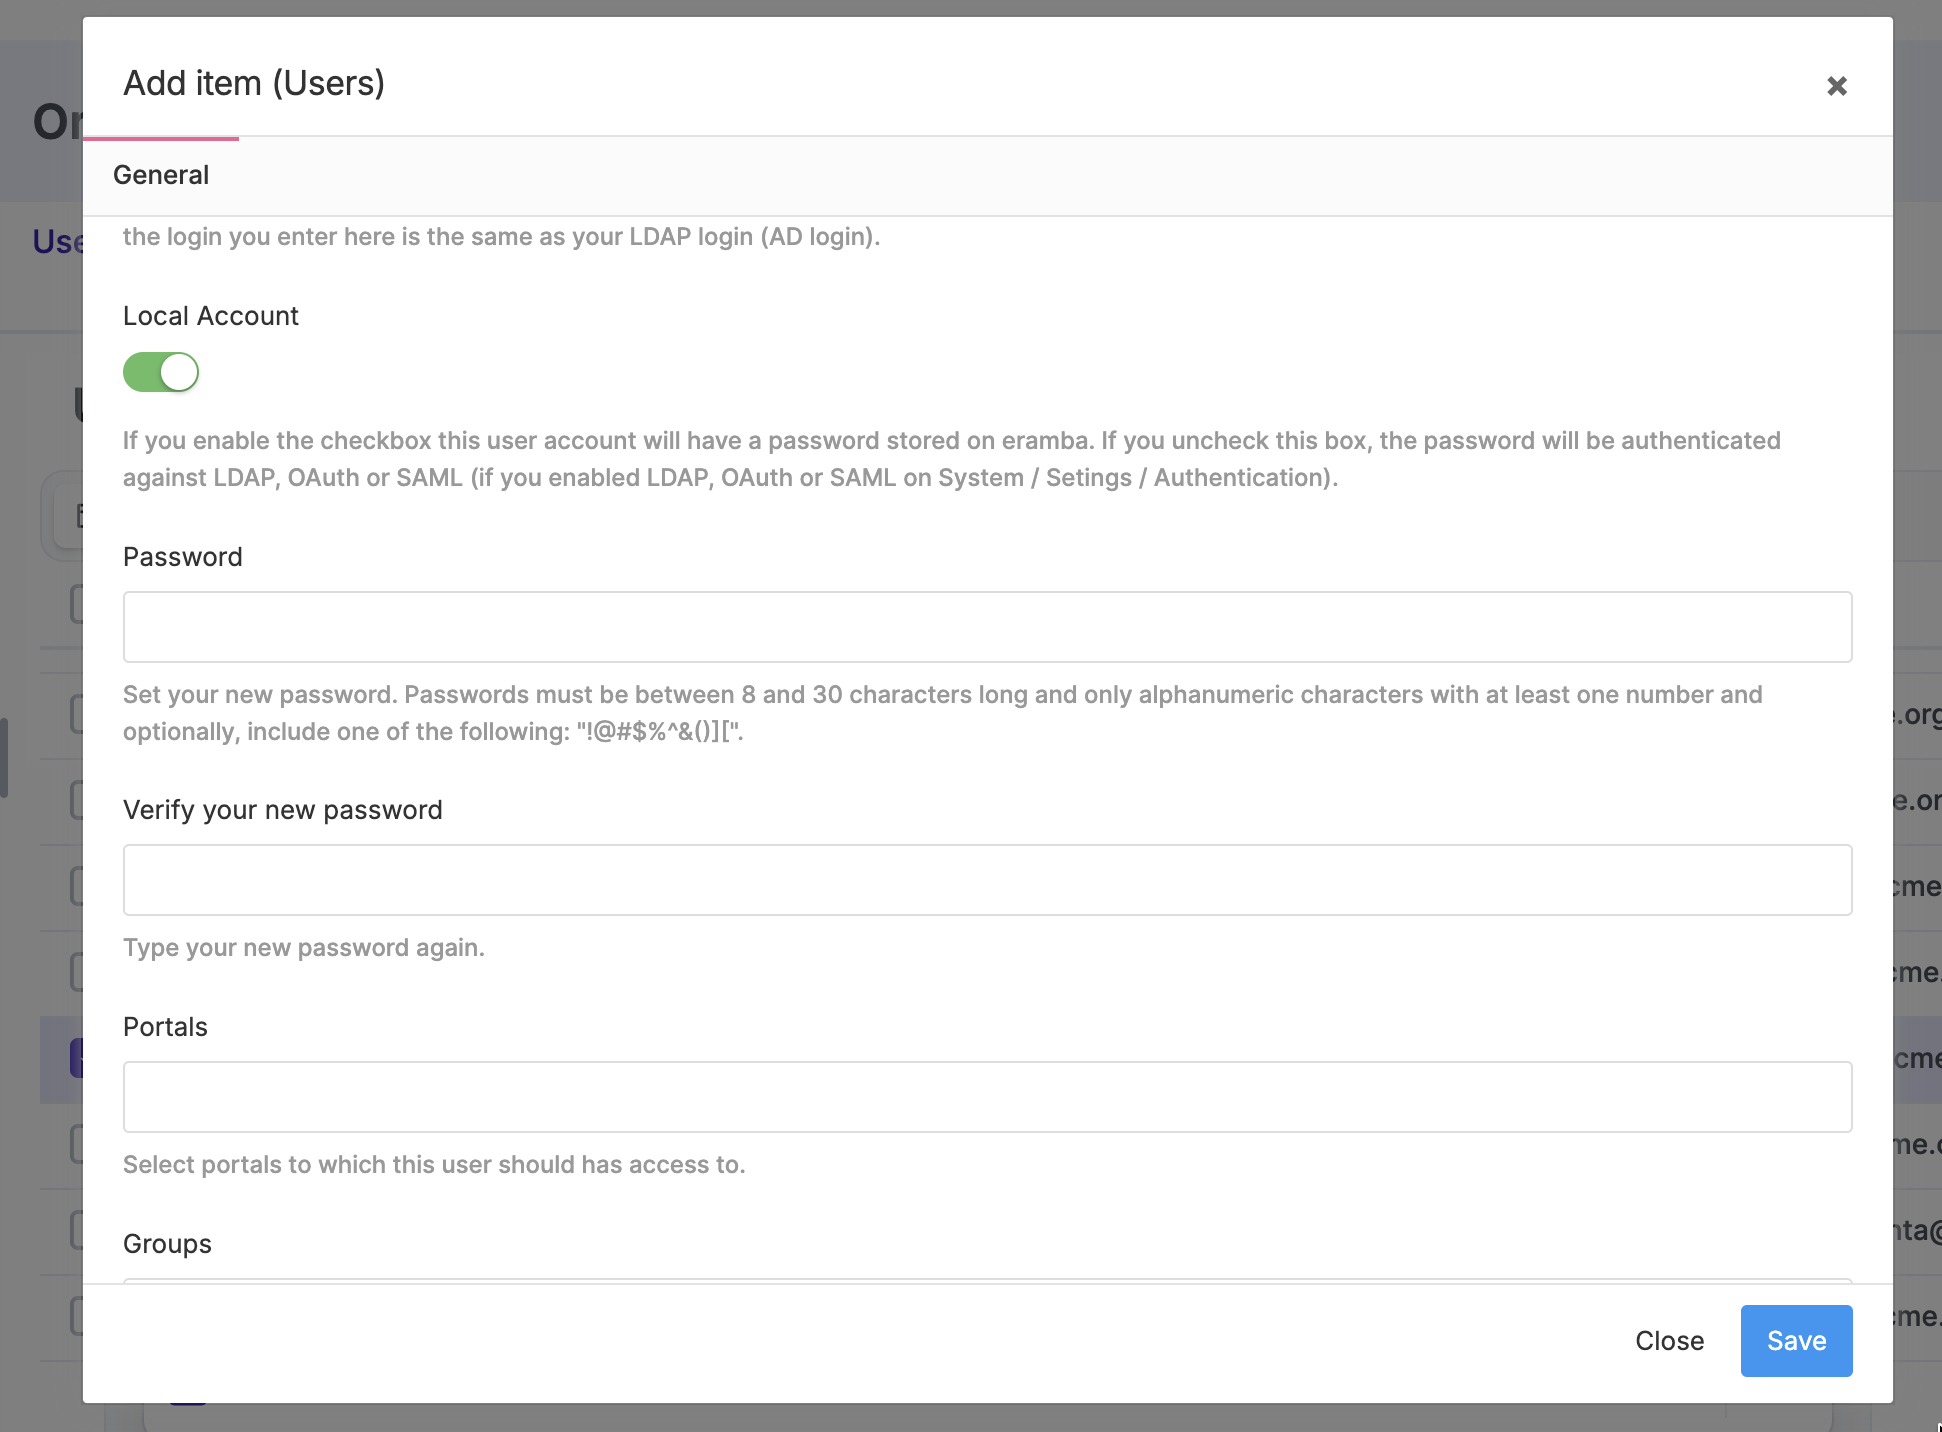
For local authentication, enable the account’s Local Account option and set a password. Local accounts can continue to sign in even when remote authentication is configured.
eramba supports remote authentication through LDAP, SAML, and Google OAuth. Configure and test the required connector under Settings → Authentication Methods, then enable it for the Main portal.
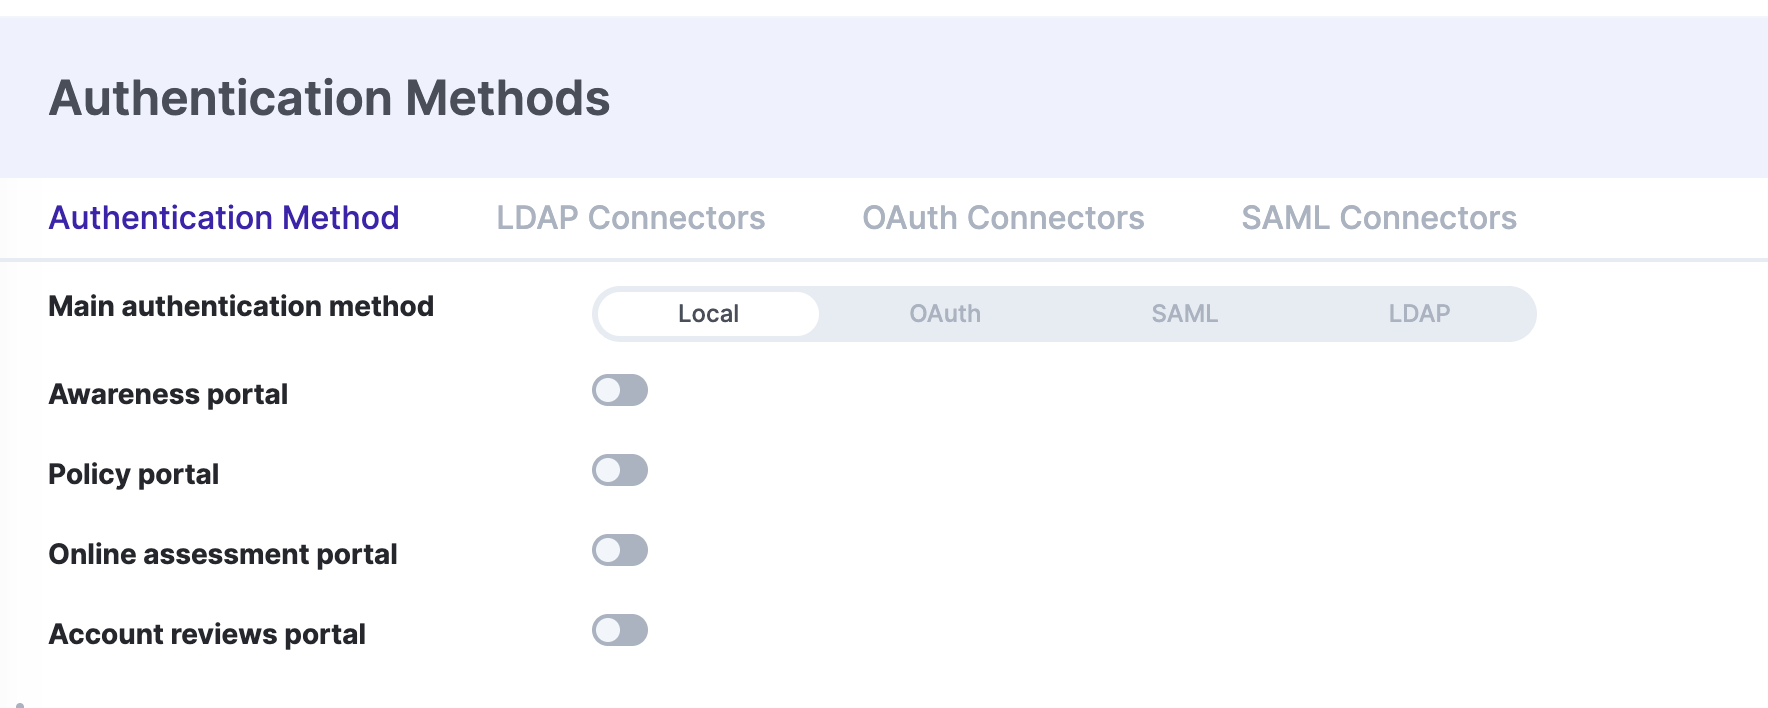
Only one remote authentication connector can be active at a time.
- LDAP: Eramba passes user credentials to an LDAP directory service of your choice, such as Active Directory (Video)
- SAML: Eramba passes authentication requests to a SAML service provider of your choice (Video). There is a special guide for Microsoft Entra.
- Google OAuth: Eramba uses Google OAuth to authenticate users (Video)
Accounts with the Local Account option disabled use the configured external provider. These users still need an account in eramba; configuring authentication alone does not create their accounts.
User Accounts
Manage user accounts under Settings → Organization & Access → Users. Every user needs an account in eramba, including those who authenticate through an external identity provider.
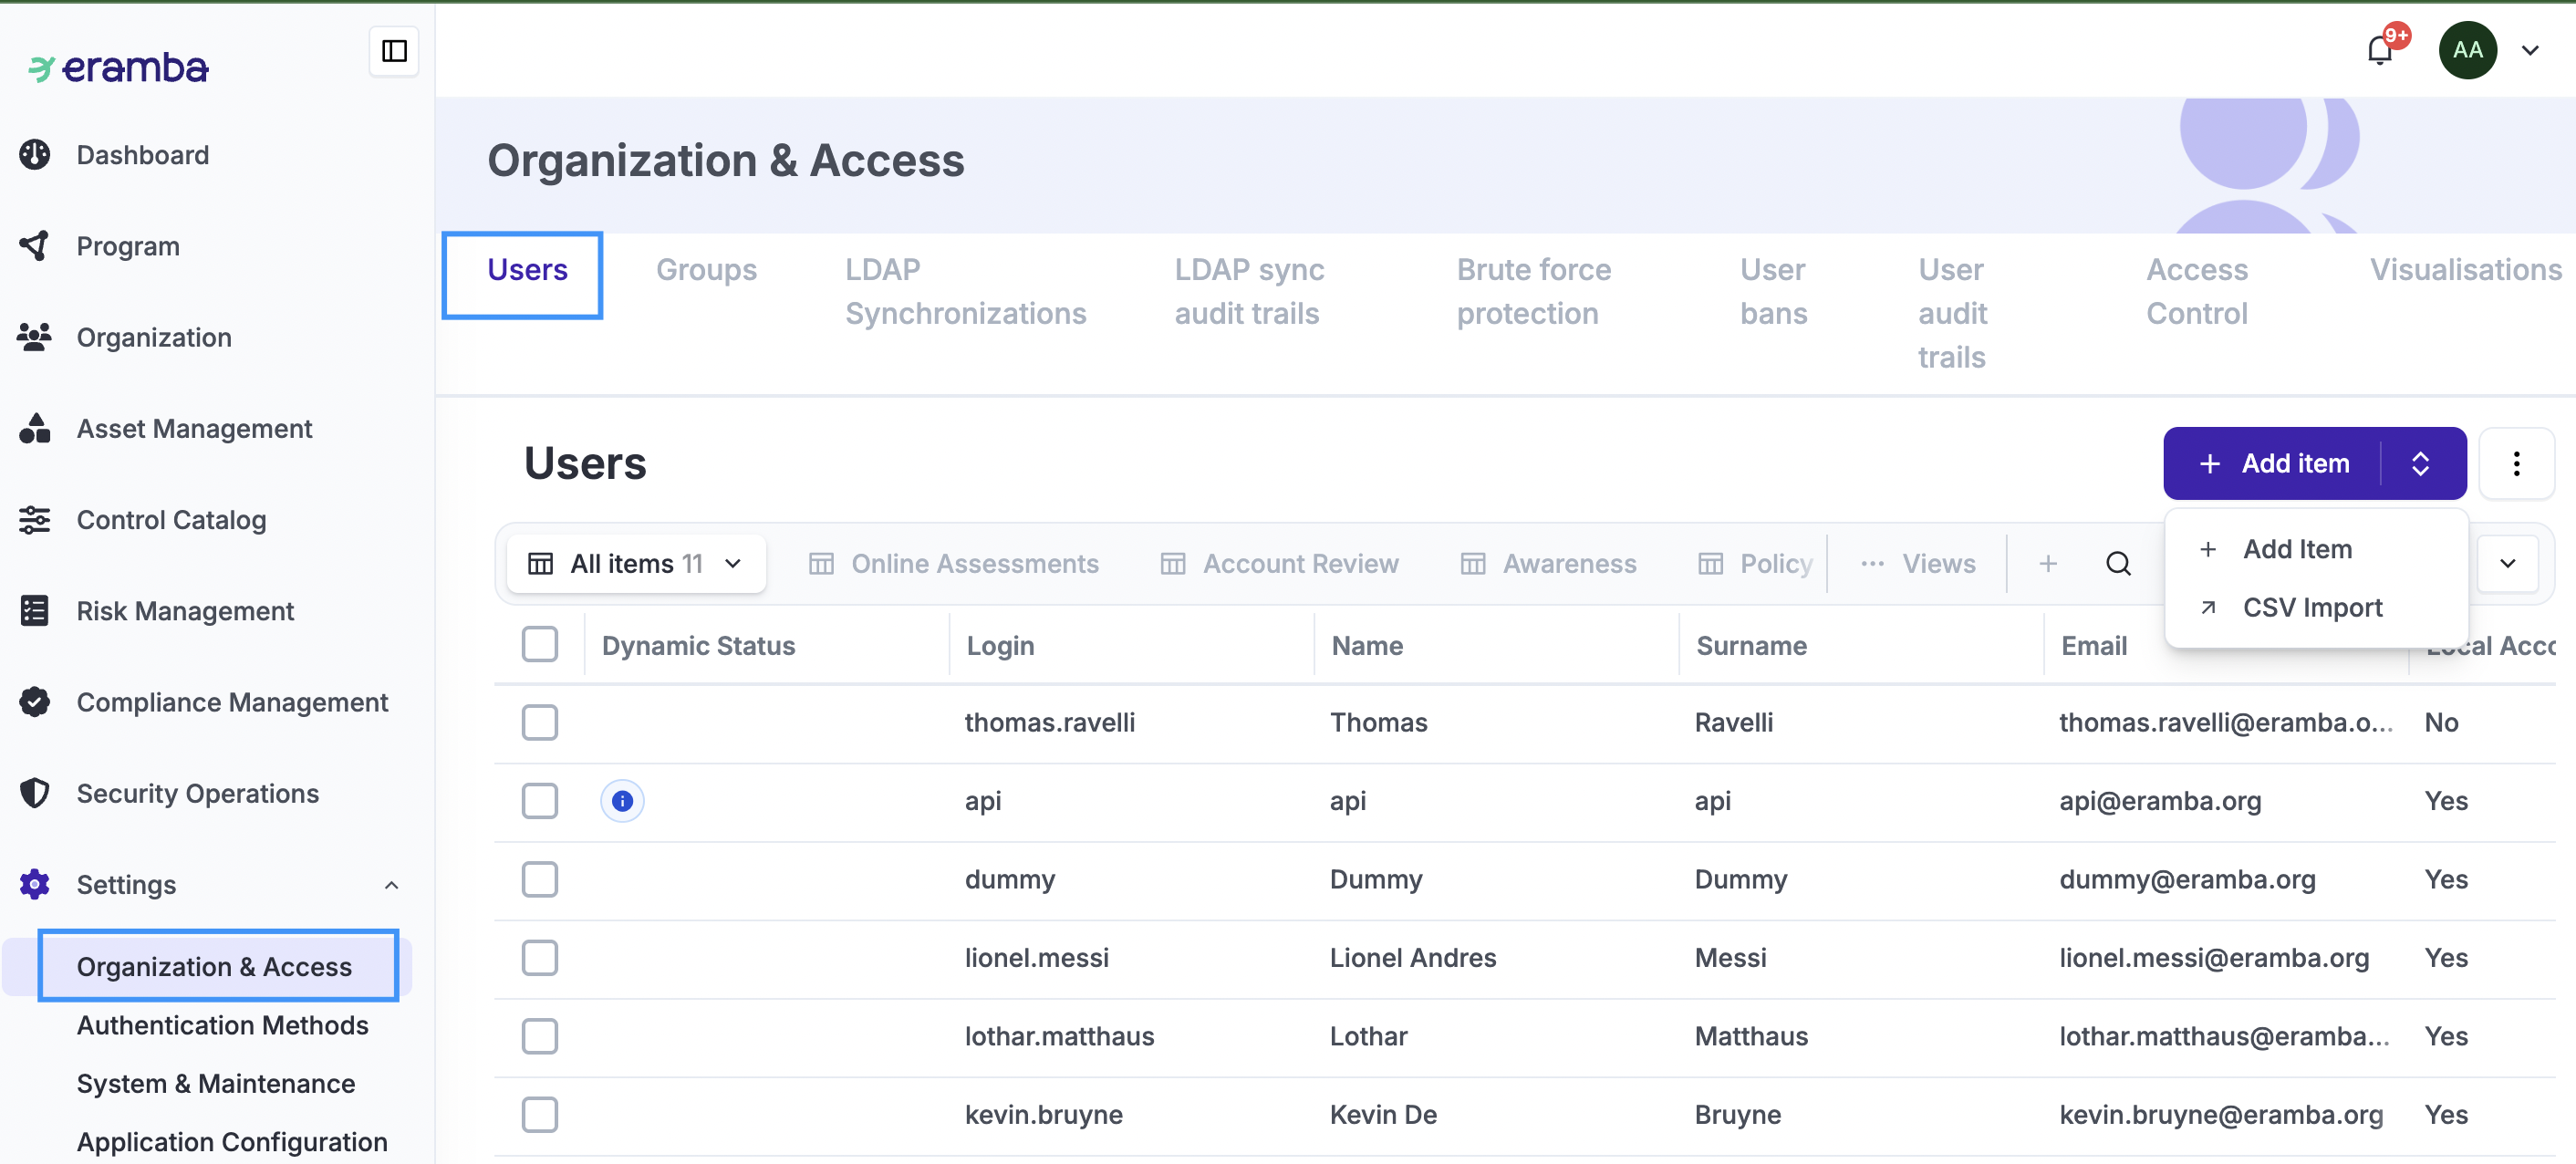
When creating an account, enter the person’s name and a unique email address, choose local or remote authentication, and assign the required groups and portals. Department groups determine which items they can see, while permission groups define what they can do. Your implementation guide specifies the configuration to use.
Accounts can be created individually or through SCIM, CSV Import, or LDAP Synchronization. CSV imports create new accounts but do not update existing ones. SCIM and LDAP synchronization require their respective integrations to be configured first.
- SCIM: Automatically create and maintain accounts from your identity provider, such as Microsoft Entra ID or Okta. Select which users and groups are provisioned, then map the received groups to eramba groups and the required portal access. For example, provision employees into an awareness audience group with access to the Awareness Portal. SCIM manages account provisioning; configure authentication separately so those users can sign in.
- CSV Import: Fill out the template downloaded from Eramba and upload it back into the system. CSV imports are only for adding new users; they cannot be used to update or edit existing accounts. Review the CSV documentation to learn how to use this method.
- LDAP Sync: Create accounts by syncing your LDAP environment. To do this, you must have the LDAP connectors configured and create a sync under: Settings / Organization & Access / LDAP Synchronizations
Disable accounts when access is no longer needed. If you try to delete an account with items assigned to it, eramba will ask you to reassign those items to another account or group before completing the deletion. The default admin account cannot be deleted.
Local users can change their passwords through User Settings in the top-right profile menu. Members of the Admin group can also change other users’ passwords.
User Account Templates let you reuse predefined groups, portal access, and local-account settings when creating accounts. You can also delegate account creation to authorised users who use the templates available to them. For example, a supplier-management team can create Online Assessment recipient accounts using settings prepared by the GRC team.
Brute Force
Brute force protection limits repeated attempts to guess a user’s password. It applies to locally authenticated accounts and blocks further login attempts when the configured failed-login limit is reached.
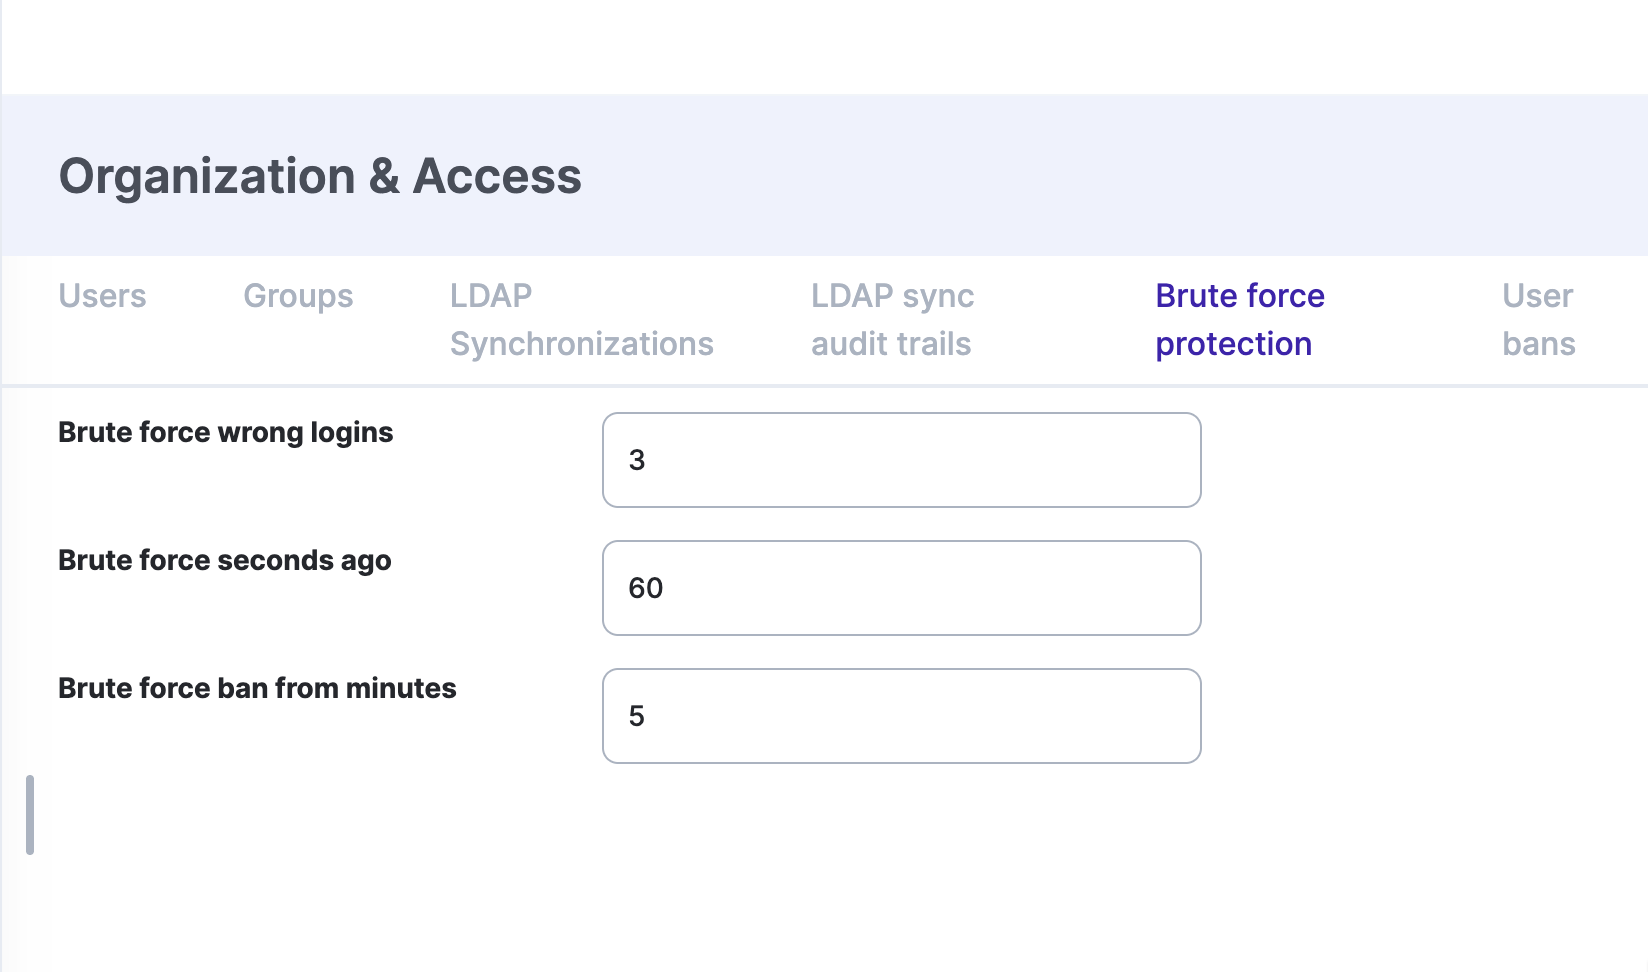
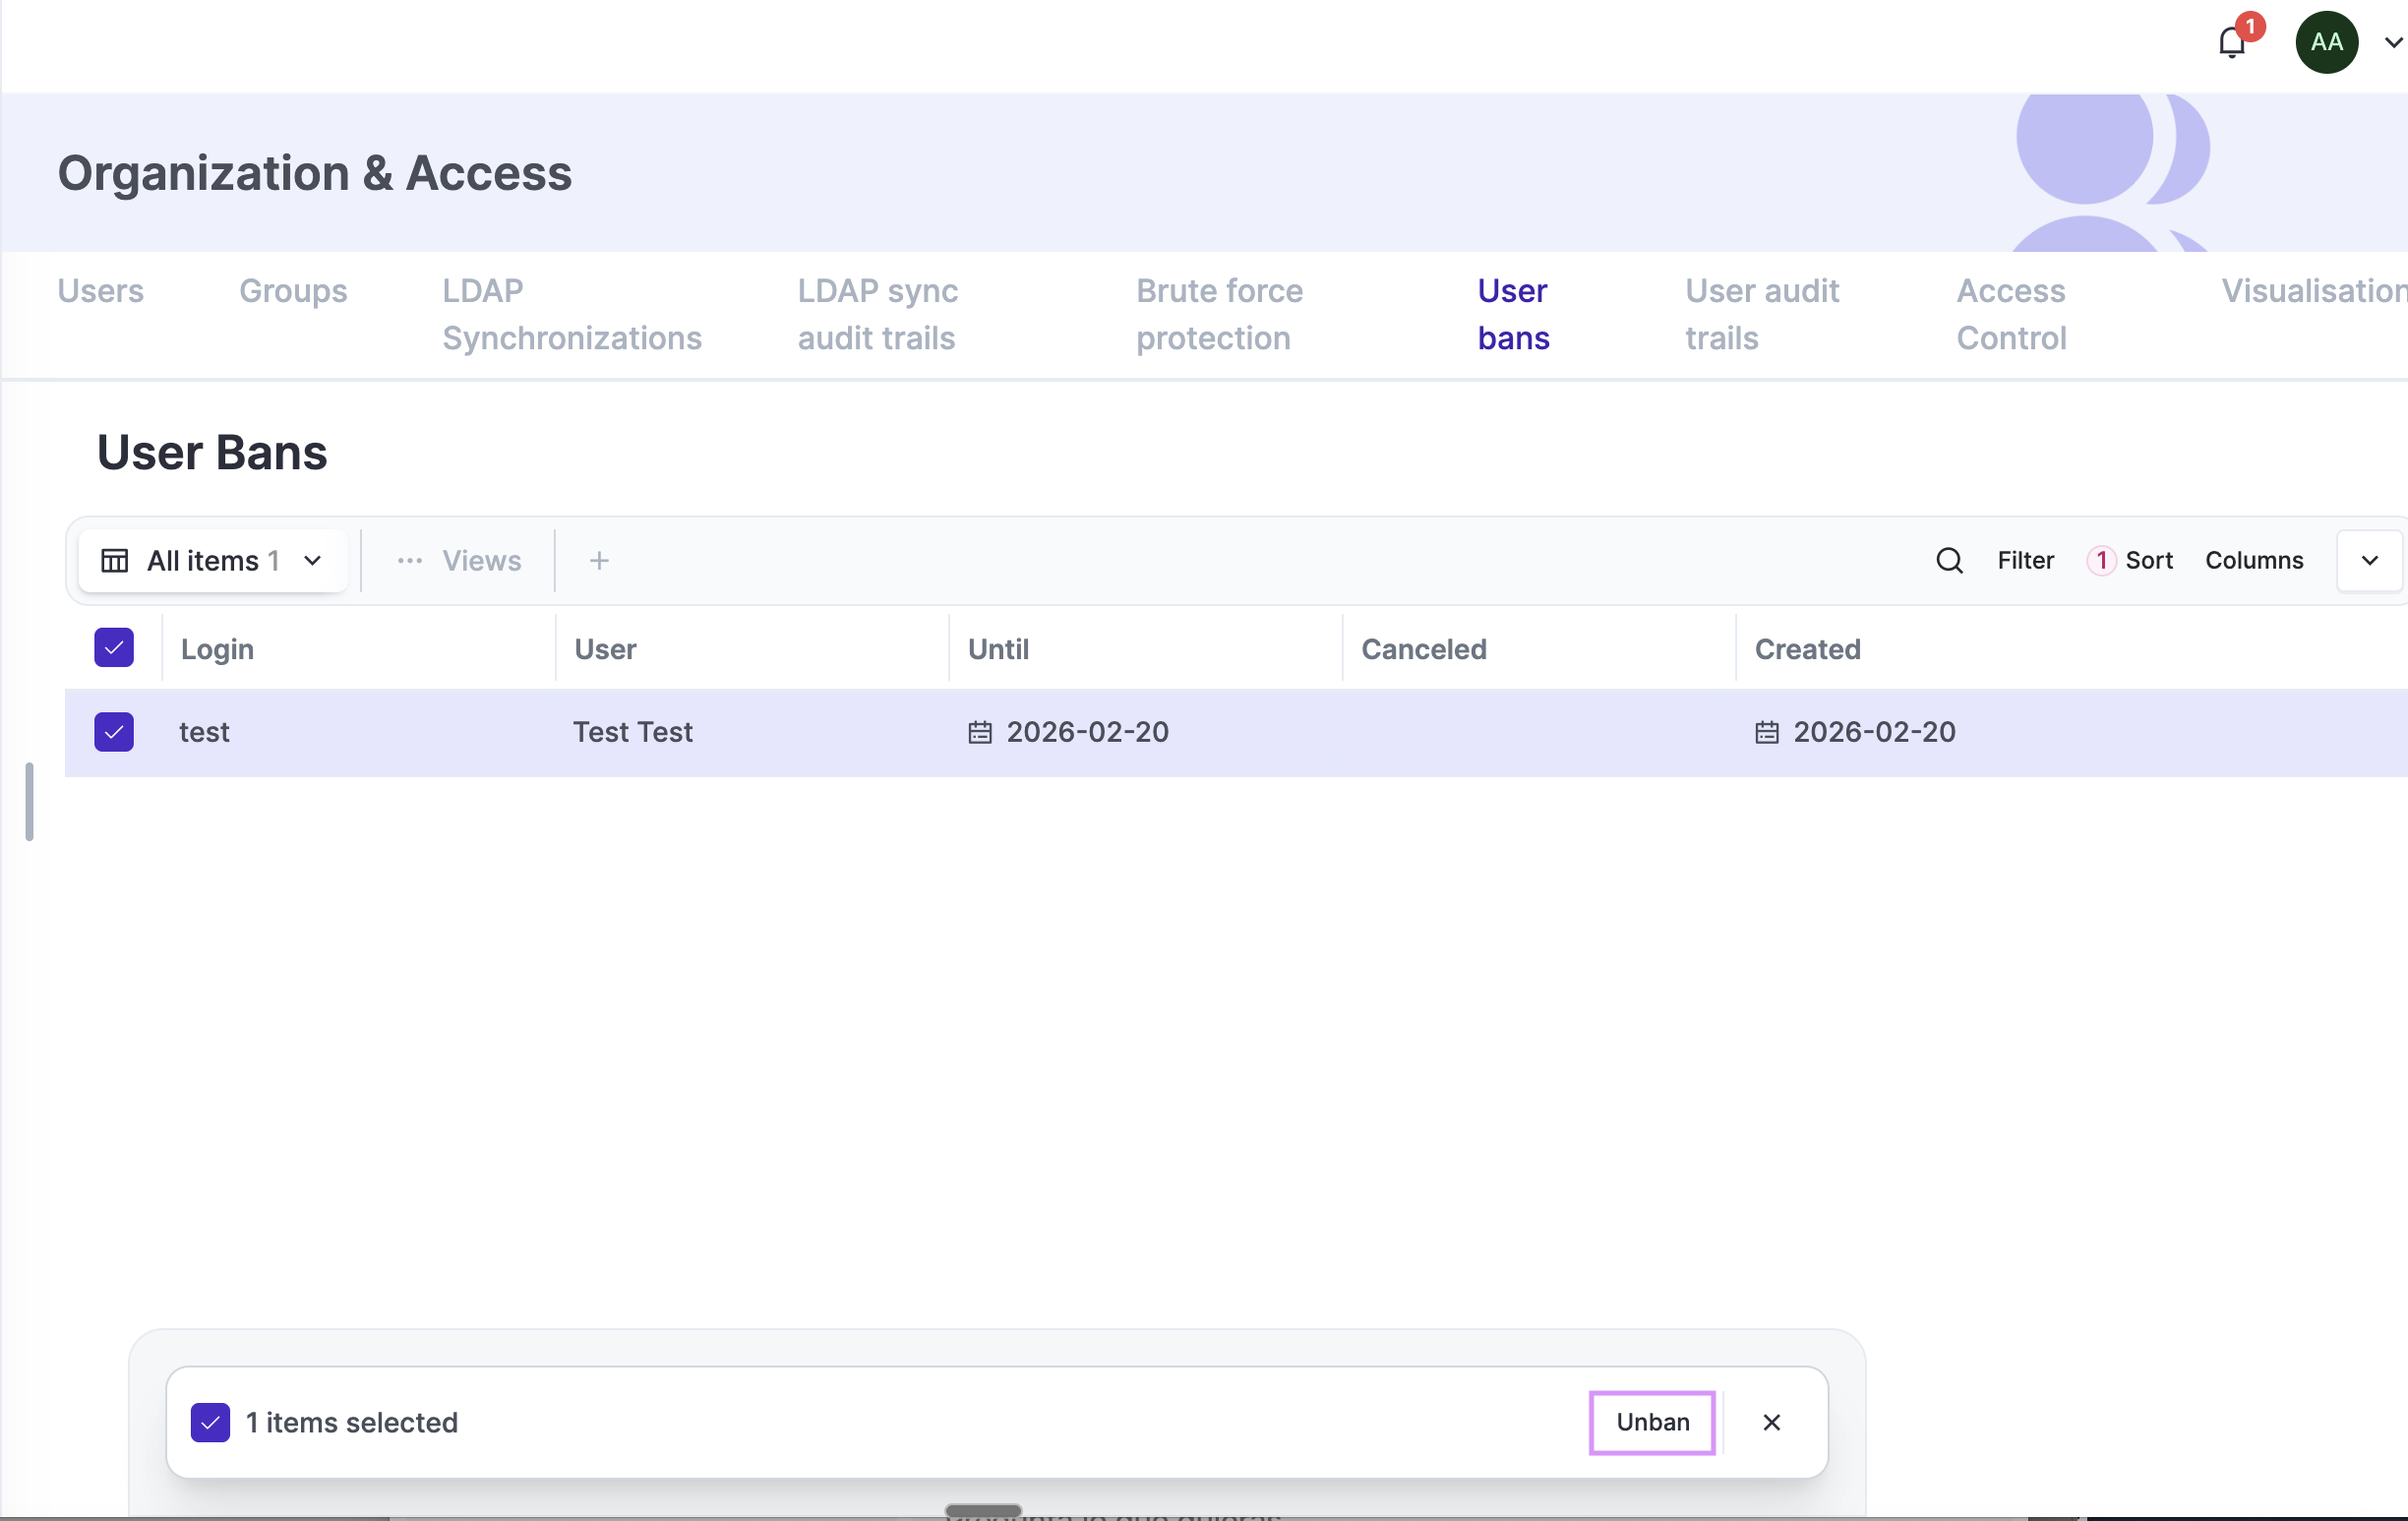
Configure the protection under Settings → Organization & Access → Brute Force Protection. To unblock an account, go to Settings → Organization & Access → User Bans.
For accounts that authenticate through an external identity provider, manage failed-login protection in that provider.
How-to Guides
Create GRC Accounts
Create "Other" Users Accounts
Create a "Test" Account
Create Department Groups
Create Custom Permission Groups
Create SCIM Connector
SCIM Use Cases
Create User Template and Manage Users