Filters
Sort, Conditionals, Columns, Display Options, Etc
Introduction
Filters determine what data is displayed within a view, making it essential to understand how they work. Properly configured filters ensure that the right data is shown, tailored to the specific needs of the view and its users.

In addition to filters you will need to configure the sorting of data and what columns you wish to display.
Filter Settings
In every view, you can adjust the filters to define what data is displayed. The filter settings can be accessed in the top-right corner of the view, allowing you to refine the data shown to suit your needs.

When you click on “Filter,” a panel will slide out from the right, allowing you to configure and adjust the filter settings to control what data is displayed in the view.
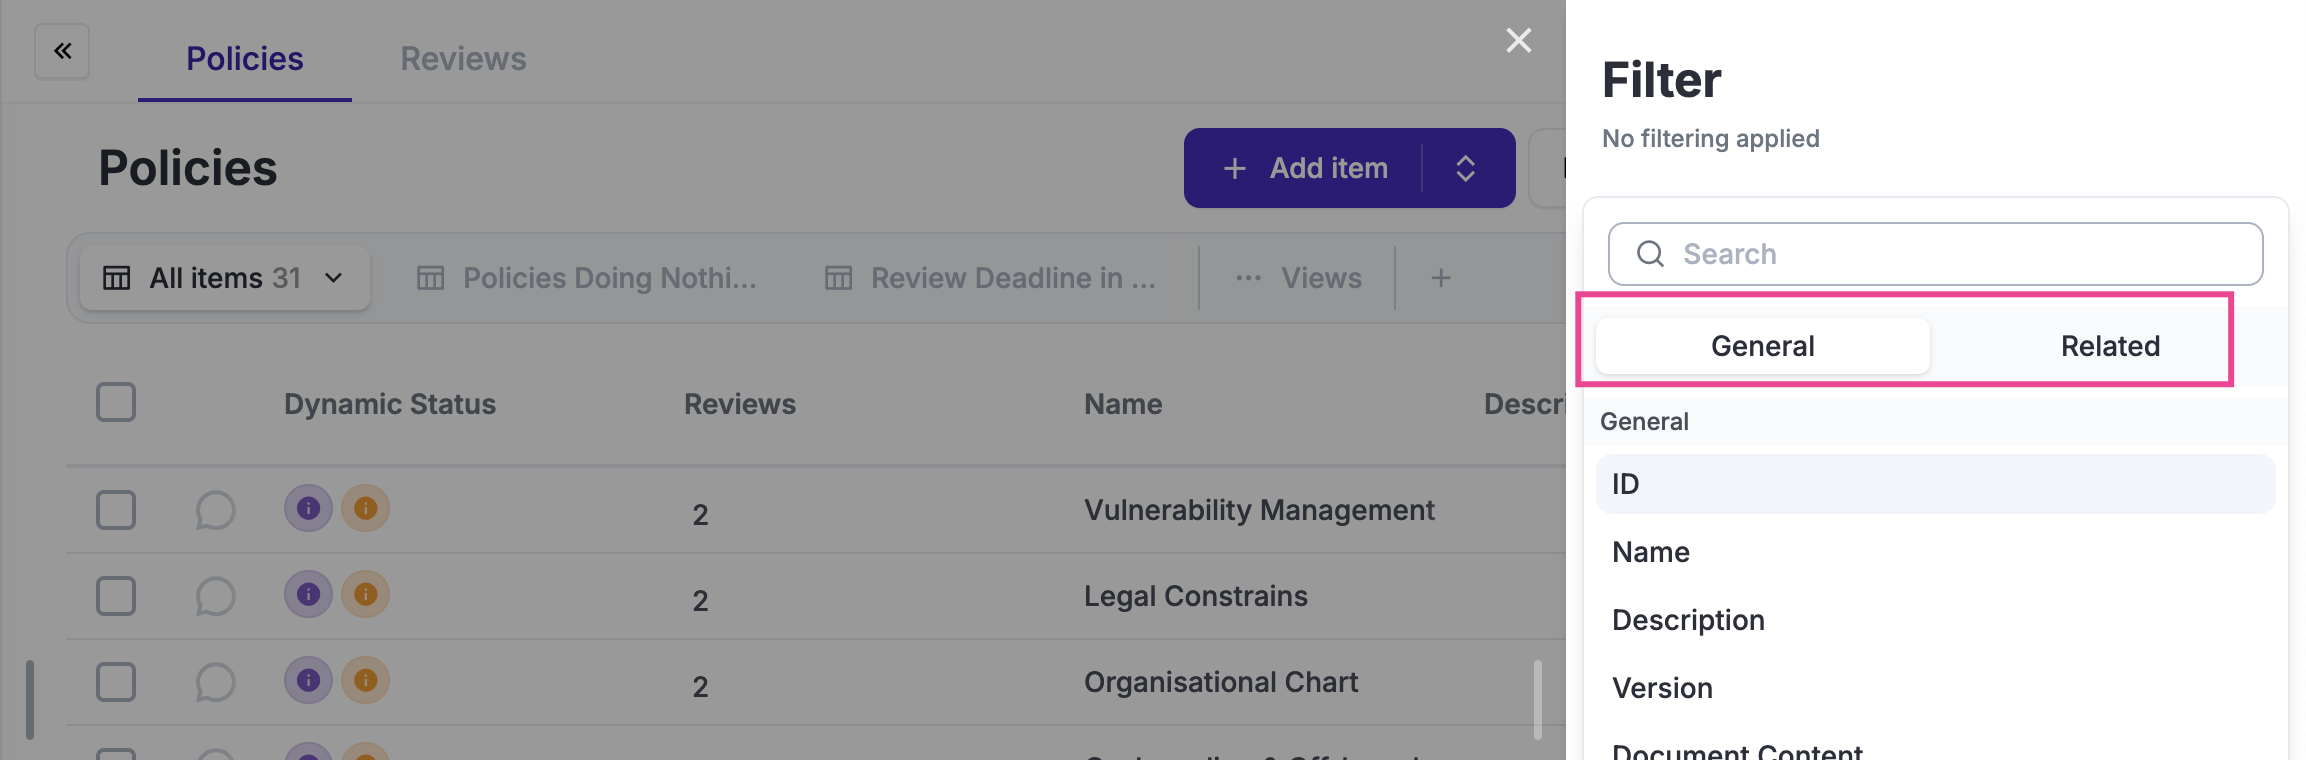
There are two basic types of comparisons you can make when setting filters:
- Field Comparison: This allows you to compare a field, such as the title of a policy, with a specific value. For example, you can filter for policies where the title “Contains” the word “Policy.”
- Related Modules: This allows you to filter data based on relationships with other modules. For instance, you can search for policies that are associated with a specific risk in the system.
- These options give you powerful ways to refine and target the data shown in your views.
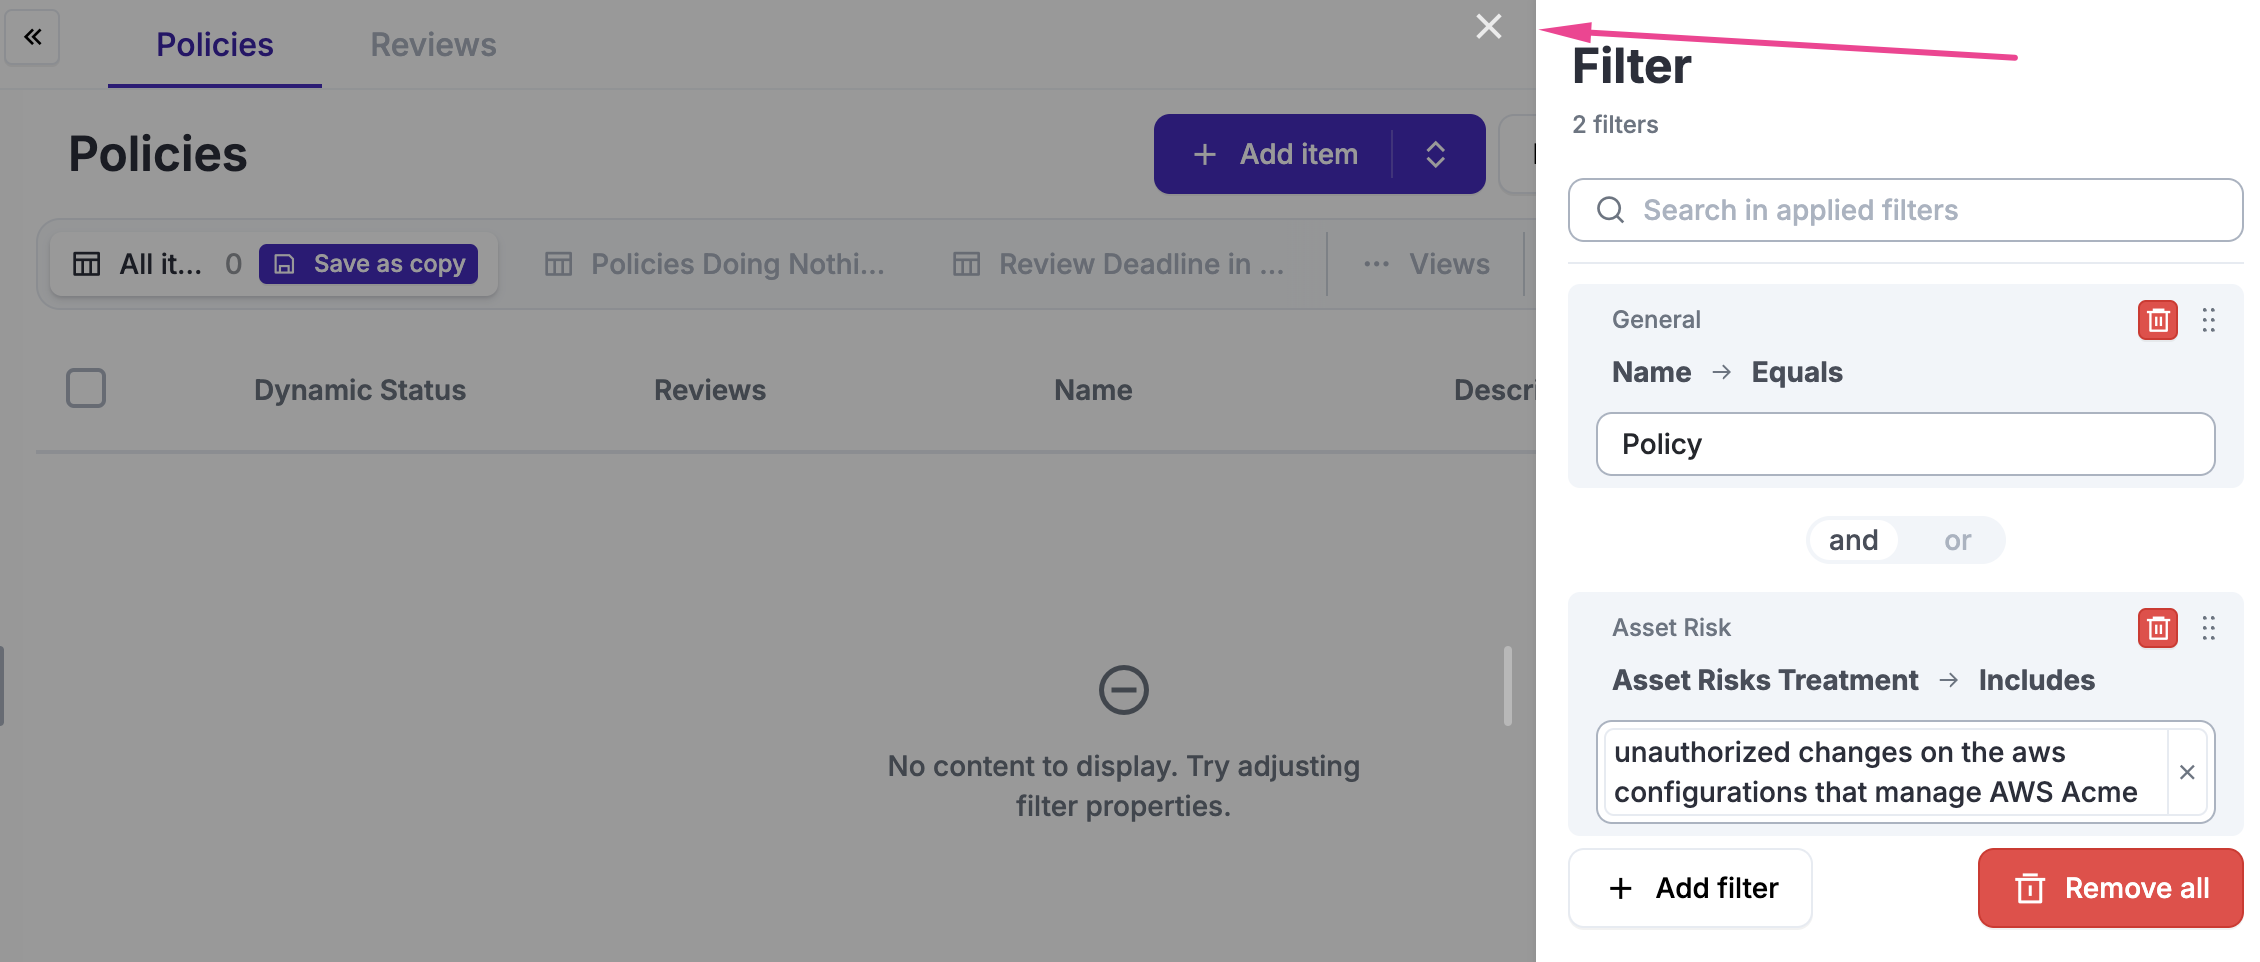
Filter conditions are applied immediately after you select them. Once you’ve finished adjusting your filters, you can close the right panel by clicking the “X” button.
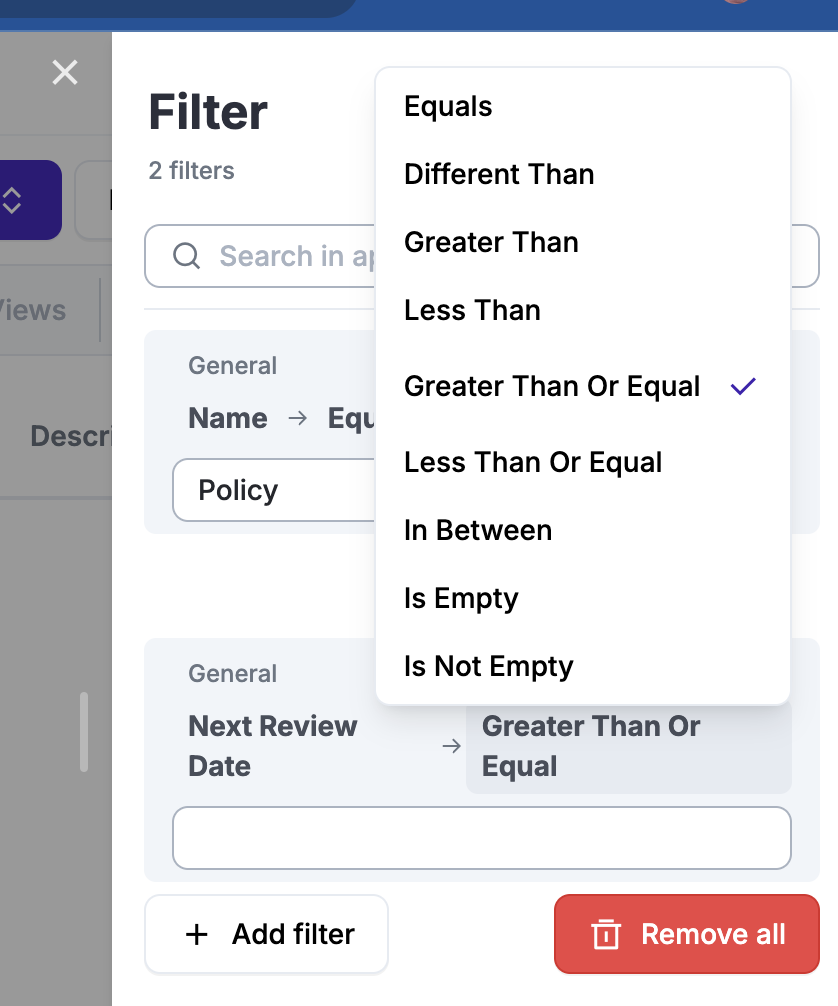
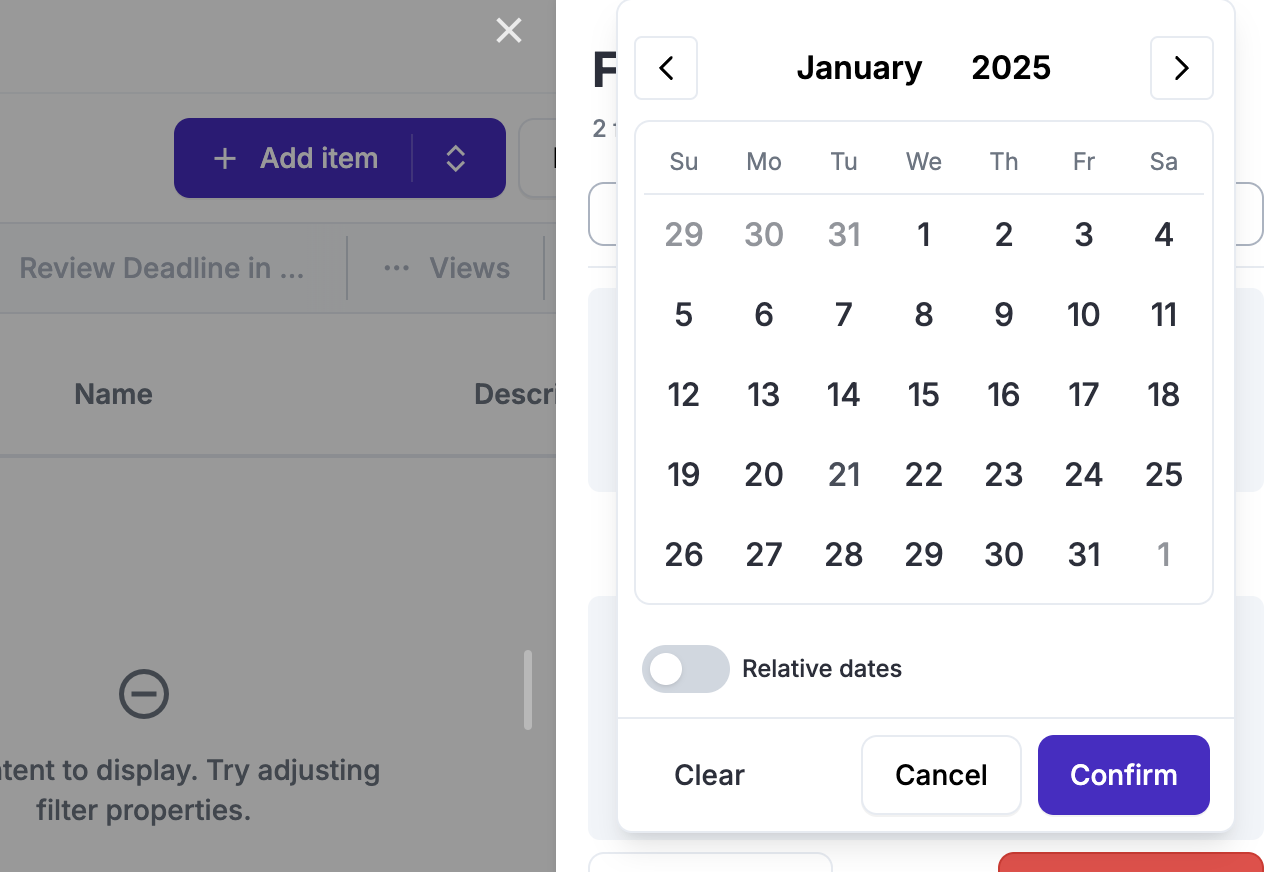
Dates
You might need to search against dates, such as "Filter audits in until this or that date". There are multiple ways how to search using dates depending if you are looking at "After" , "Before" or "Exactly" a date.
You will later learn how to automate regular reports using filters. This allows Eramba to run your filters automatically on a schedule—daily, weekly, or at intervals you define—and send the results directly to you.
When setting up filters, avoid using exact dates like “After 1st of January,” as they will eventually stop matching. Instead, use relative times, such as “In the next couple of weeks,” to ensure your filters remain relevant. When using the date picker, be sure to select either exact or relative times based on your needs.
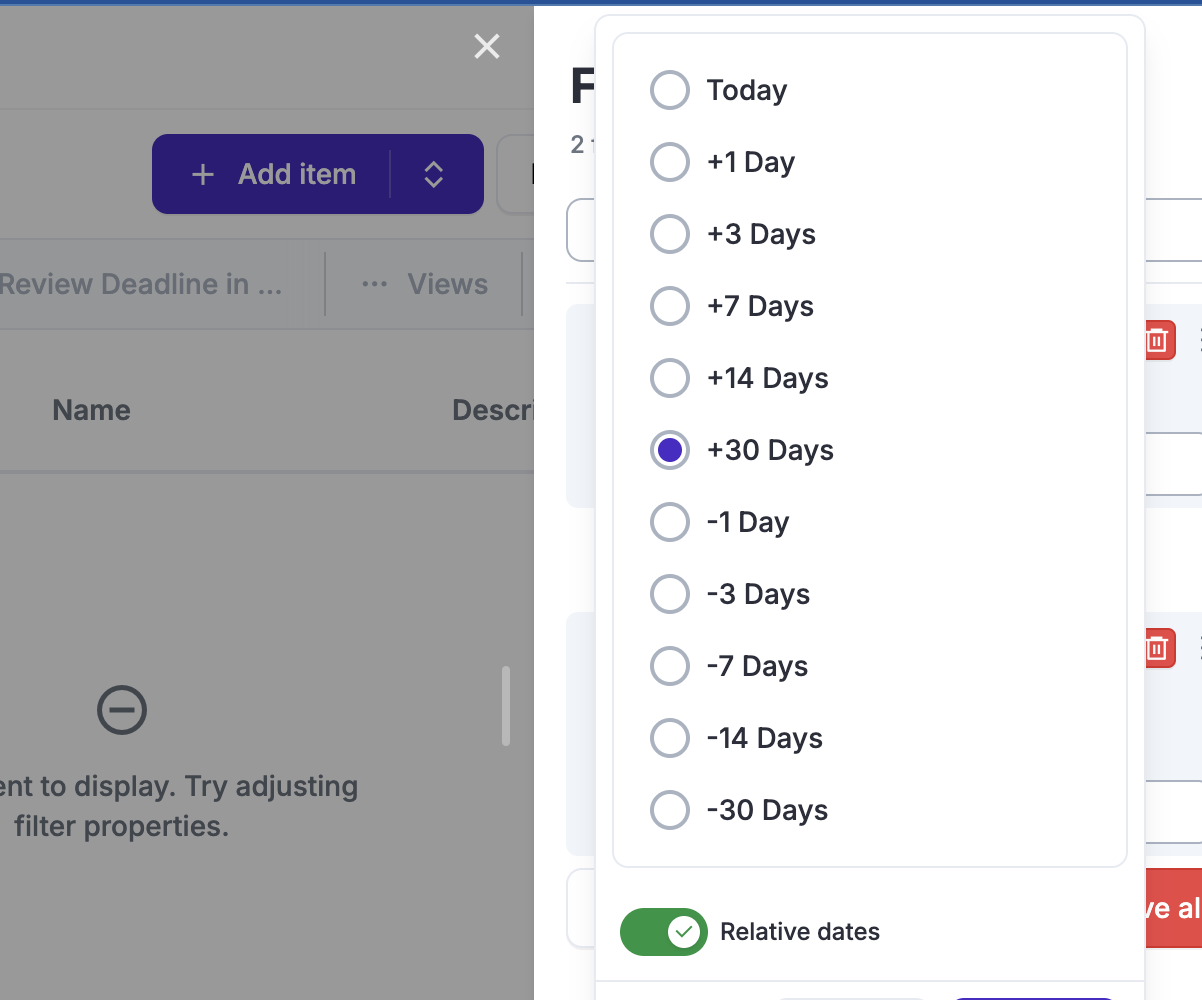
- After "+30 Days" means any date after today plus 30 days
- On "+30 Days" means exactly in 30 days
- Before +30 Days" means all dates in between "Today" and 30 days in the future
- After "-30 Days" means any date in between "Today" and 30 days in the past
- Before "-30 Days" means any date before 30 days in the past
As you can see combining operators and relative dates you can search any timeframe.
Columns
When working with views, it’s best to use the minimum number of columns needed for efficiency.
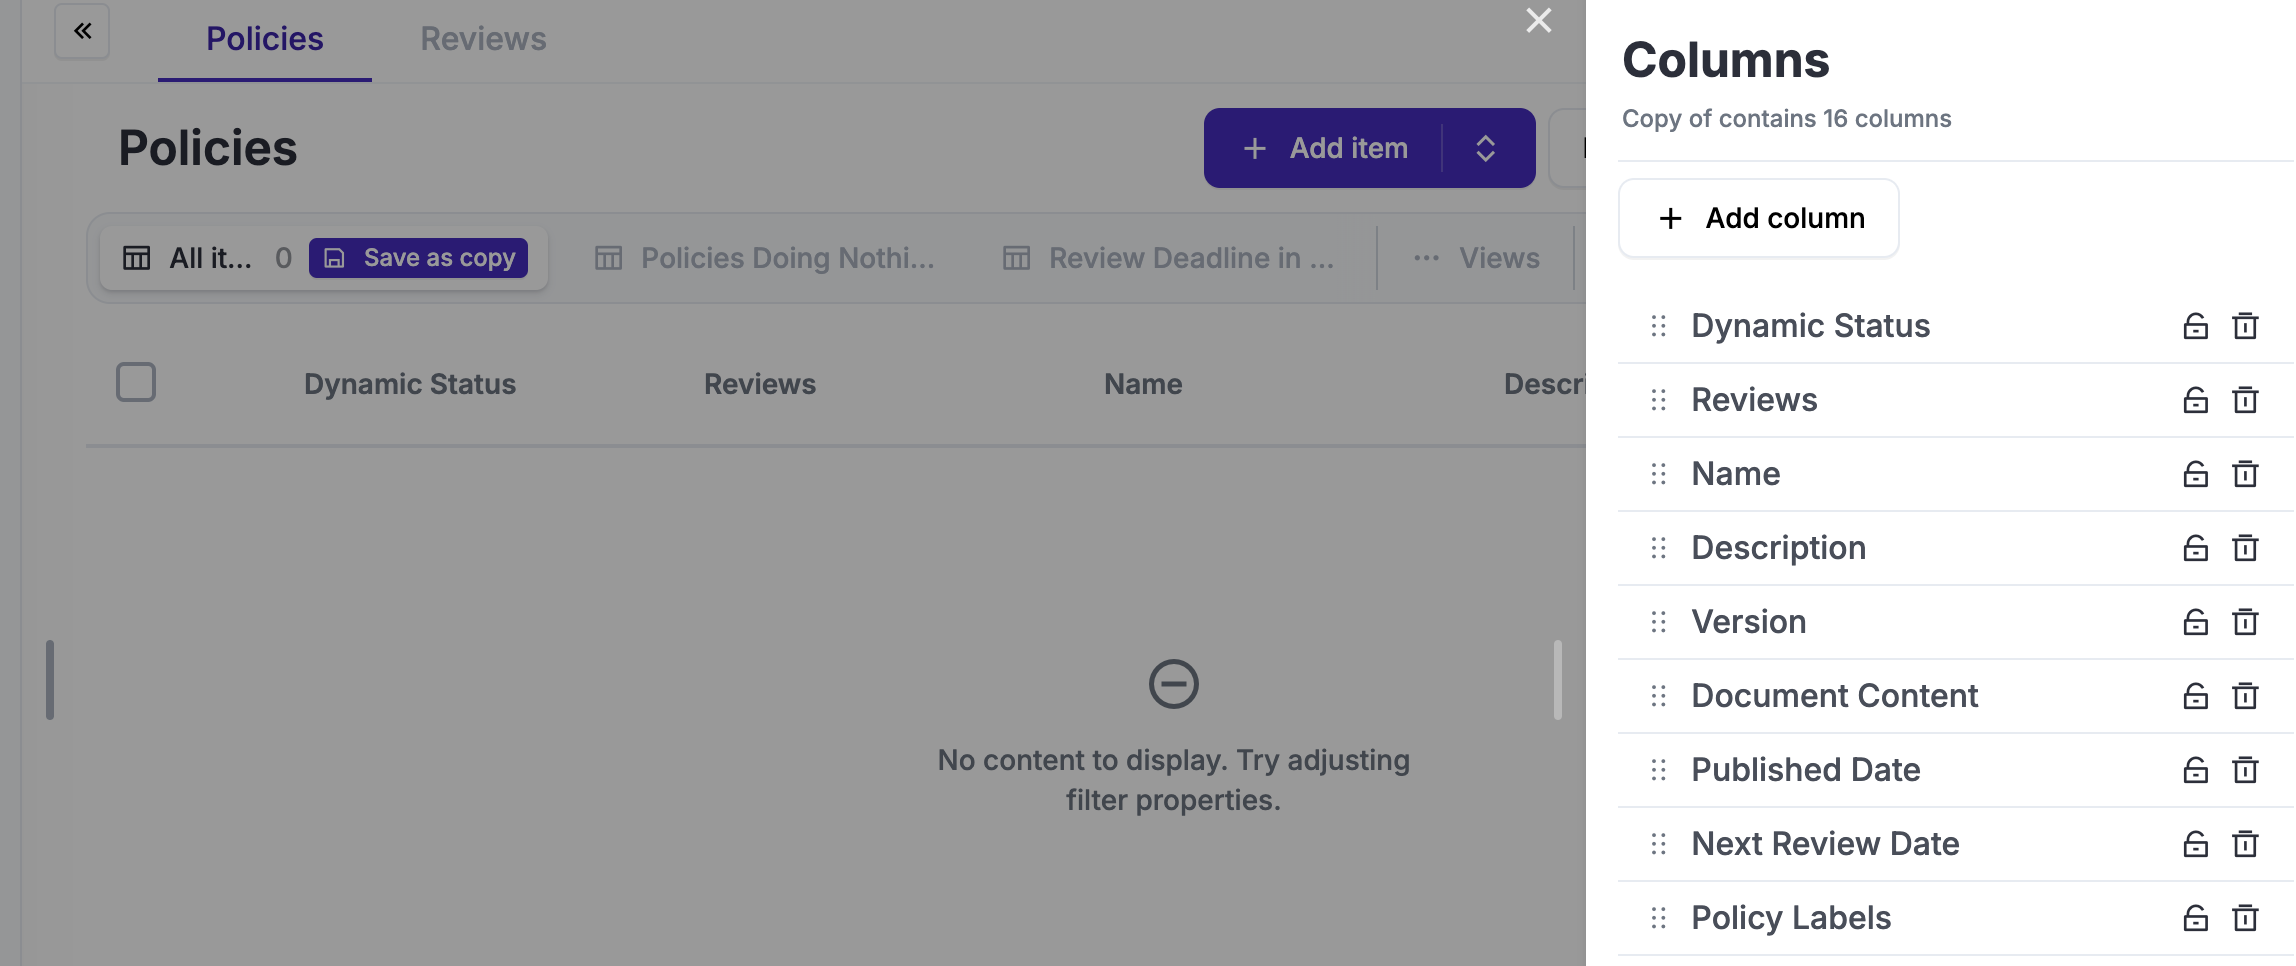
You can select which columns to display and which ones to “Freeze” for easier navigation by clicking the “Columns” button. This helps streamline your workflow and keeps the focus on the most relevant data.
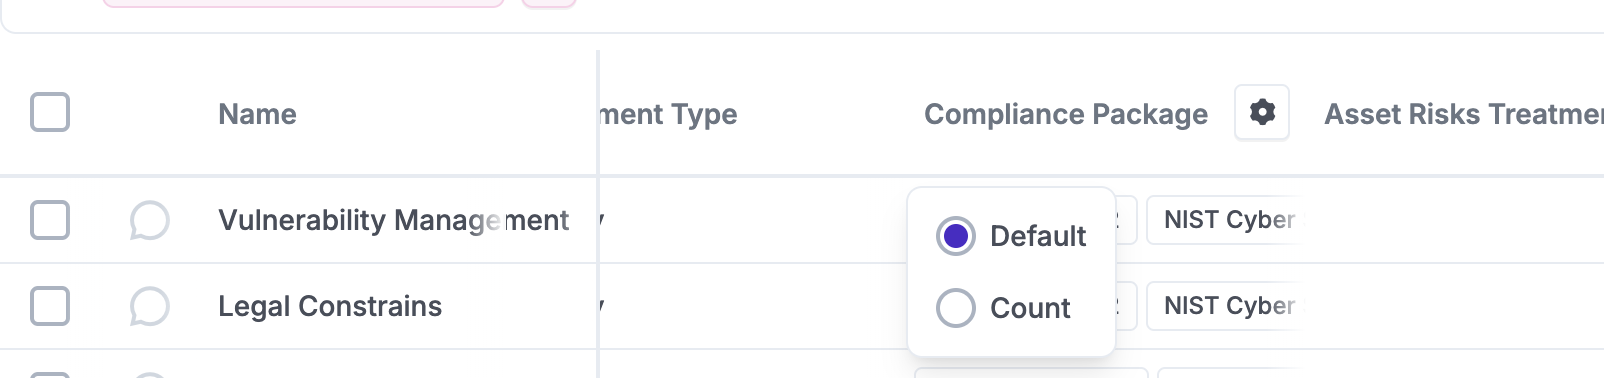
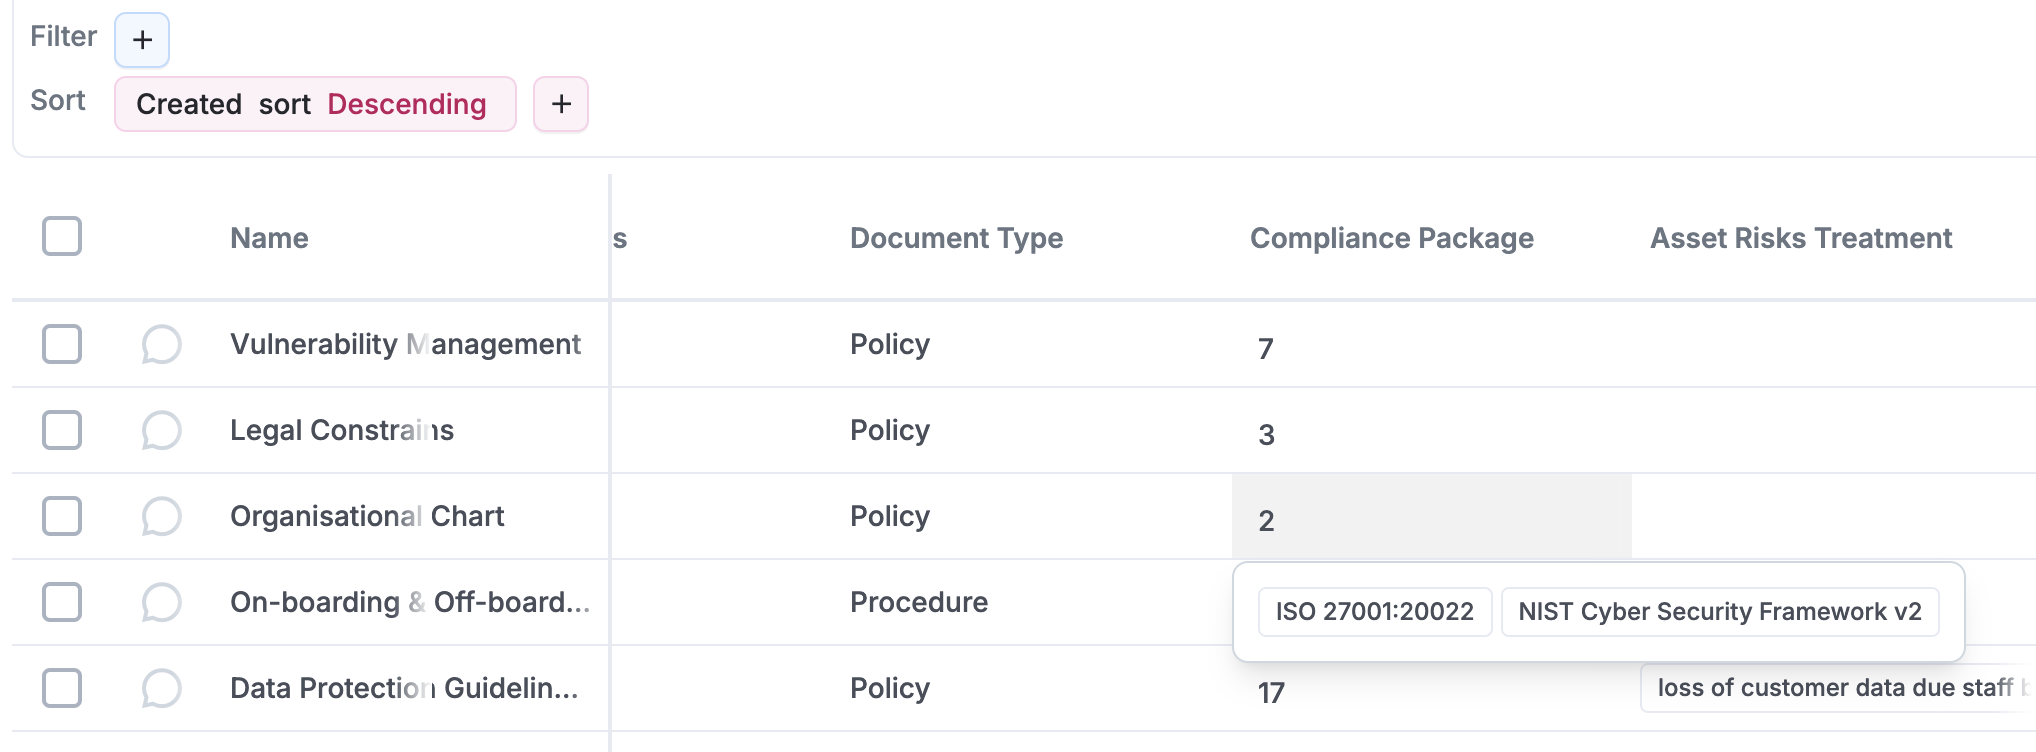
Some columns show other module related items, in those scenarios you can display the "Names" of those related items or just a "Counter"

Counters make more efficient use of space and also when you click in them remember they work as a shortcut to those items.
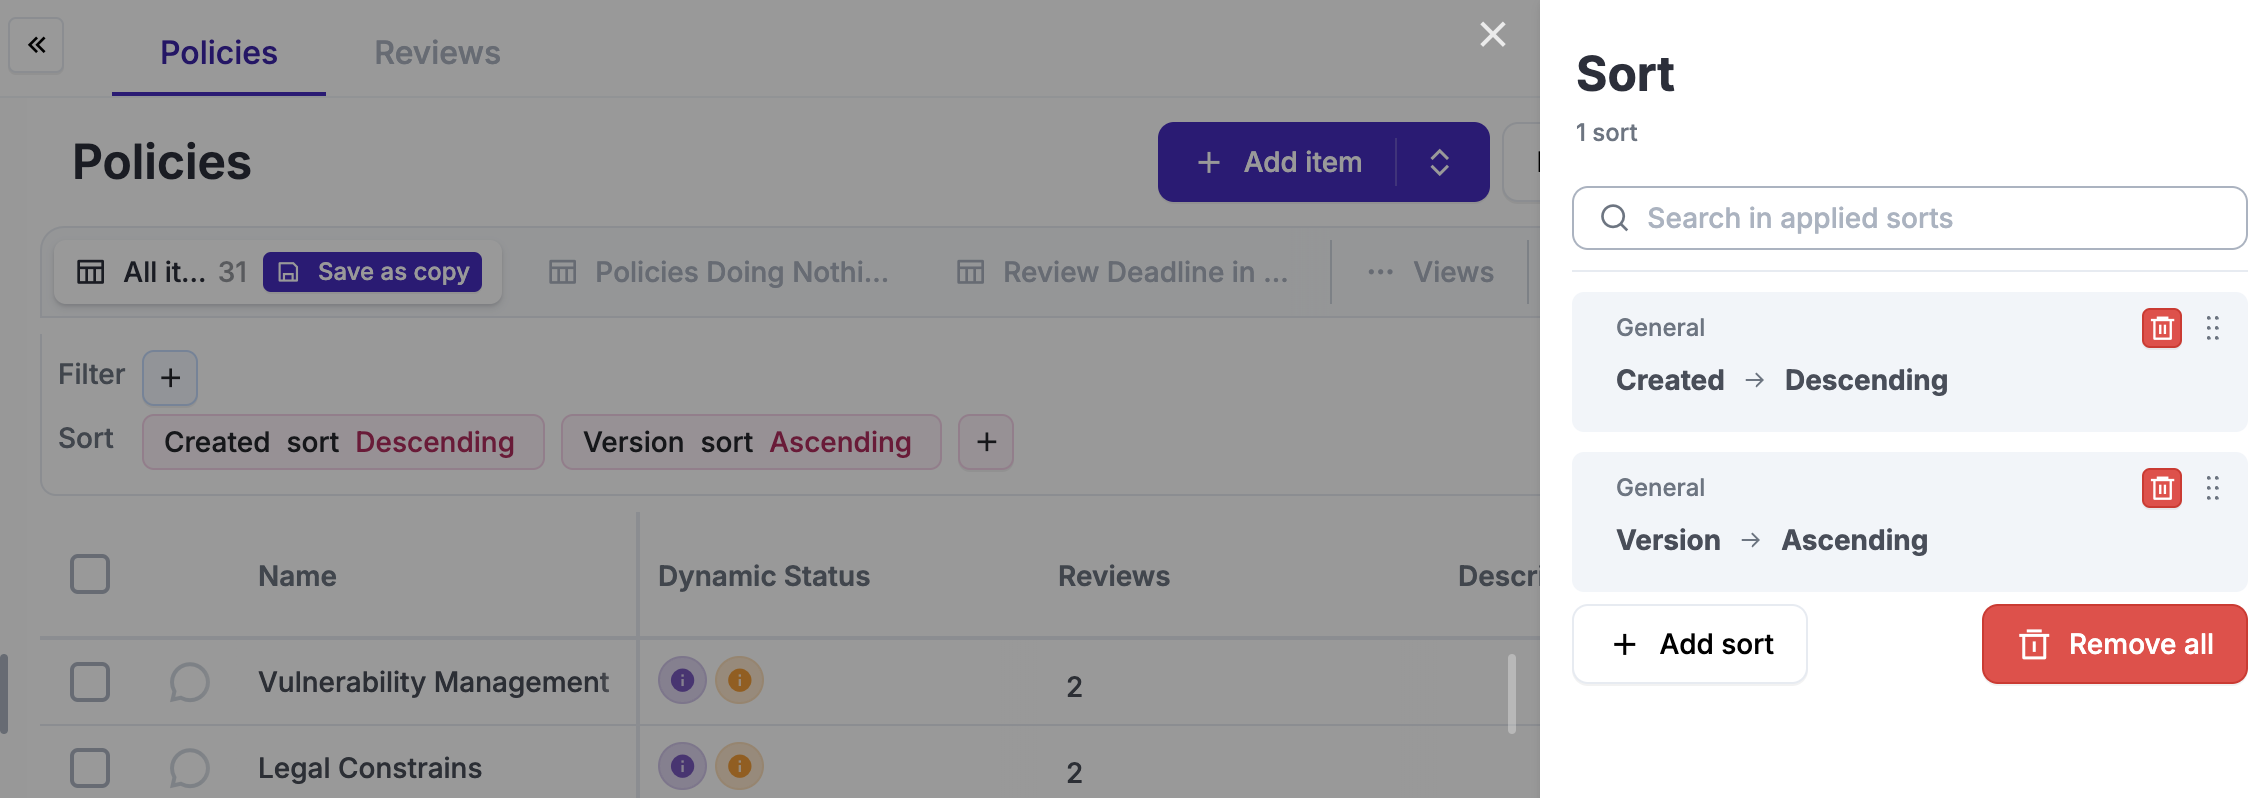
Sorting
You can sort your table data using one or more conditions using the "Sort" option on the top right corner.
Export
To export the data from a View simply click on the view and "Export", you will be presented with a CSV and PDF option.
