Quick Introduction
Course Introduction
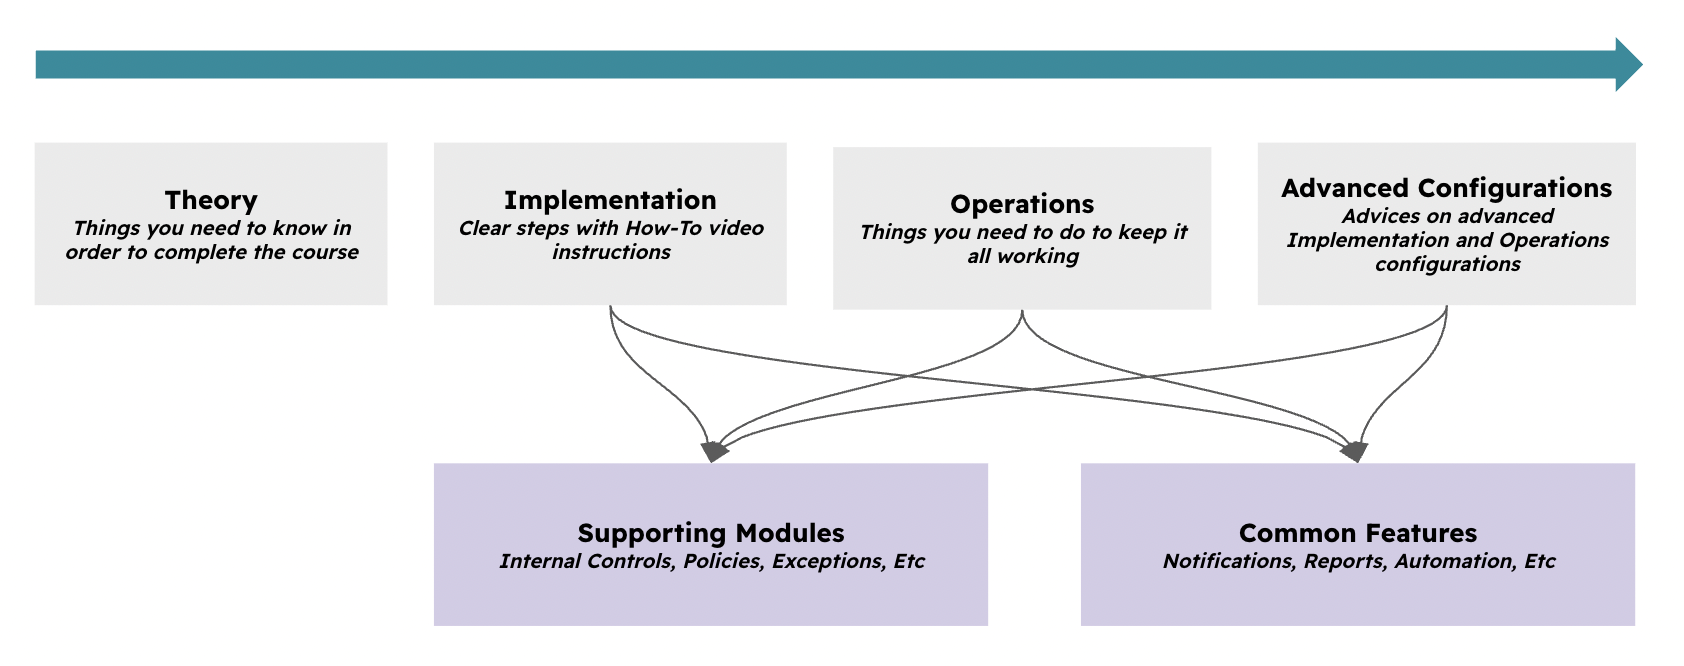
The course is structured around Theory, Implementation, Operations, and optional Advanced Configurations. You cannot skip these steps; otherwise, you will not succeed with a successful implementation and later operation of the use case.
At times, this guide will require you to understand how other modules (Supporting Modules) and features (Common Features) work. Follow the instructions carefully.
Typical Scenarios
The Incident module is used to:
-
Manage your cybersecurity incidents
-
Systematically analyse them using predefined analysis stages
-
Run playbooks for known incidents
Supported Versions
This feature runs on Community and Enteprise versions.
Theory
Module Relationships
The Incident module (Security Operations / Incident Management) works on its own without the need for other modules. Optionally, you can define one or more “Stages” that apply to every incident. These help the handler work systematically with every incident created.
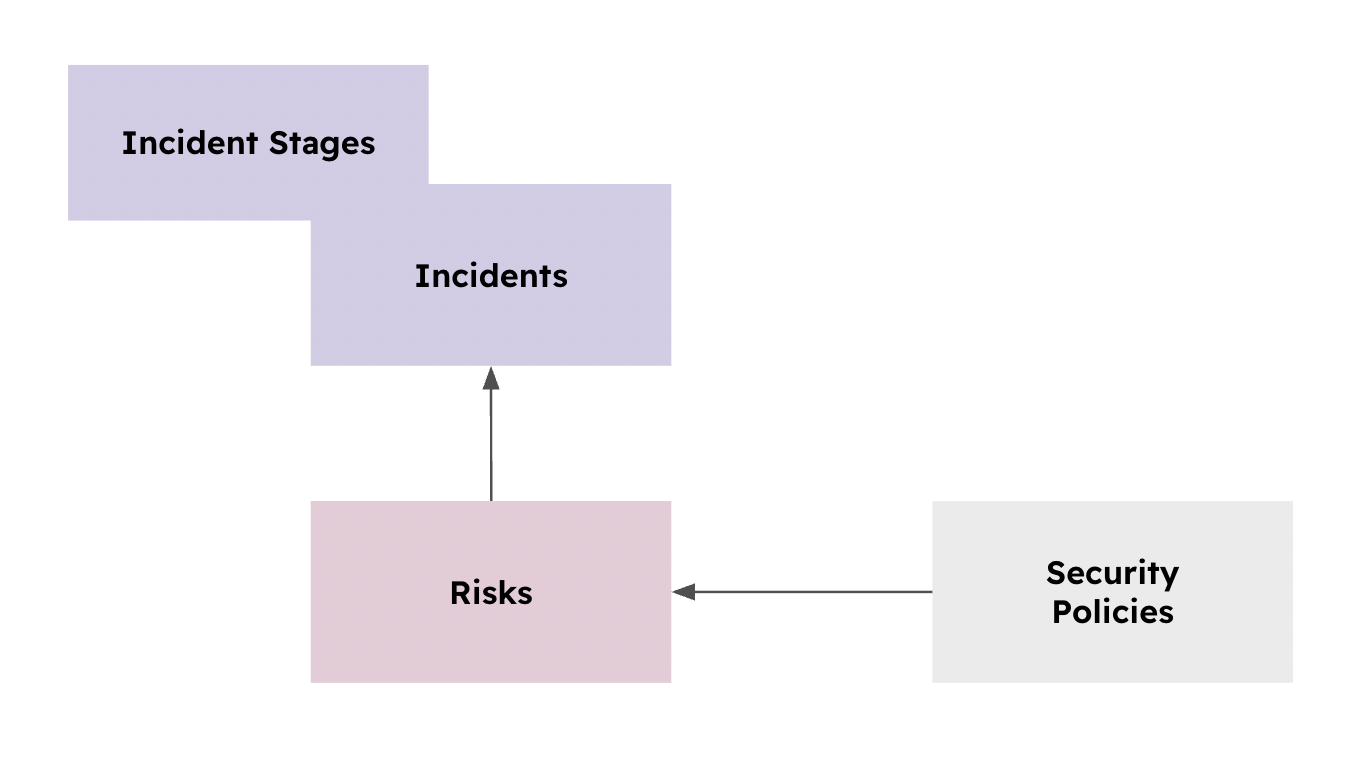
While the Incident module can work on its own without the need for any other module, it is possible to associate Risks that include playbooks when creating incidents. This allows the incident handler to see, for a known Risk that has triggered an incident, what instructions must be followed for that specific incident.
Incidents
The Incident module is located at Security Operations / Incident Management. The module allows you to create incidents and events related to your organization. Events are not yet confirmed incidents.
Items can be categorized in three ways:
-
Incident: a confirmed incident
-
Possible Incident
-
Event: an issue that has not created an incident but is worth recording, as it could have become one
The GRC Contact is meant to be a group for your GRC team, and the Incident Contact is meant to be a group with the team collaborating on, or being affected by, the incident.

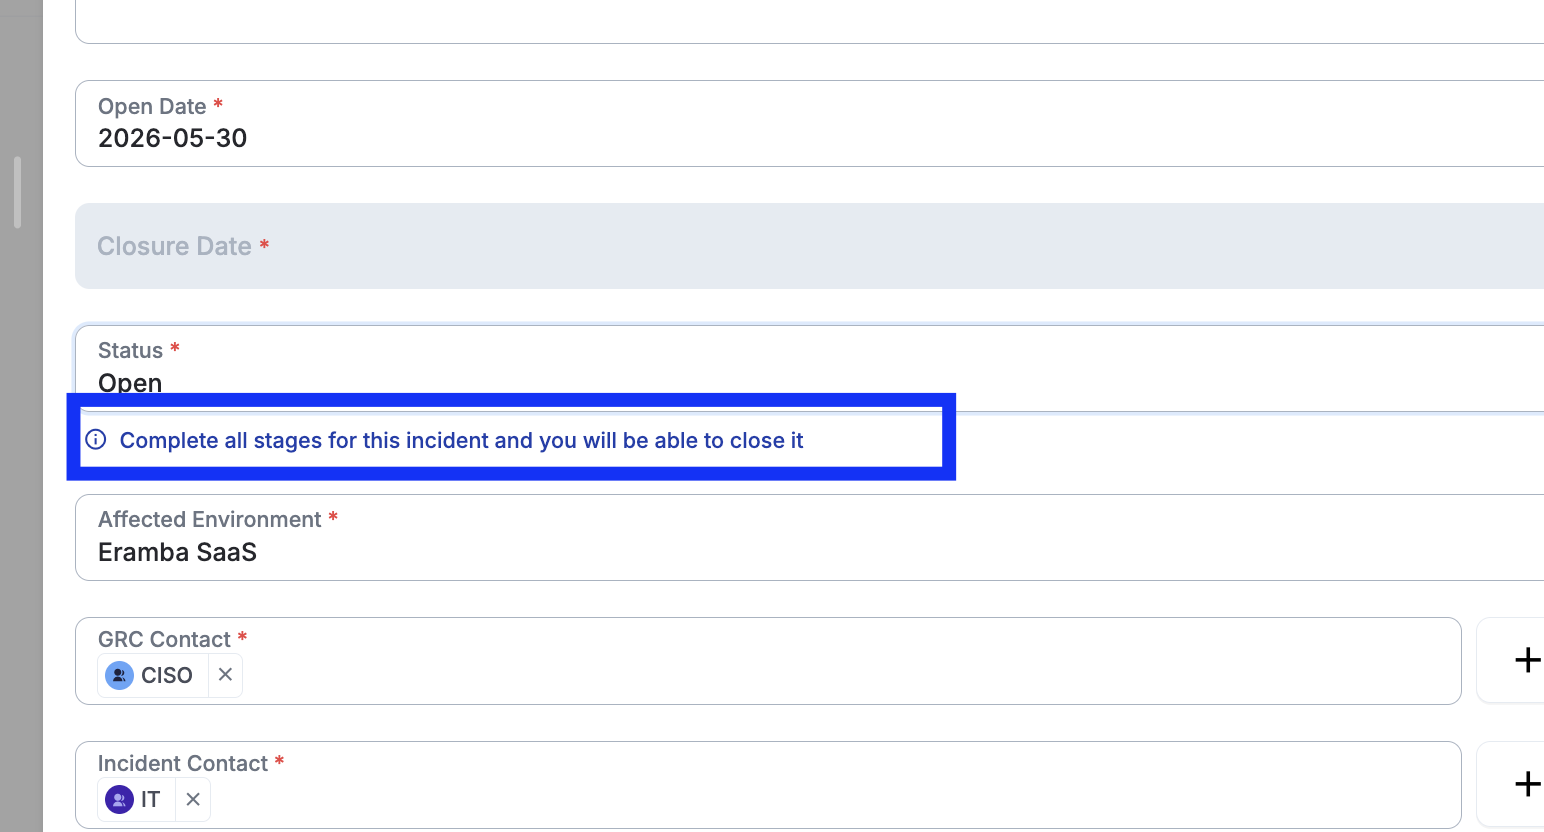
Incidents have an “Open Date” and, by default, are in the “Open” status. It is not until you decide to switch the status to “Closed” that the “Closure Date” is set. Custom Fields, such as “Affected Environment”, can be used to track your own attributes.
Once the incident is saved it can be edited at any time and the "Status" switched to "Close", in which case the "Closure Date" will be automatically popuplated with the current date.
Stages
Under “Settings”, you can define one or more stages that will be automatically assigned to every incident you create in the module. A stage is composed of a “Title” and “Description”. Typically, they describe what needs to be done with every incident to ensure they are all handled systematically.
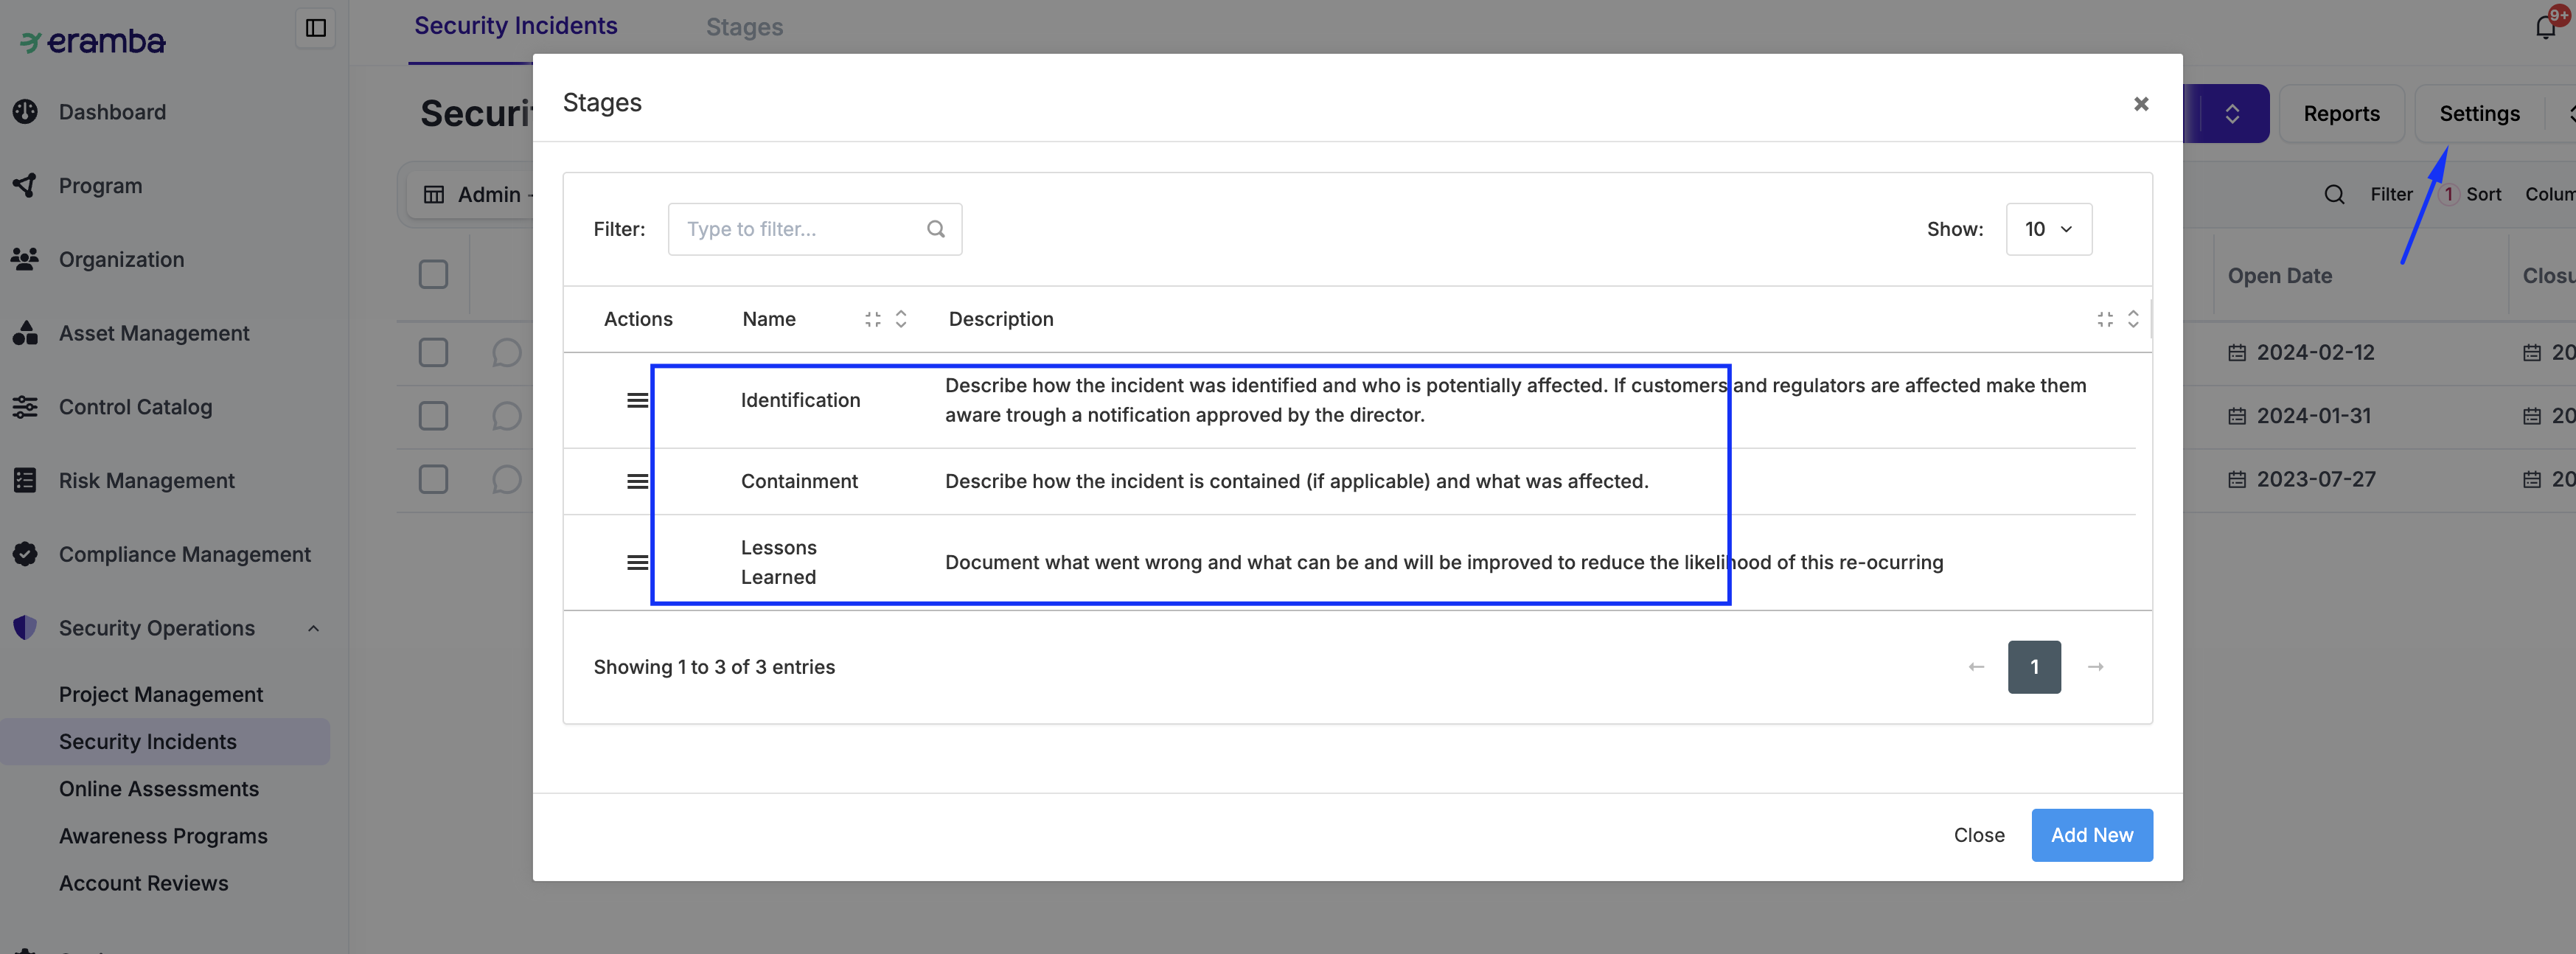
When an incident is created and stages are associated, the handler is required to follow them. Attachments and comments can be included in every stage as evidence that the stage has been completed.
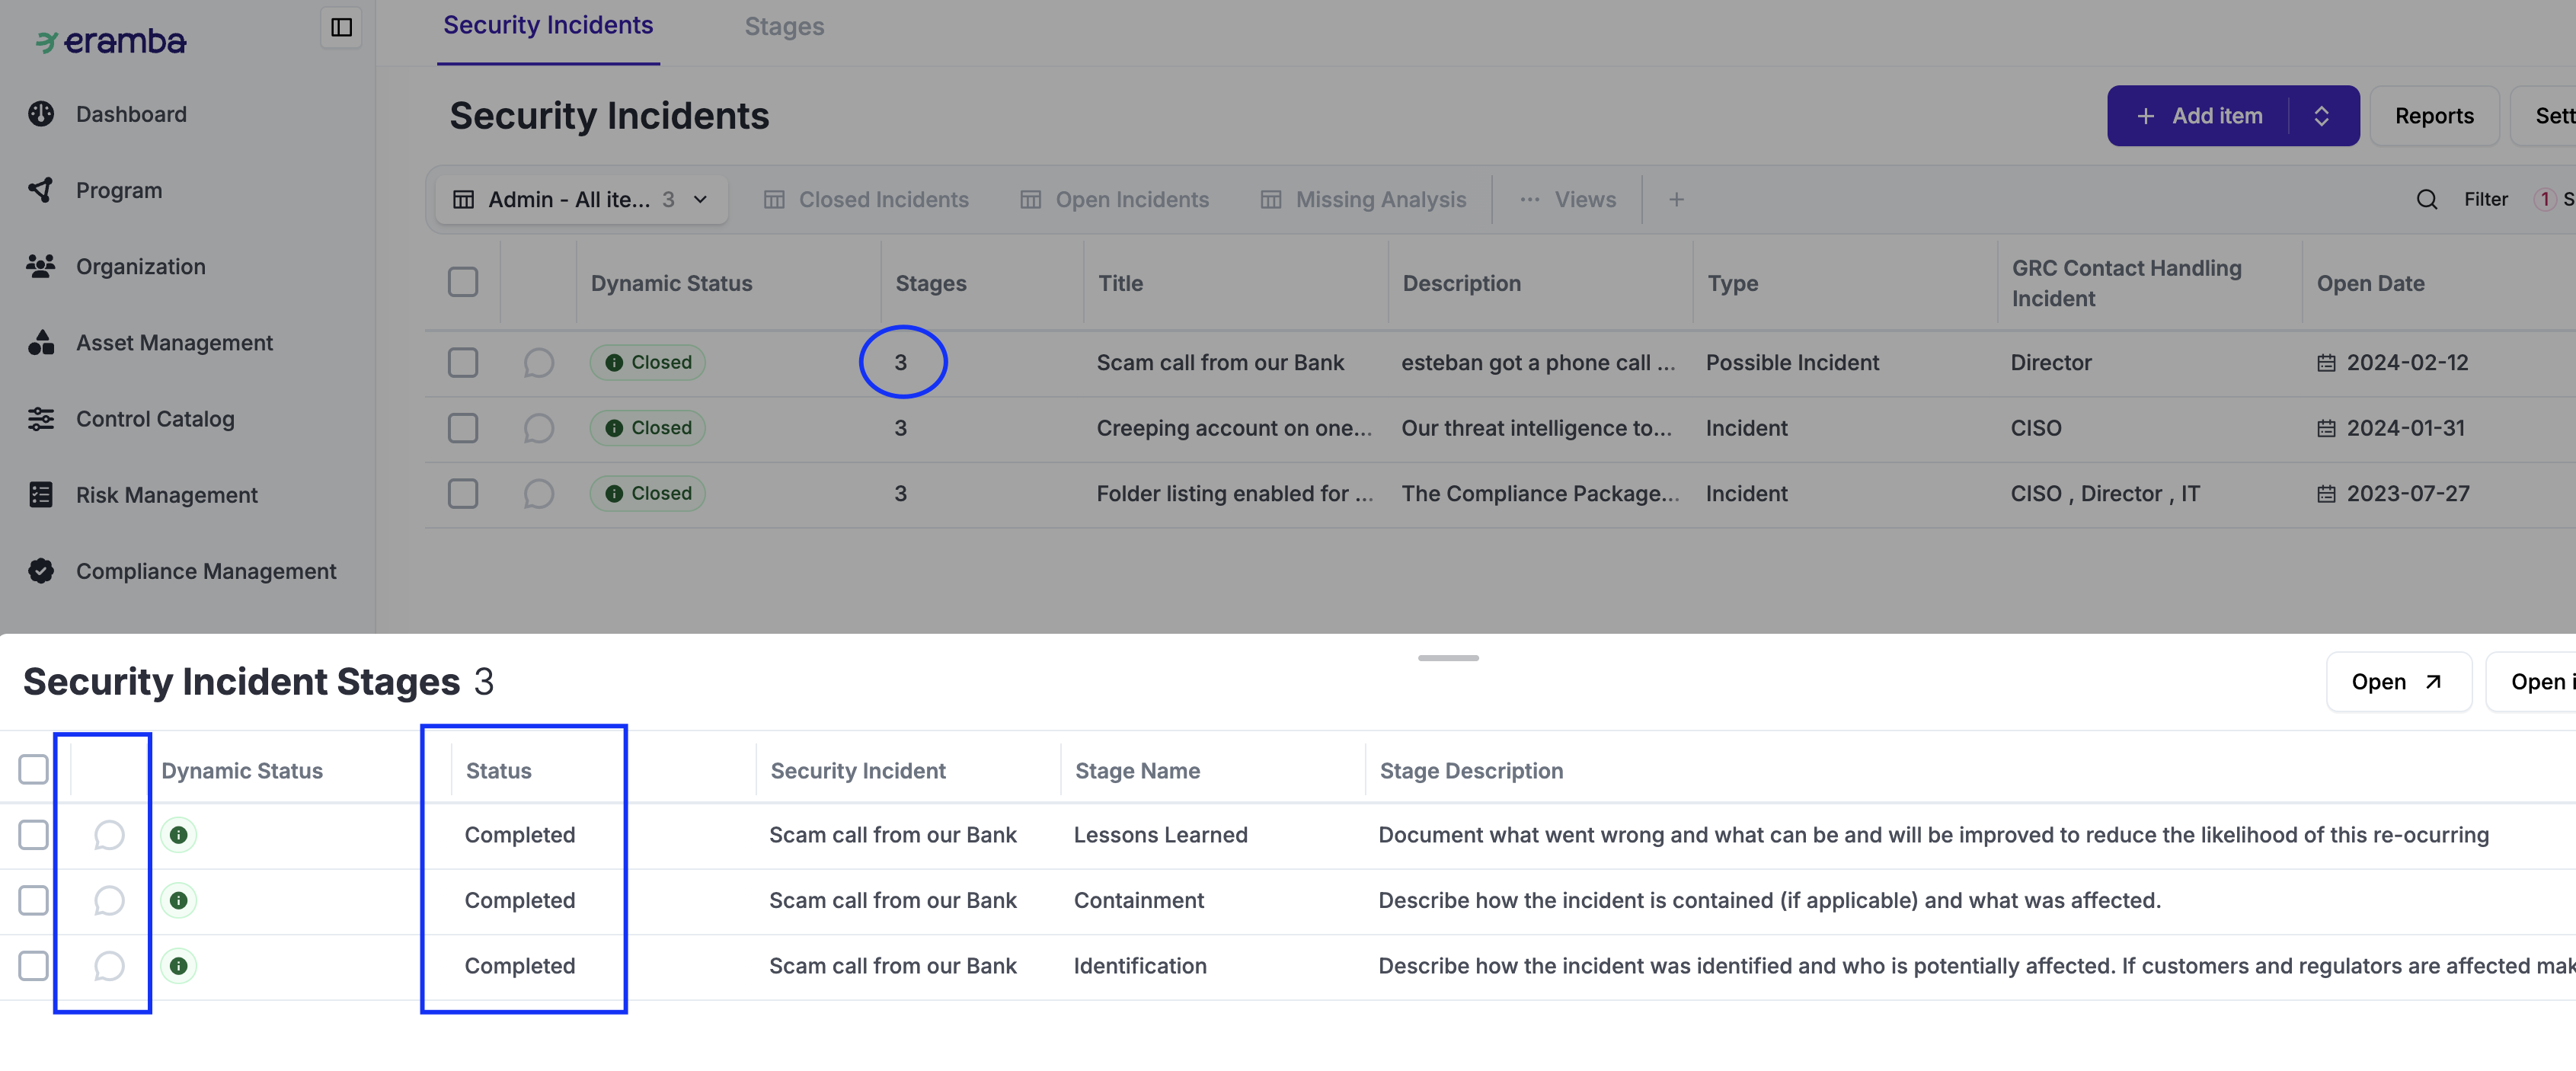
Once completed, stages must be marked as such. Only incidents with all stages completed can be “Closed”. As shown in the screenshot below, closing an incident with open stages is not possible.
Status
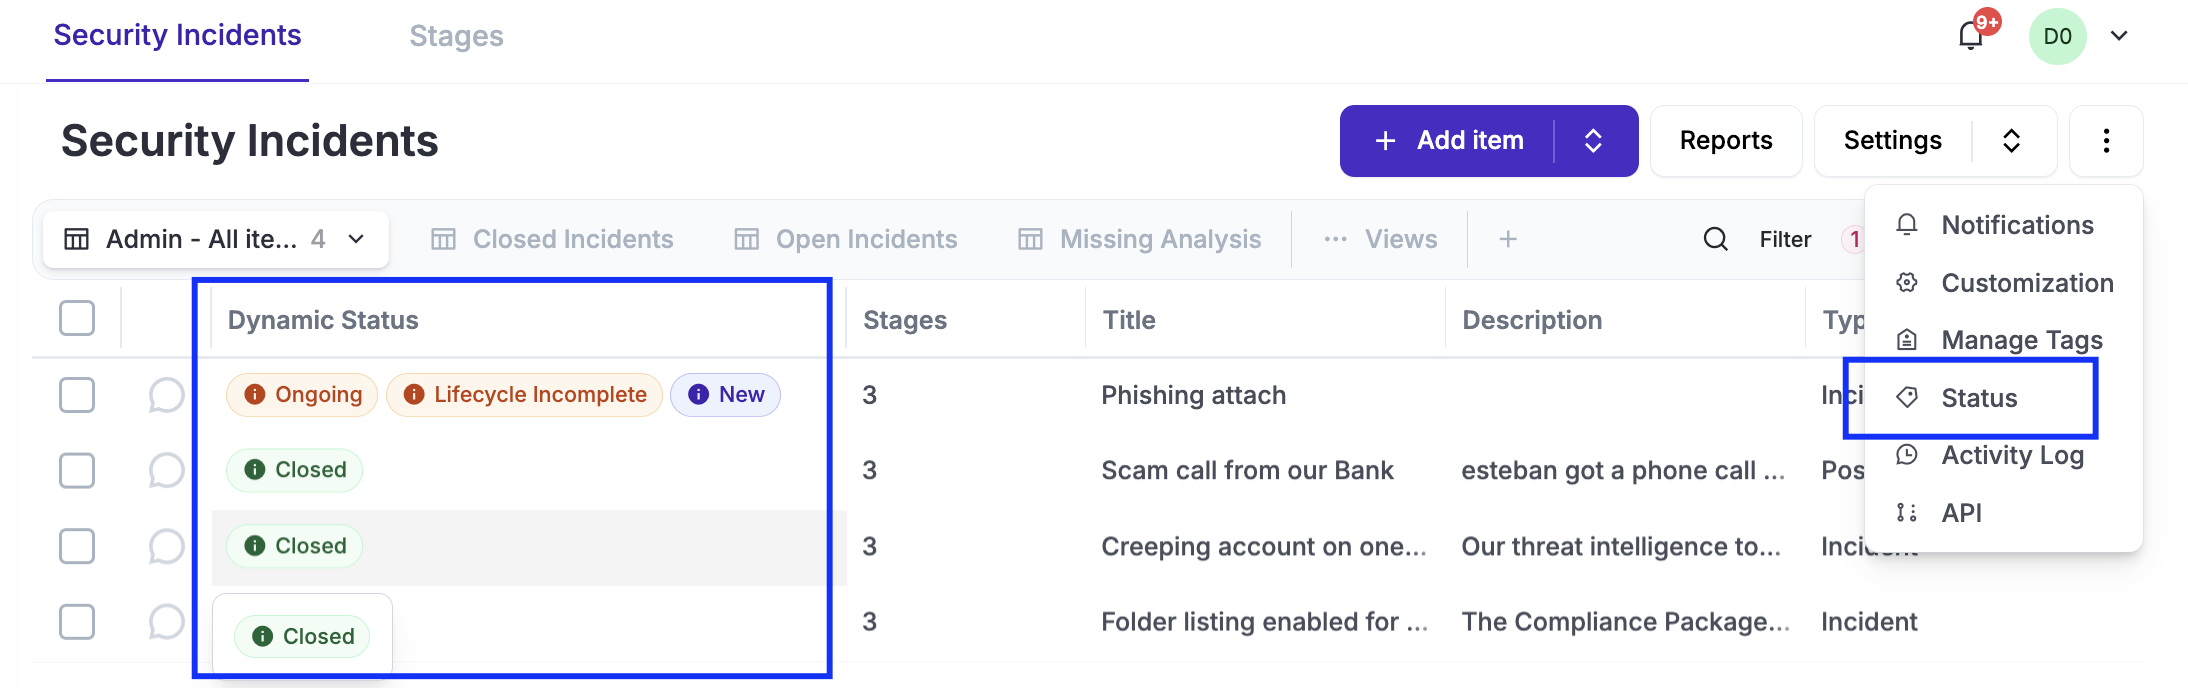
As in any other module in eramba, statuses are labels that are triggered based on certain conditions. In the case of the Incident module, there are multiple predefined labels:
-
Ongoing: when an incident is “Open”
-
Lifecycle Incomplete: when an incident has one or more “Incomplete” stages
-
Closed: when the incident has all its stages completed and is “Closed”
Implementation
Access Management
Before continuing, review the following common feature documentation: Access Management.
It is critical to get this right before implementing this use case, as correcting it later can be complex and time-consuming. The following steps must be completed:
-
Log in to Eramba for the first time and set the Admin password and email. This account is not going to be used so we recommend not using your email.
-
Create a Group for your GRC department (name it according to your department) (How-To) (Theory)
-
Create User Account for the GRC team (How-To) (Theory). Do not create user accounts for anyone else (IT, Human Resources, Finance, Etc)
-
Create a "Dummy" User Account (How-To) that will be used to test permissions (Theory). Assign the following groups: View Incidents. Assign the "Main" "Portal" only.
-
Log out as Admin, from now on always login with your personal account
-
Create one Group for every Department in the scope of your Compliance program (How-To) (Theory)
-
Optional: Set up SAML, Google OAuth, or LDAP Connectors (How-To & Theory)
Stages Definition
Incident Creation
Basic Module Configuration
Before continuing, review the following common feature documentation: User Interface and Customisations
Apply the following steps to the Incident and Stages tabs:
-
Adjust the module form fields using customisations (How-To) (Theory)
-
Create your default view (How-To) (Theory) and adjust columns (How-To) (Theory)
Setup Weekly Reports
Before continuing, review the following common feature documentation: Notifications.
Enable template weekly reports for your incidents and stages tabs:
-
Edit template report notifications adjusting Recipient, Frequency, Etc and enable them
-
Create custom Report notifications with your own defined Views
Setup Warning Notifications
Before continuing, review the following common feature documentation: Notifications.
Enable template Warning notifications for your incidents and stages tabs:
-
Define what type of feedback you want to setup: Online or Offline (Theory)
-
Edit Template Warning and Comments & Attachments and adjust them accordingly (How-To)
-
Test Notifications (How-To) and "Others" Permissions (How-To)